1. Recommended lead file format is .csv (Comma delimited). Required fields that should have data on your file is the phone number column. If "Omit Phone Code" is set to "N" on your campaign advanced settings, your lead file is required to have a phone code column as well.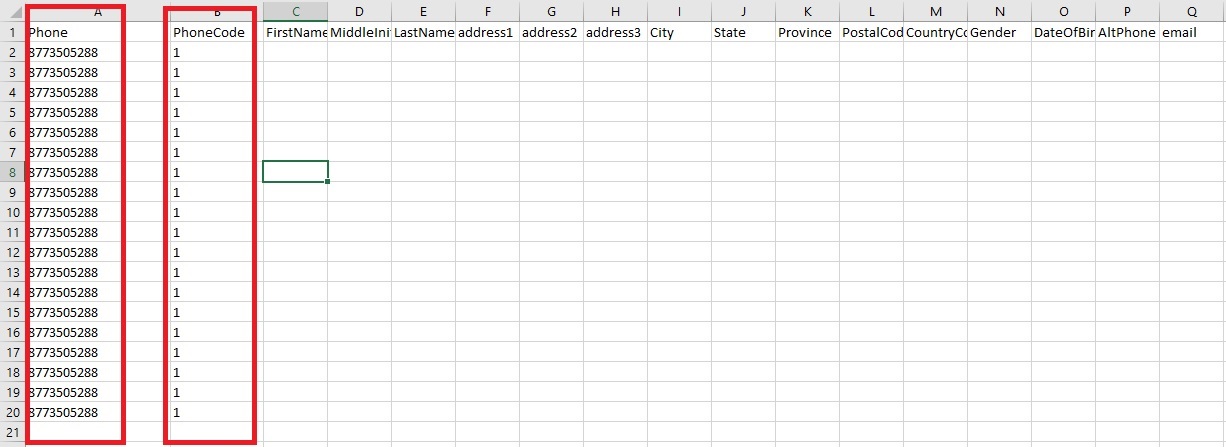
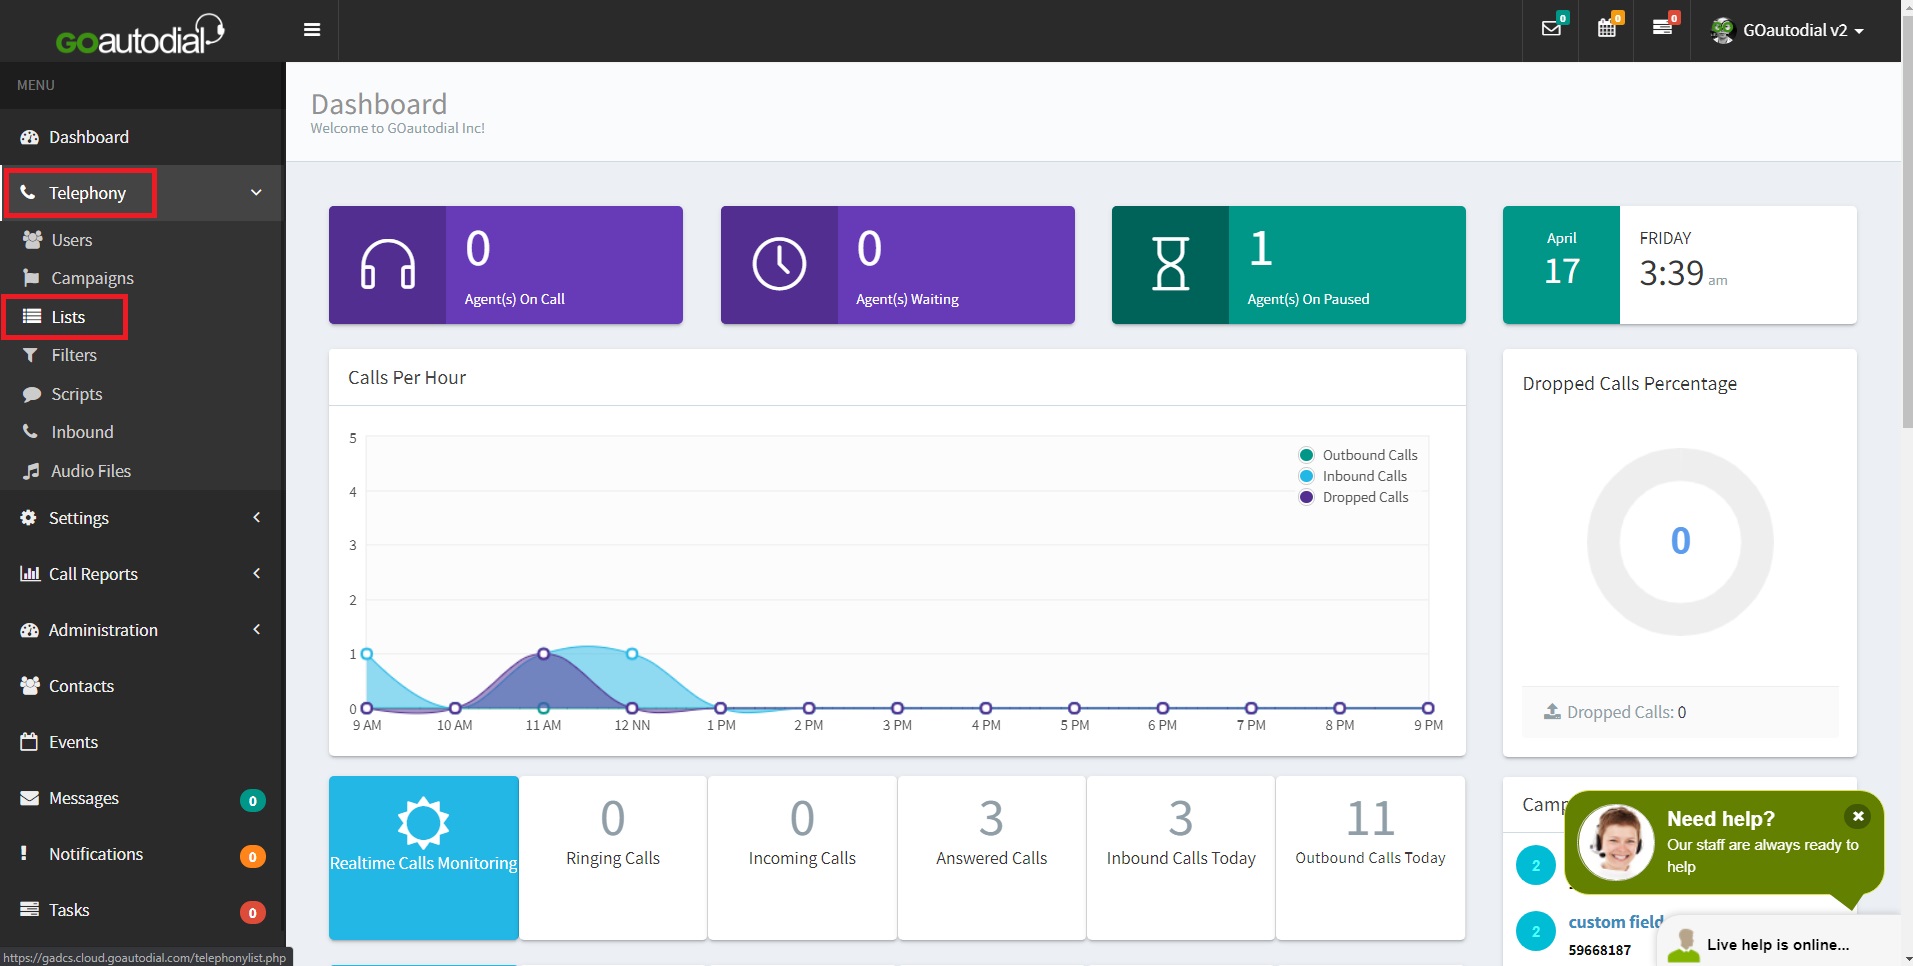
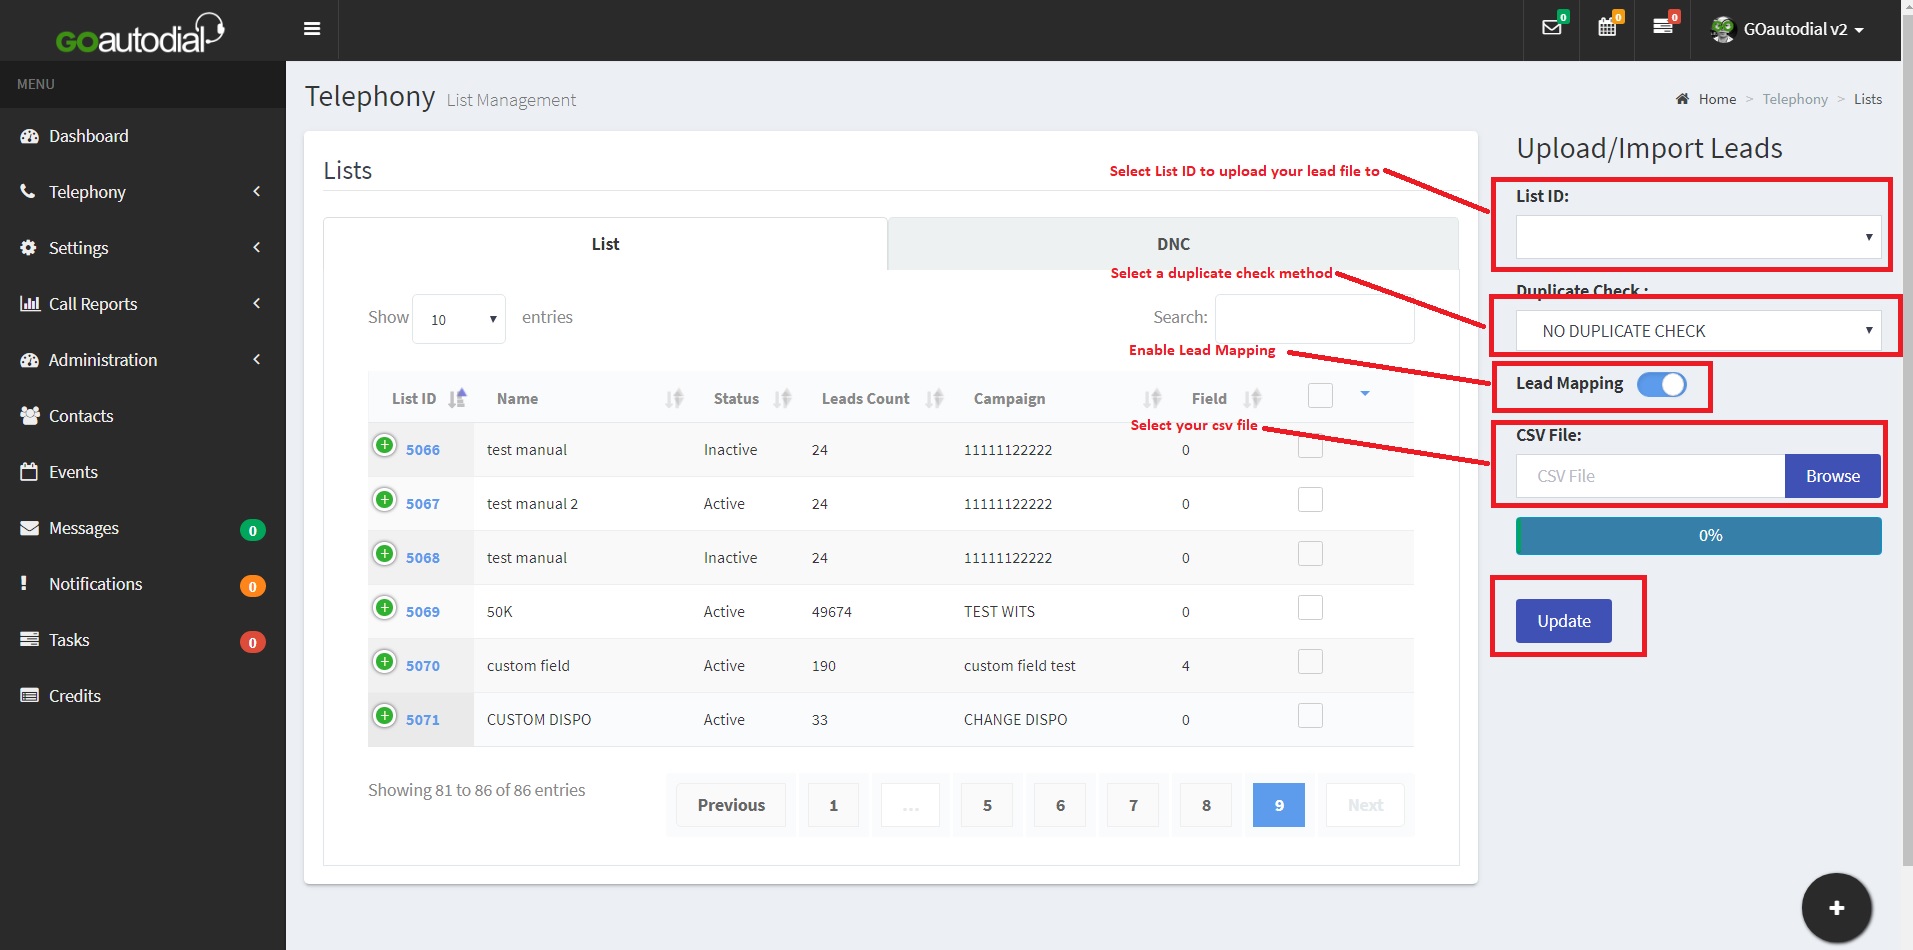
2. Log-in your Admin account then go to Telephony > List
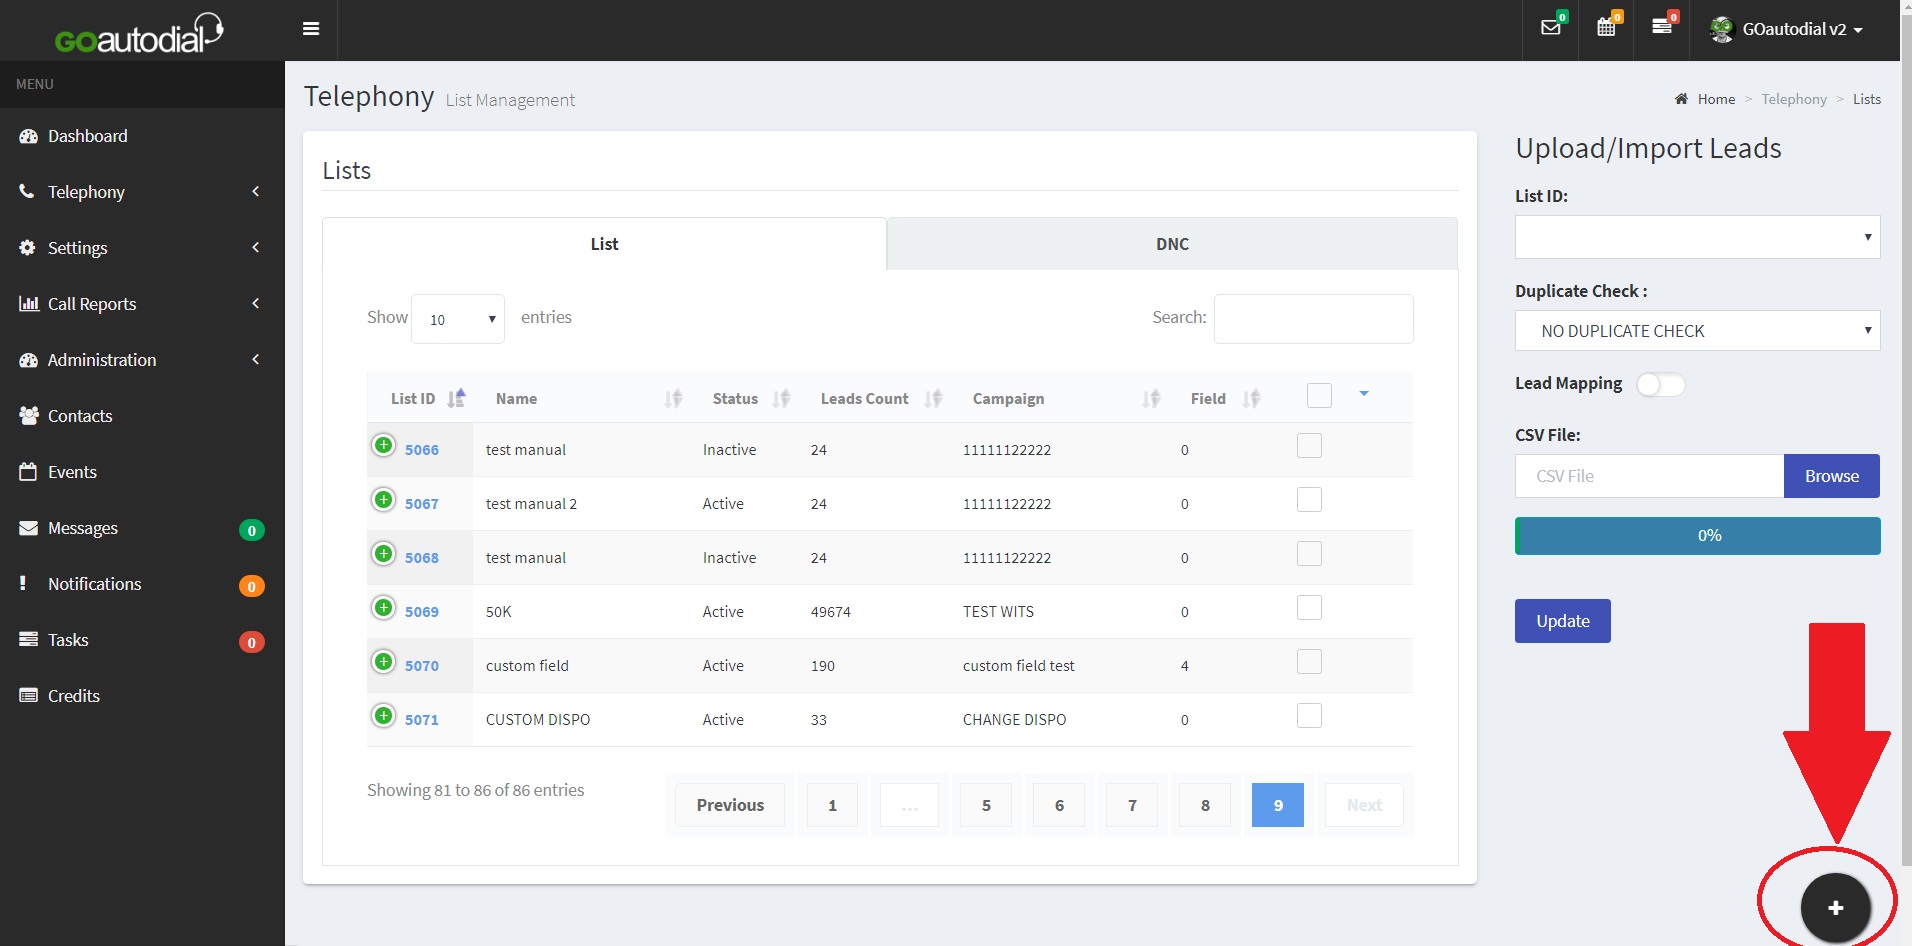
3. On the lower right corner click the circle to proceed to create a List.
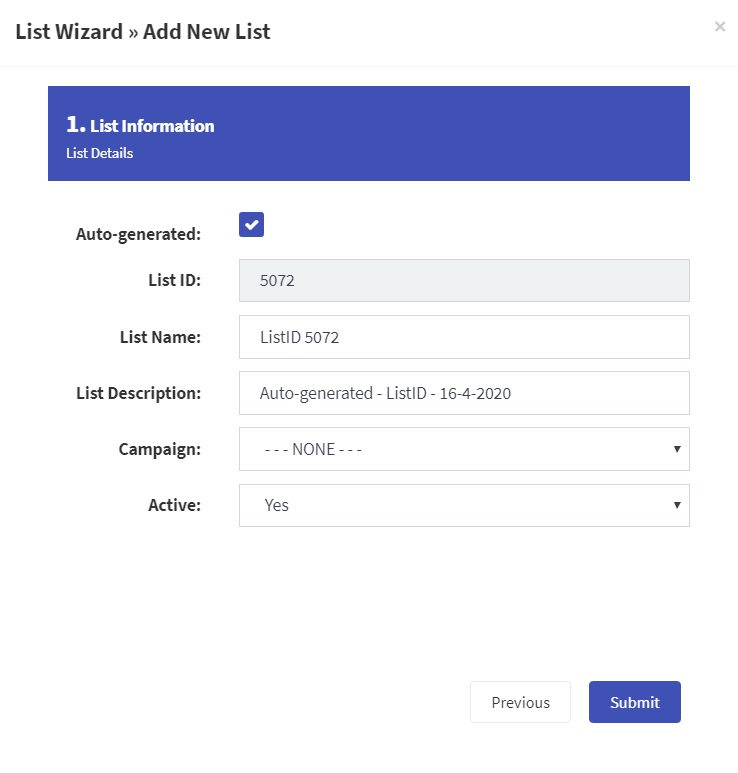
4. Fill up the List Wizard. You can type the List Name , Description , and which Campaign you want to assign the List/Leads. Then click submit to proceed.
5.Now to upload your lead file make sure you select the List that you’ve created. You have an option to check for duplicates Make sure "Field Mapping" is toggled then browse your Lead File.csv then click Update to start uploading.
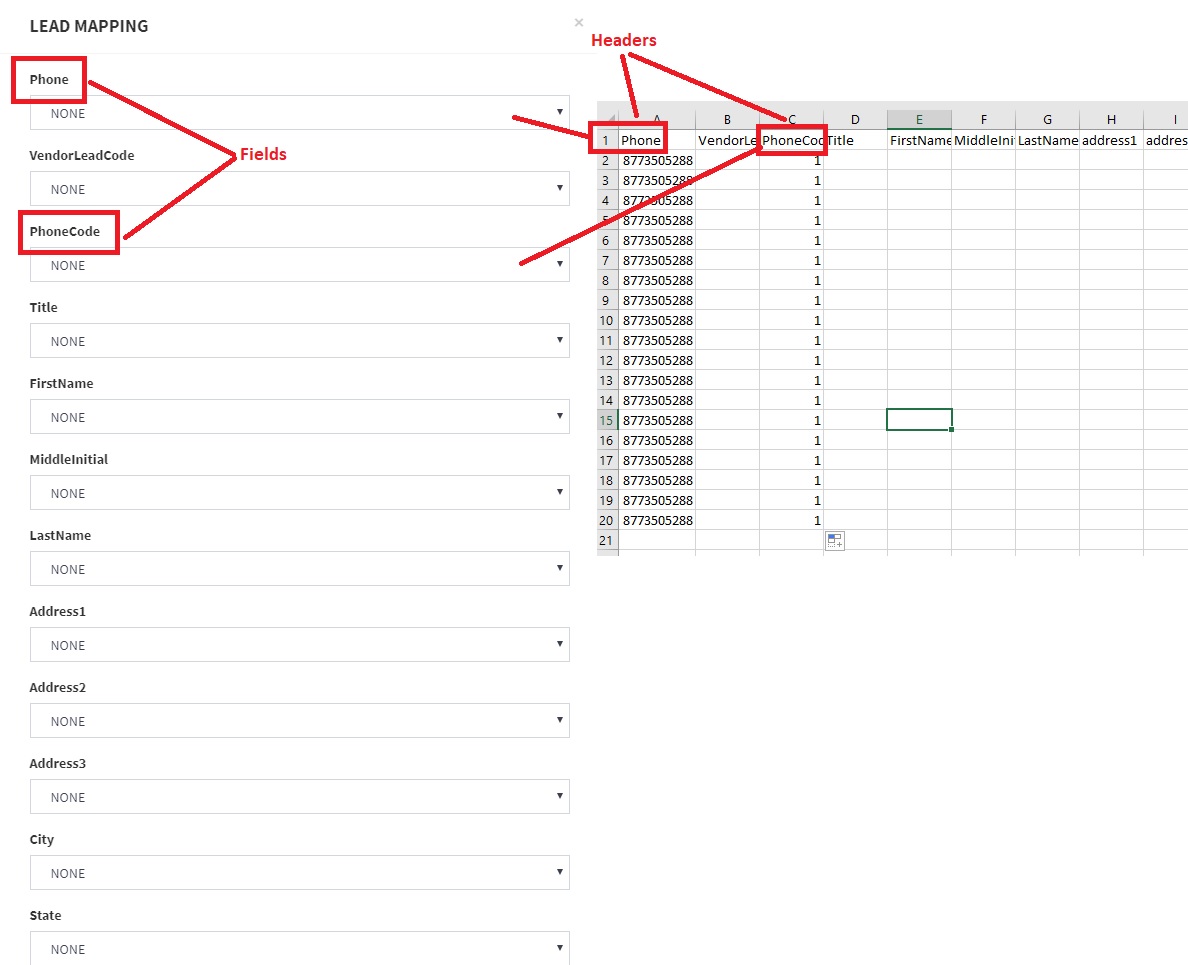
6. Map the headers of your spreadsheet to their corresponding fields.
7. Wait for the leads to be uploaded once the “Data processing complete” pop-up, it means your lead file has already been uploaded to the List and Campaign. Click “OK”, then wait for the confirmation window informing you how many leads were uploaded and how many duplicates it found.
