- Login to you admin portal navigate to Telephony > Campaigns
2. Point the mouse on the plus icon at the bottom right and select "Add Disposition"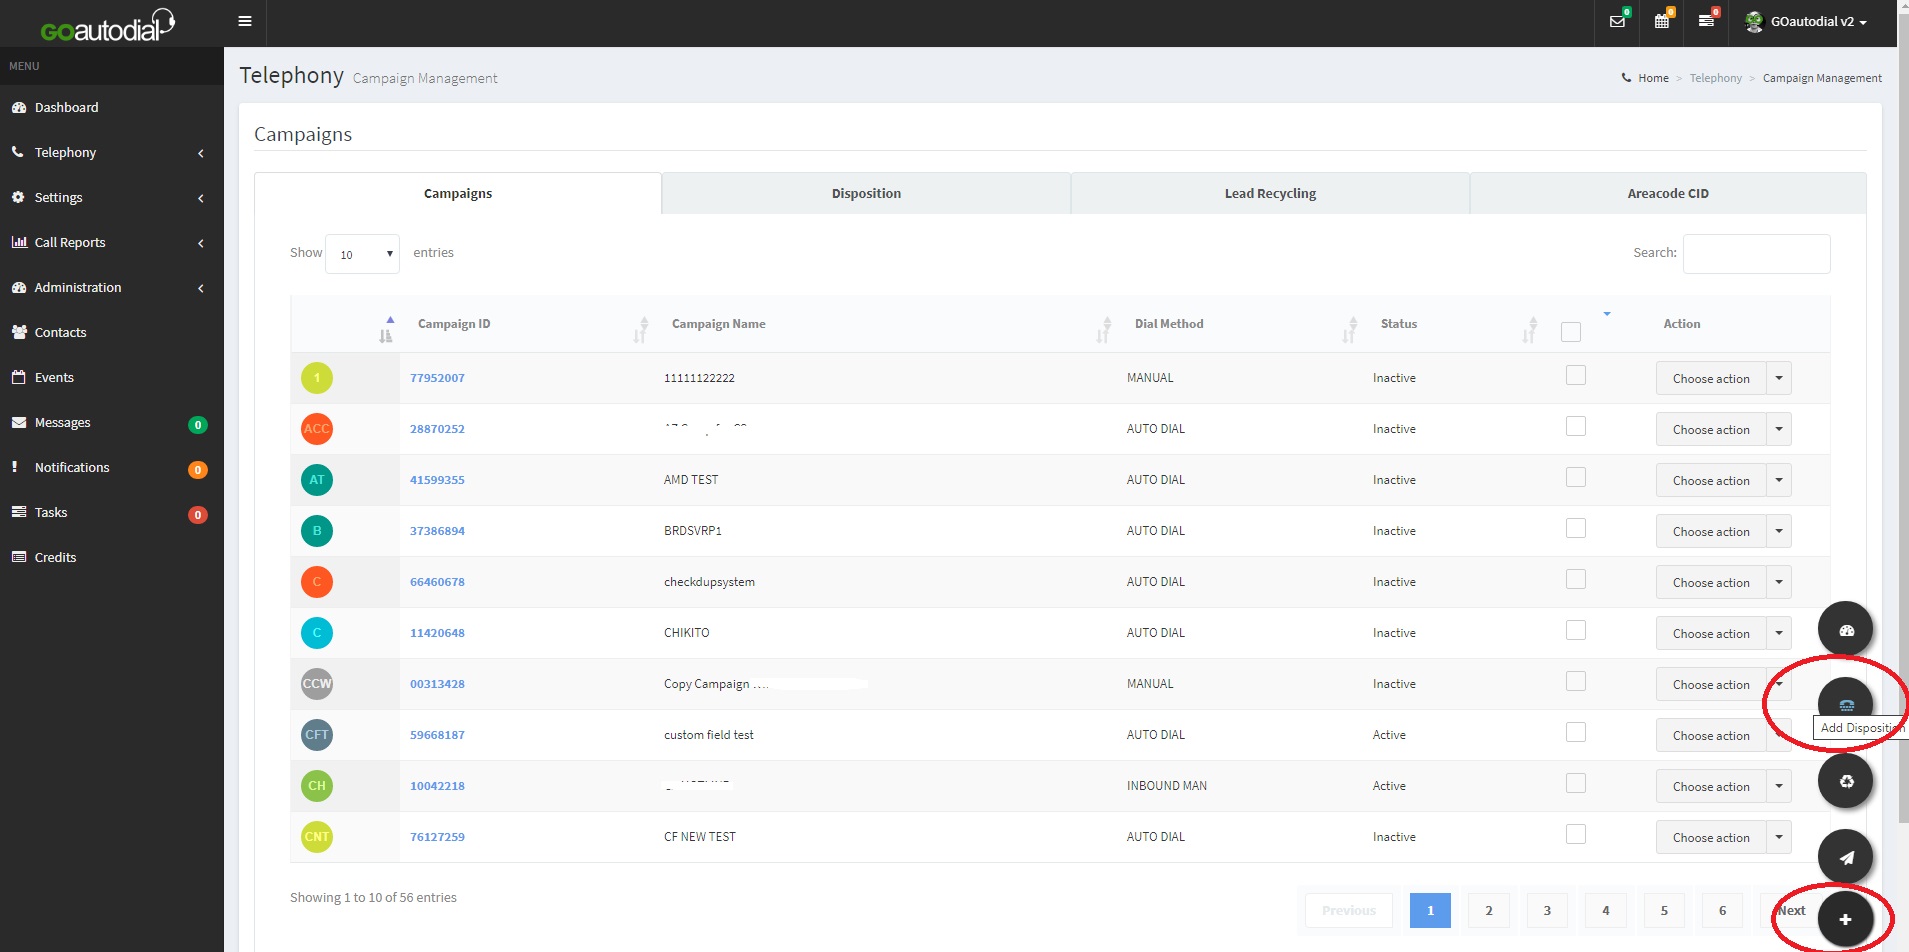
3. Select the campaign to apply the new custom disposition and fill in the required fields.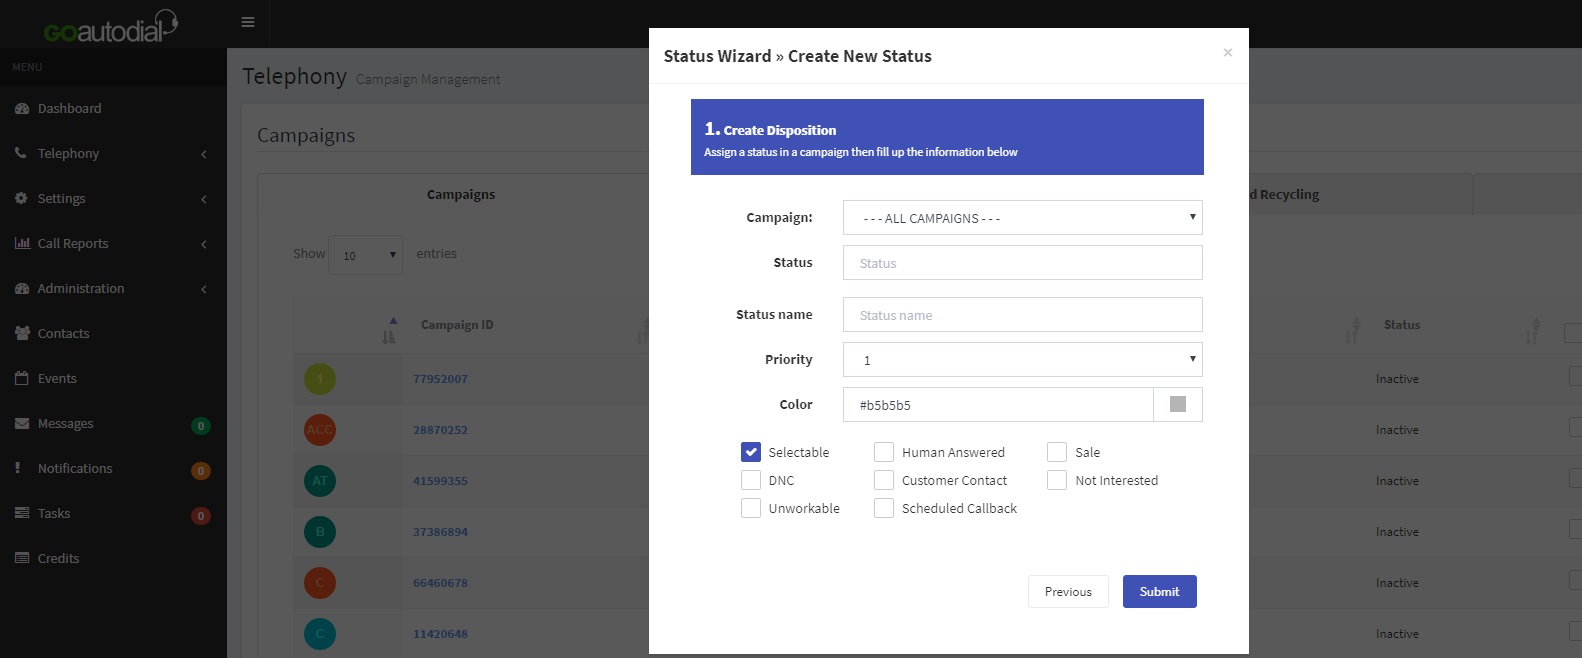
Here are the description for the following fields;
Campaign - select campaign to assign the custom field on the dropdown
Status - Label of the custom field. This will appear on the report. Maximum of 6 characters
Status Name - Name of the custom field that the agent will see on the disposition screen
Priority - Used to sort and arrange the way the custom fields are displayed on the disposition screen
Color - defines the text color of the custom field on the disposition screen
Selectable - Check this to make the custom field visible on the disposition screen
DNC - Checking this will put the lead on the Campaign DNC list
Human Answered - Checking this will classify the call as Human Answered and is used for calculating the drop rate
Scheduled Callback - Checking this will enable the callback function for the call
SALE - checking this will count the call as a SALE
**The rest are used for statistical Analysis only.
- 827 Users Found This Useful
