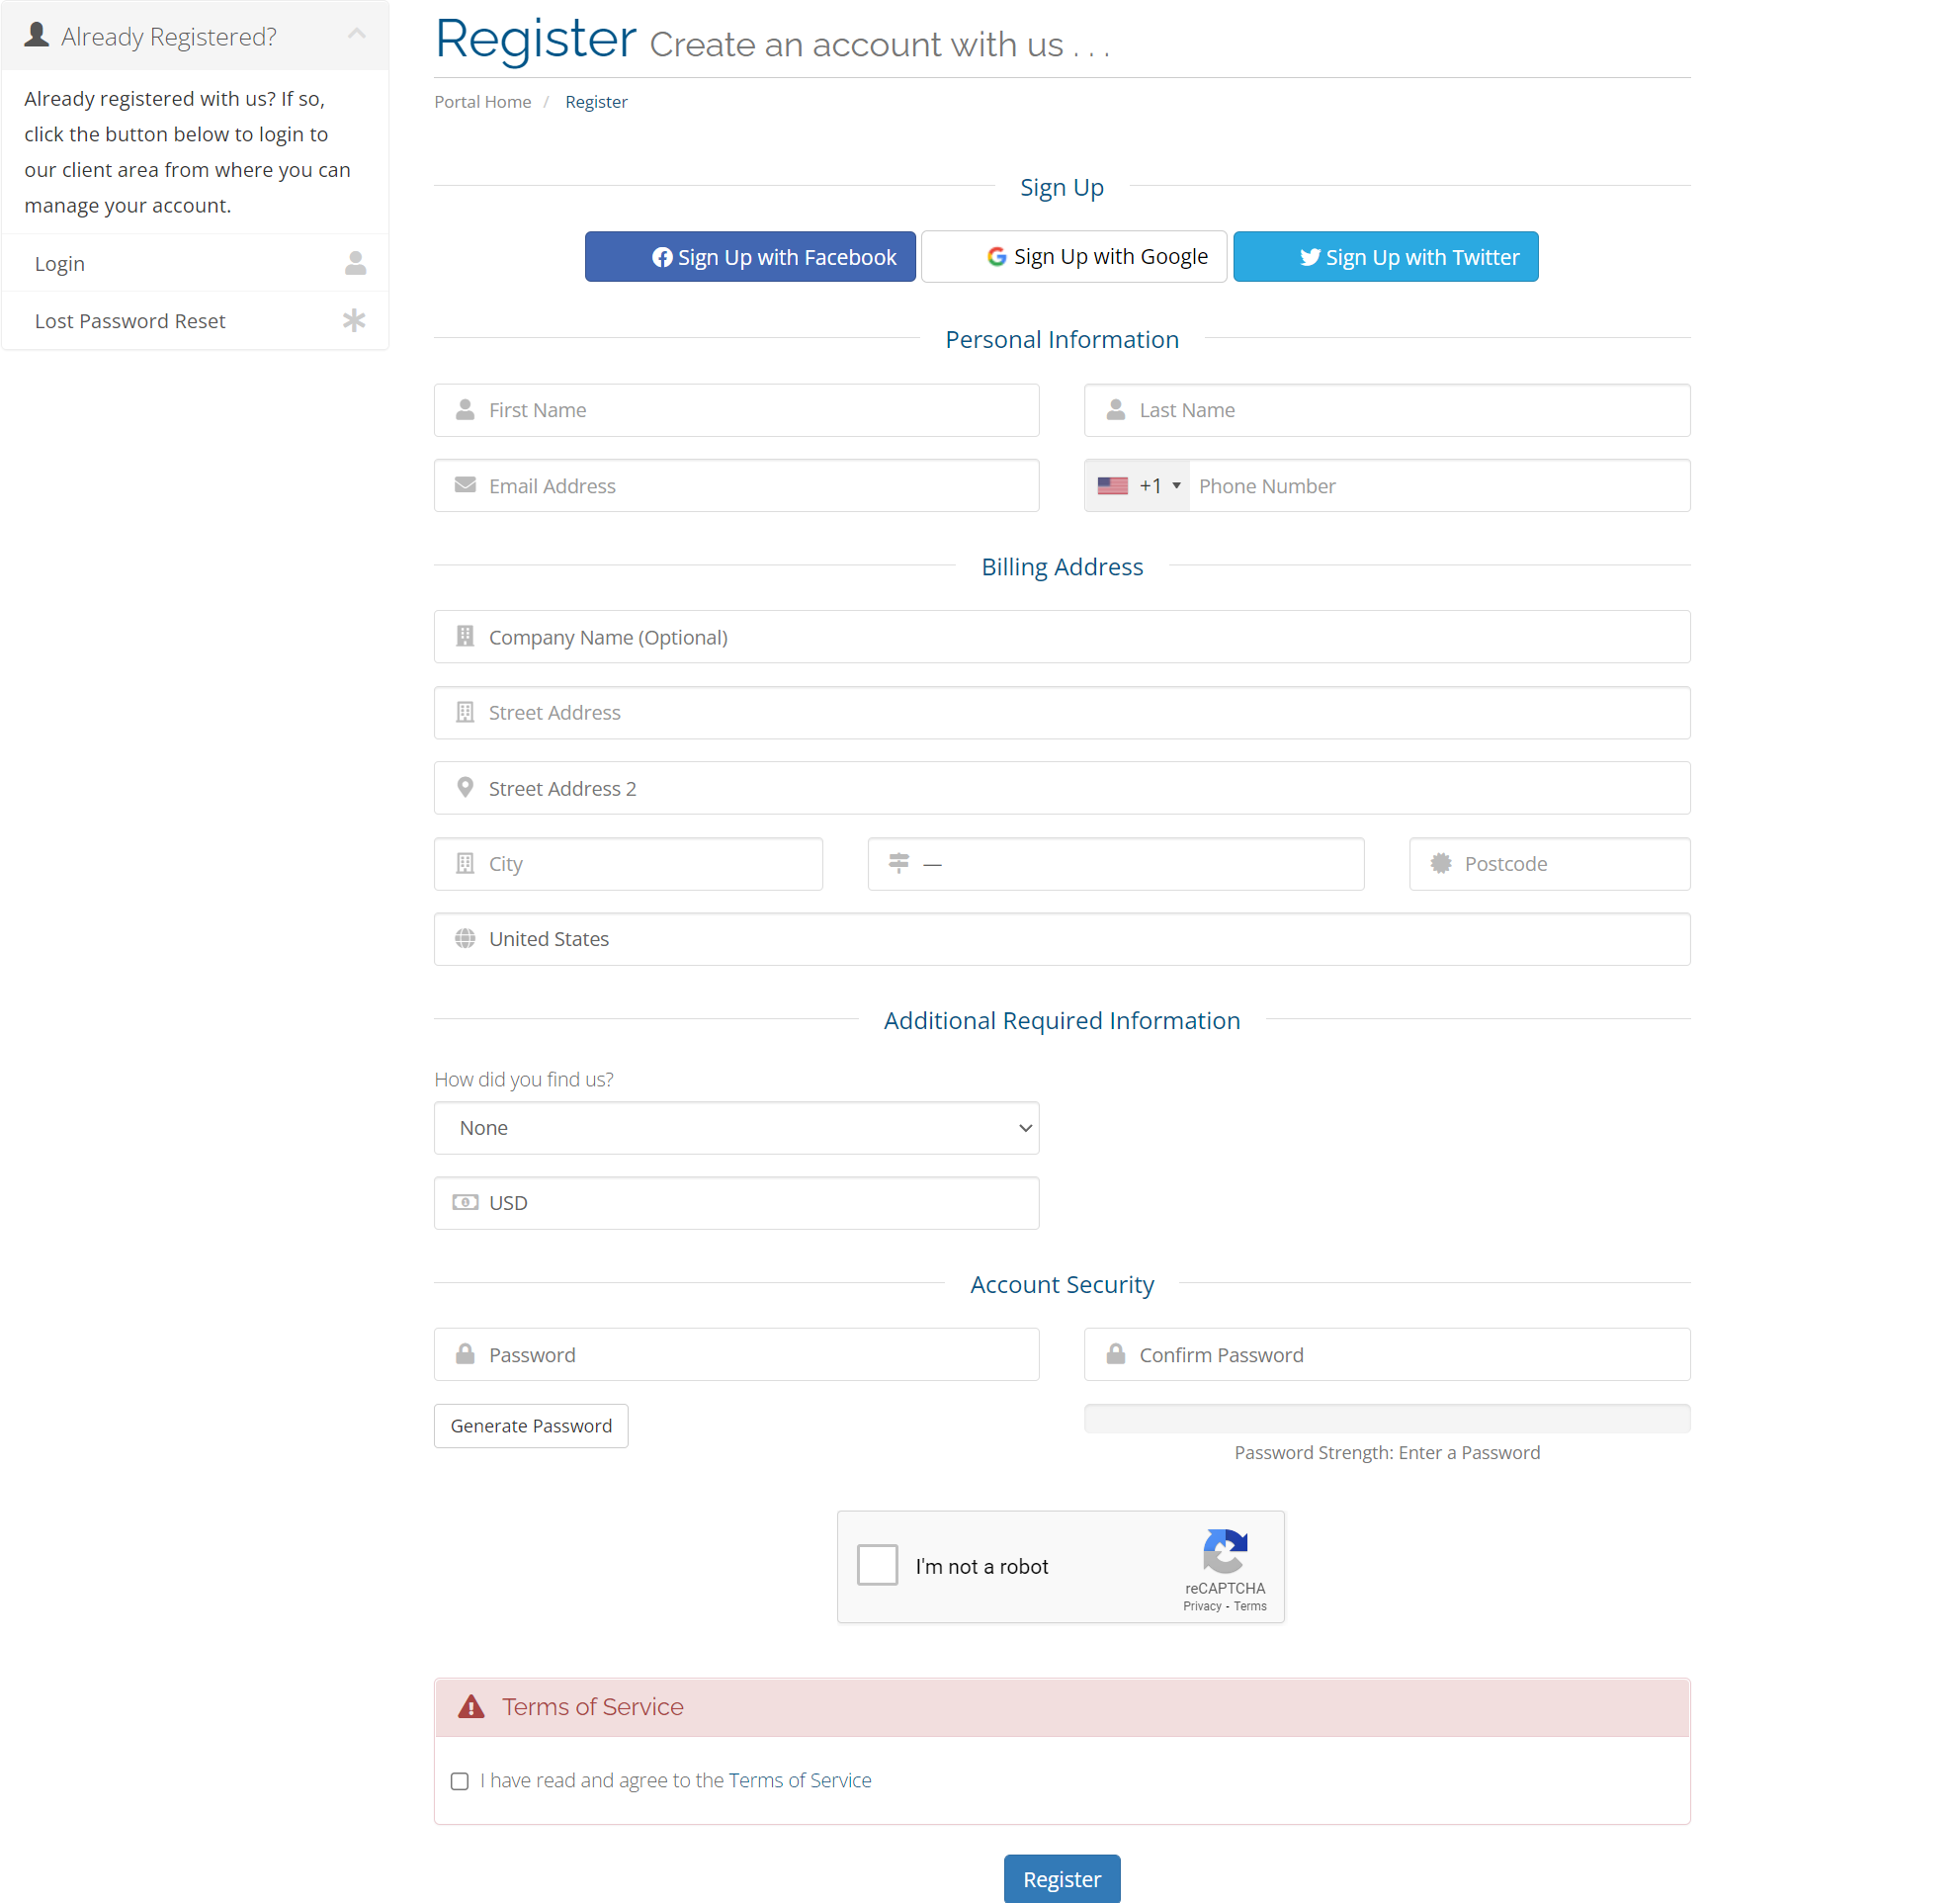
1. To get started, you will need to register an account with us. Registration is required to be able to purchase any of our products. Go to Register - GOautodial Inc. and fill up the form. Your billing information with us should match the billing information of your payment method to avoid any payment issues.
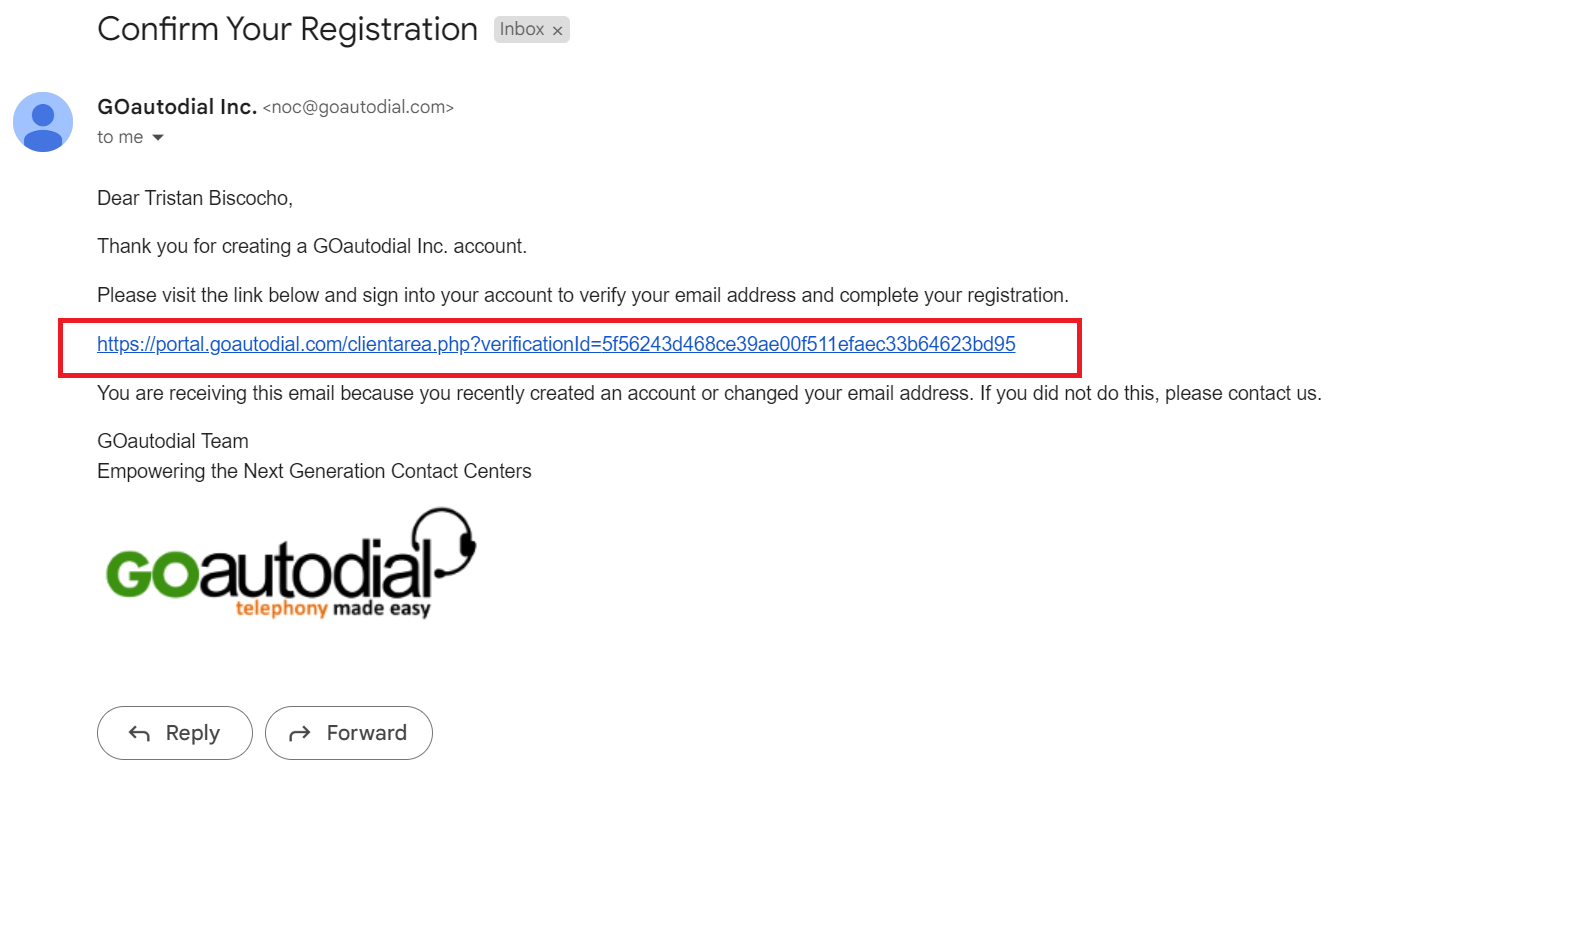
2. After registration, an email will be sent with the subject "Confirm Your Registration" from noc@goautodial.com. Click the verification link to confirm your email.
3. After clicking the link, a message will confirm that your email has been validated. You can now purchase the package or service you want.
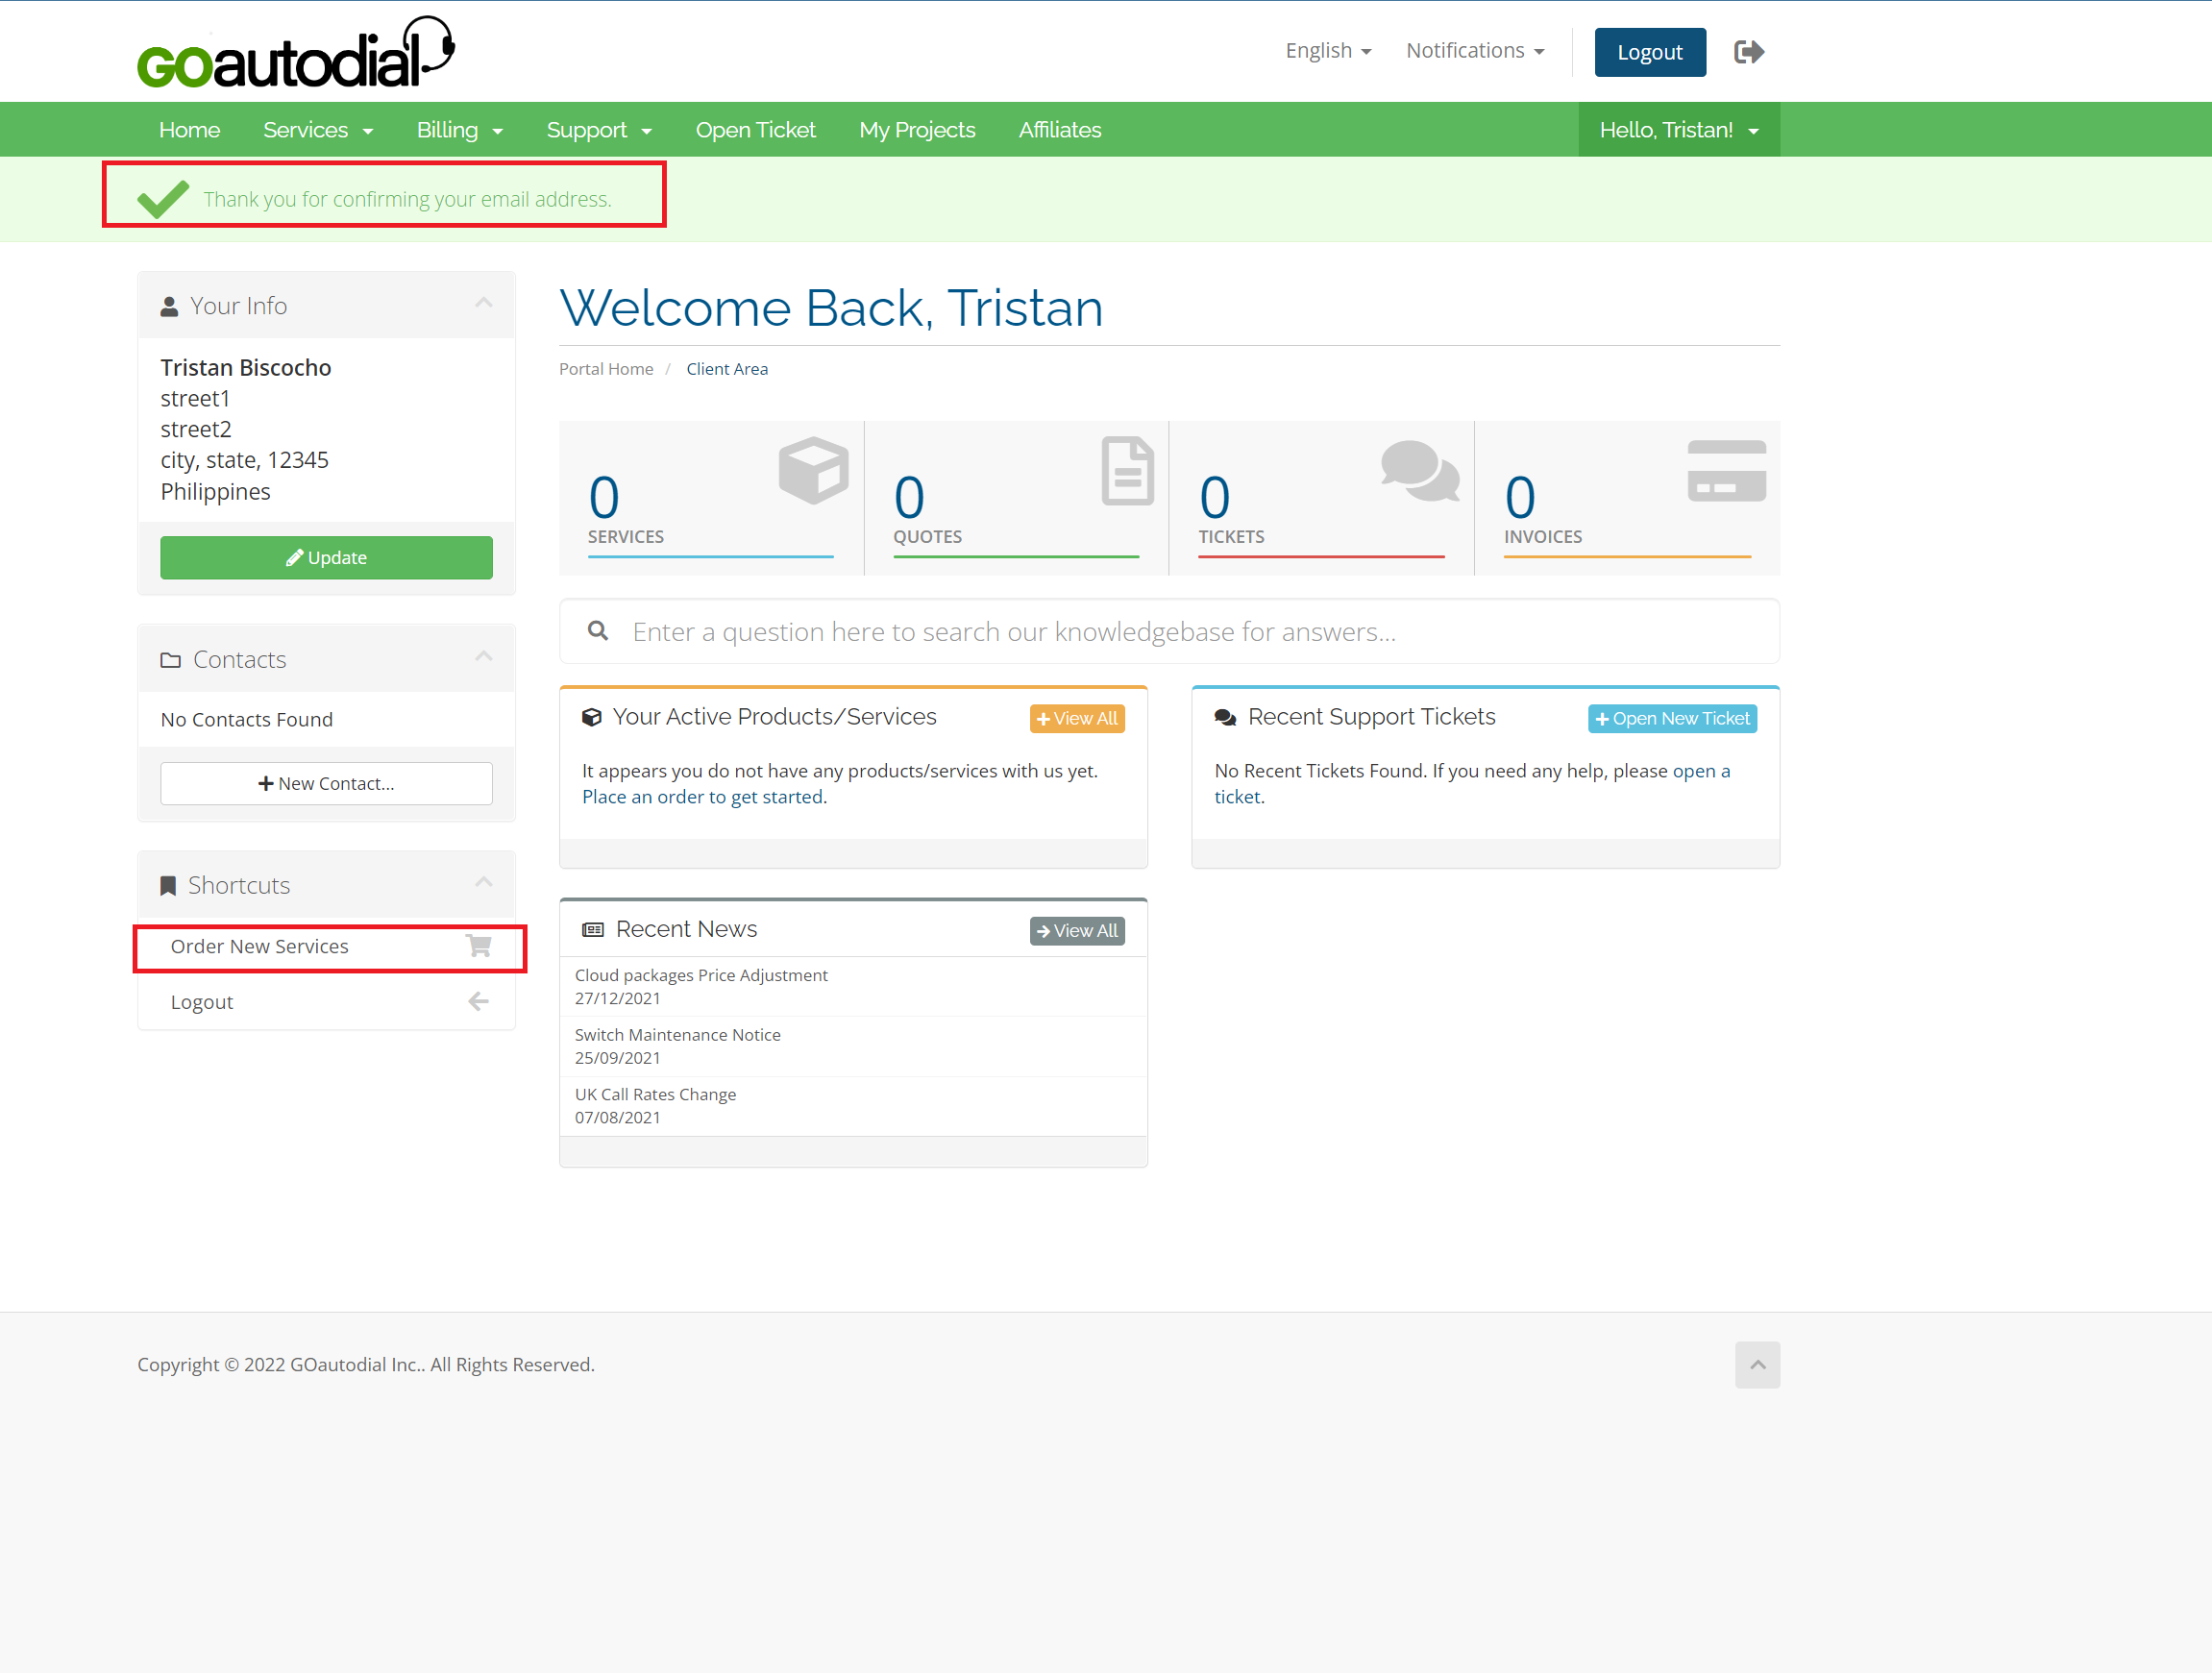
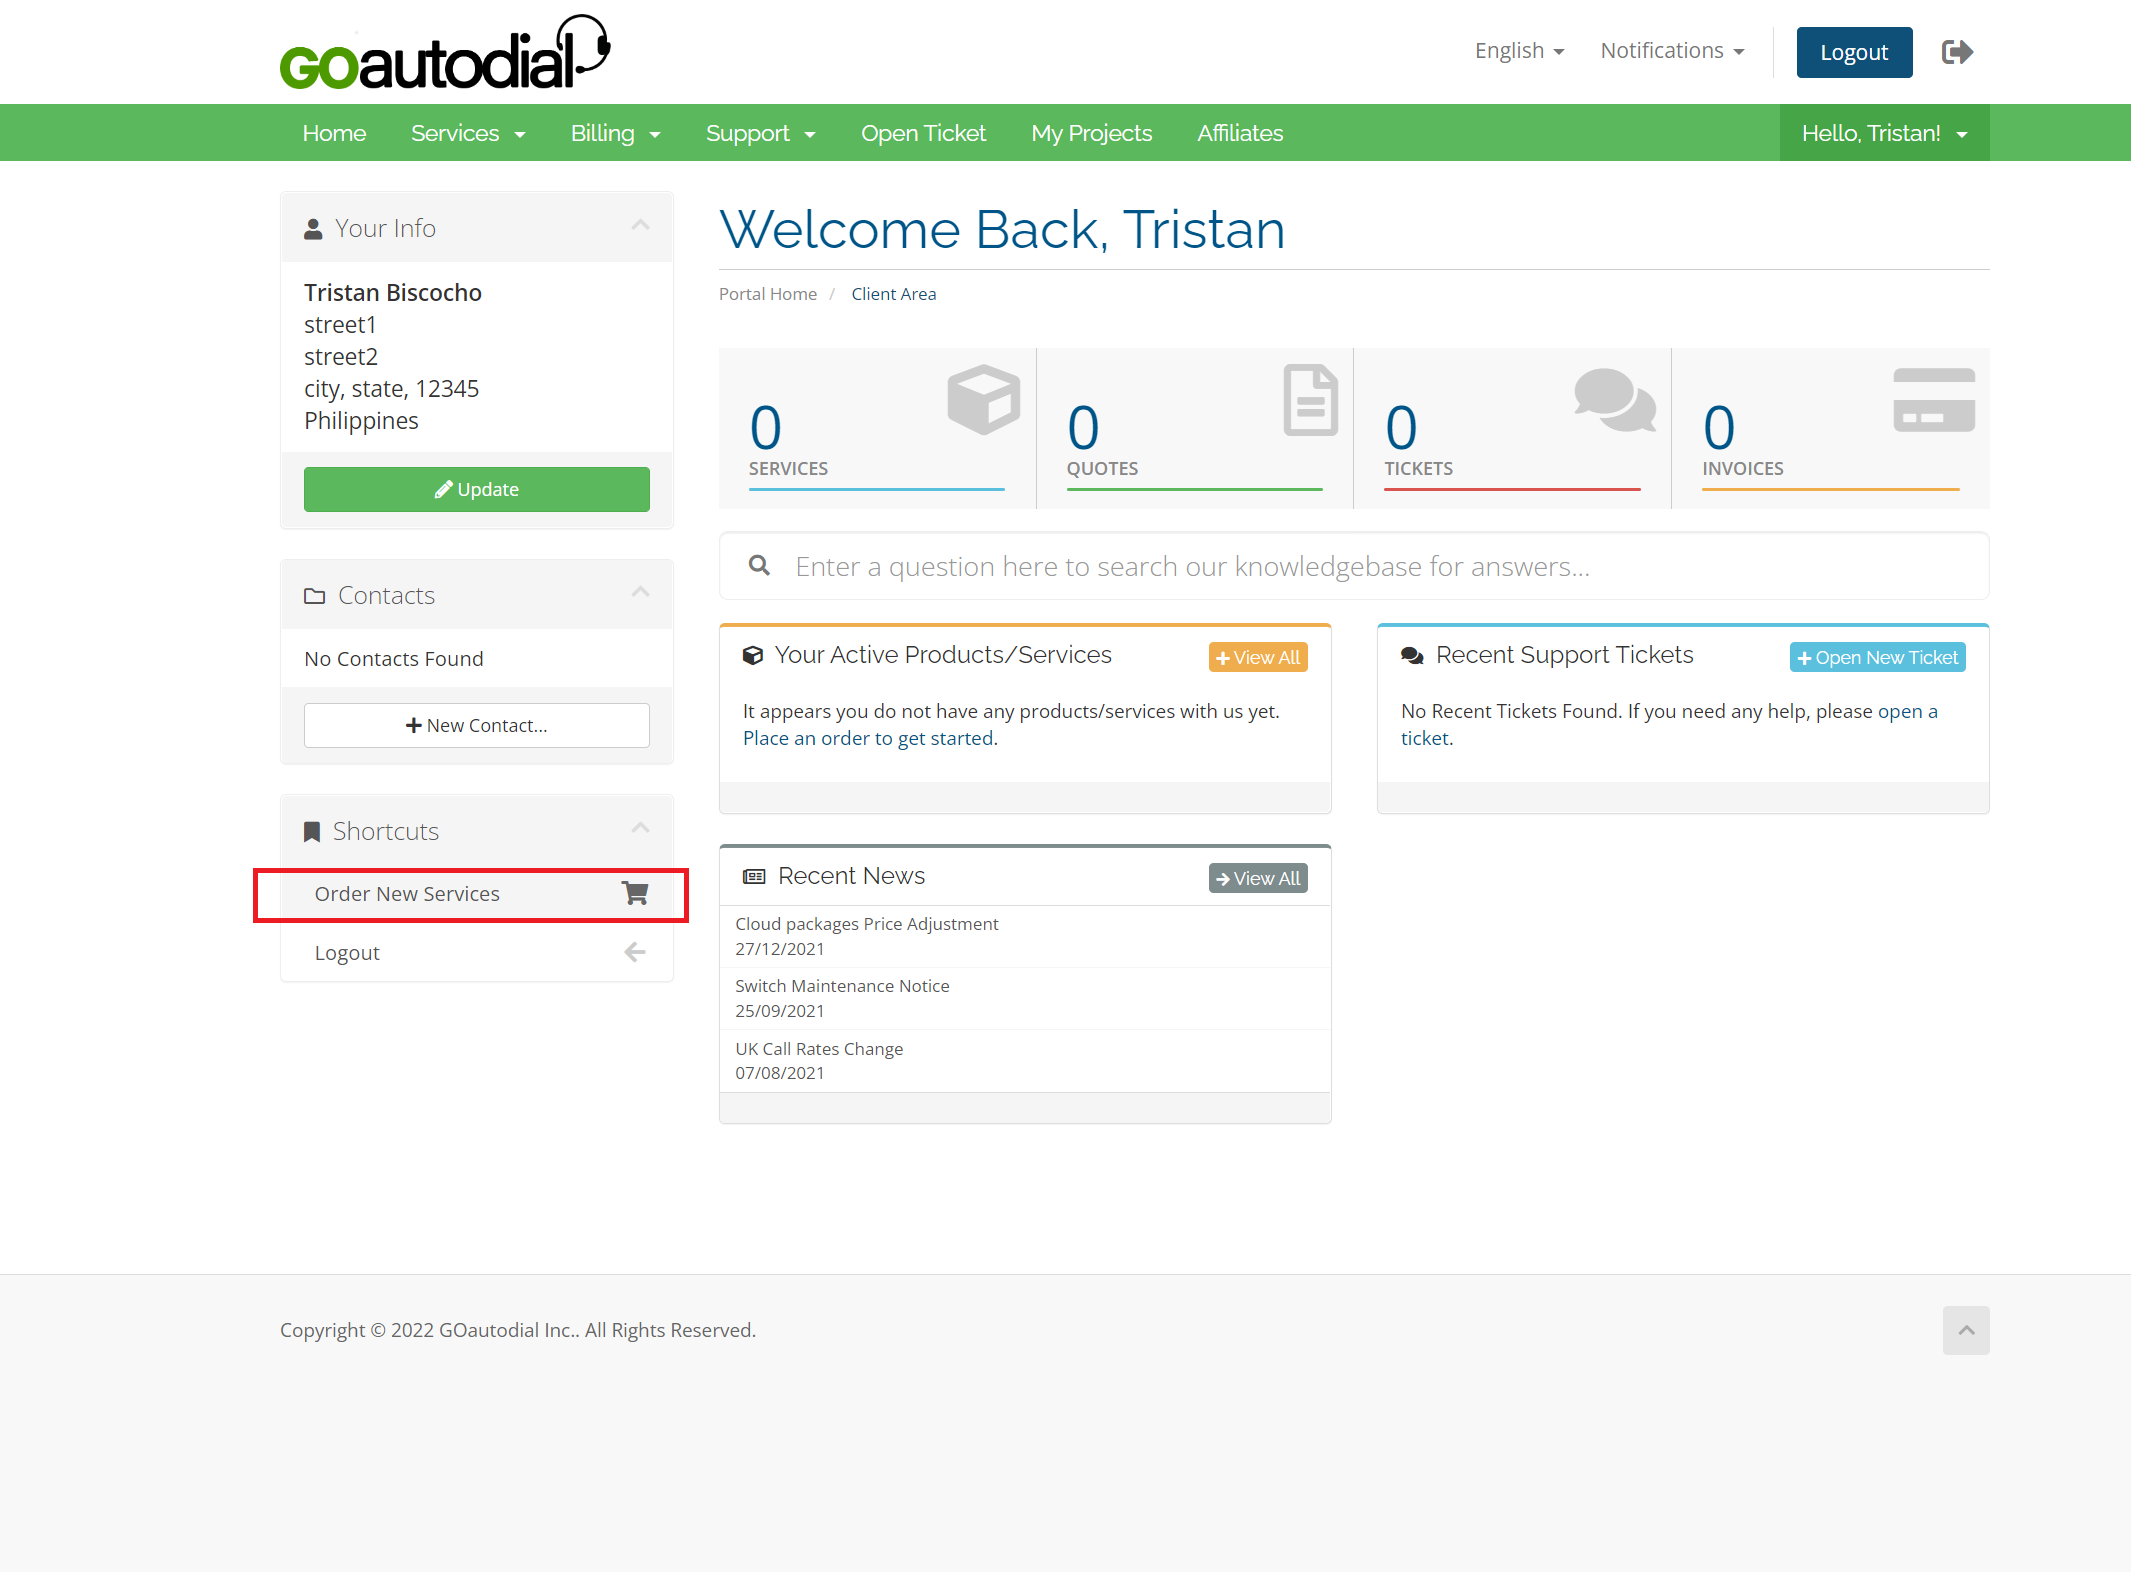
4. To make a purchase, login to your account at https://goautodial.com . Select the cloud package you want by clicking on "Order New Service".
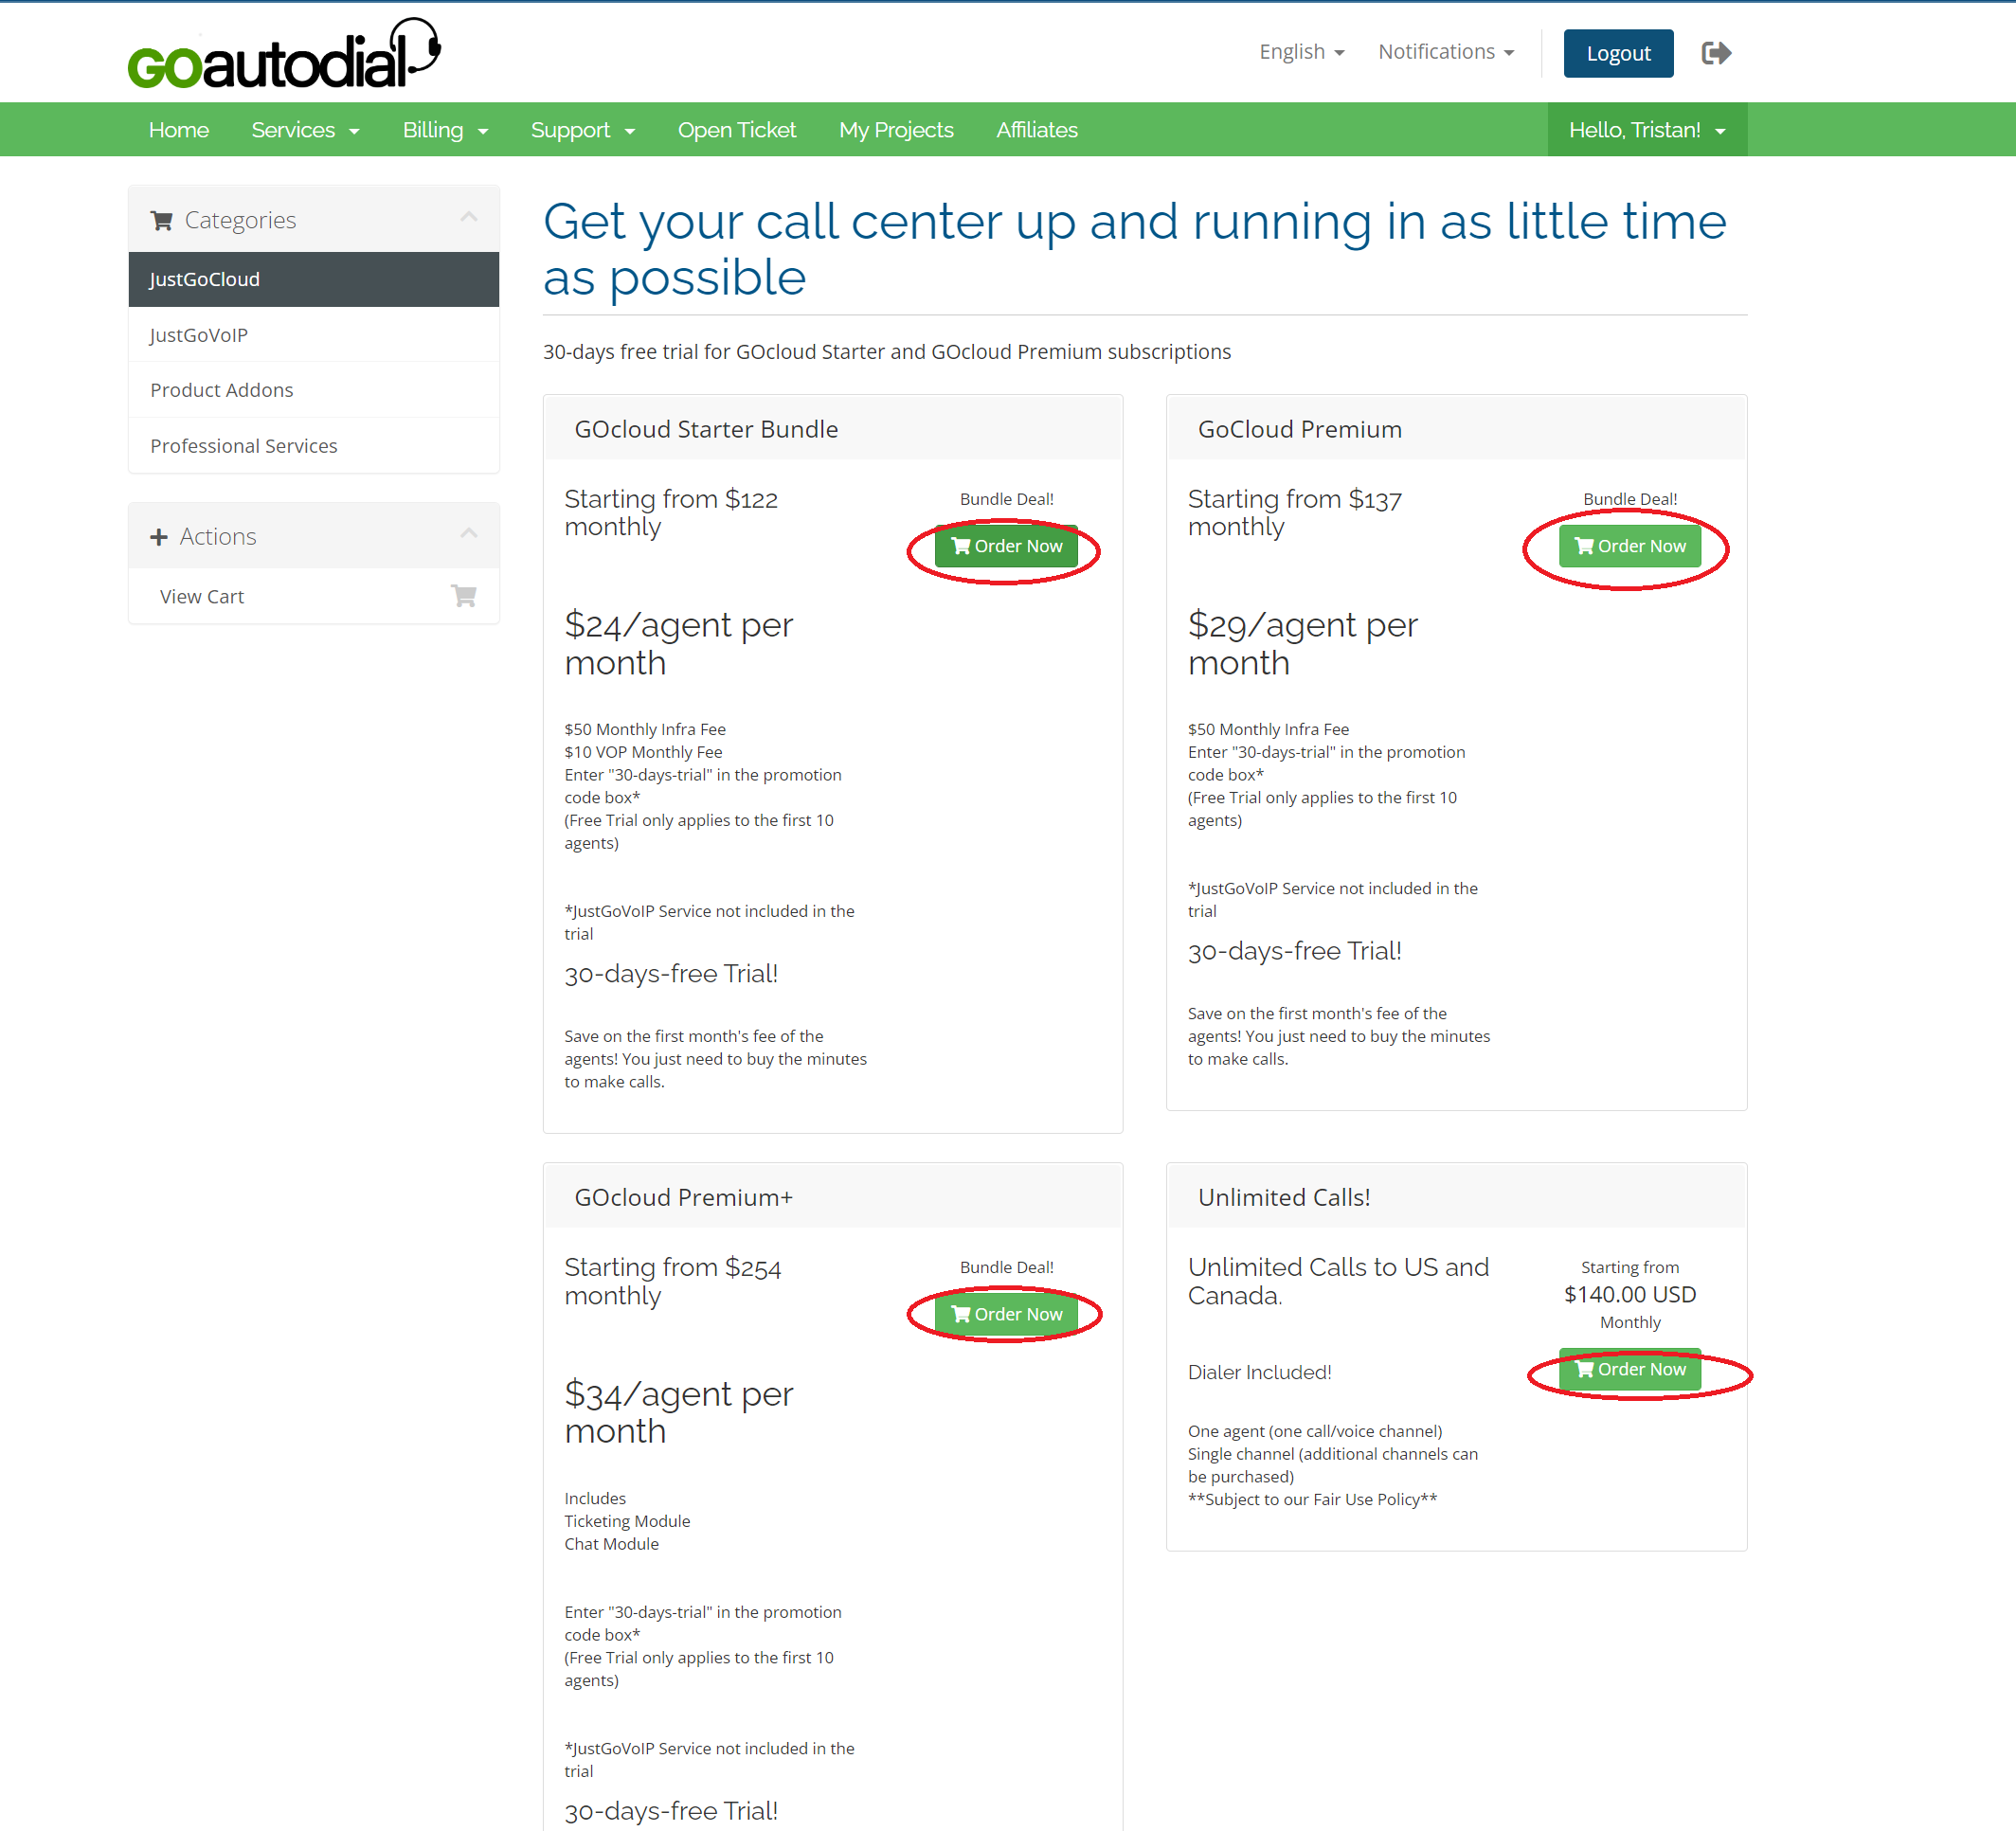
5. Click "Order Now" on the package you want.
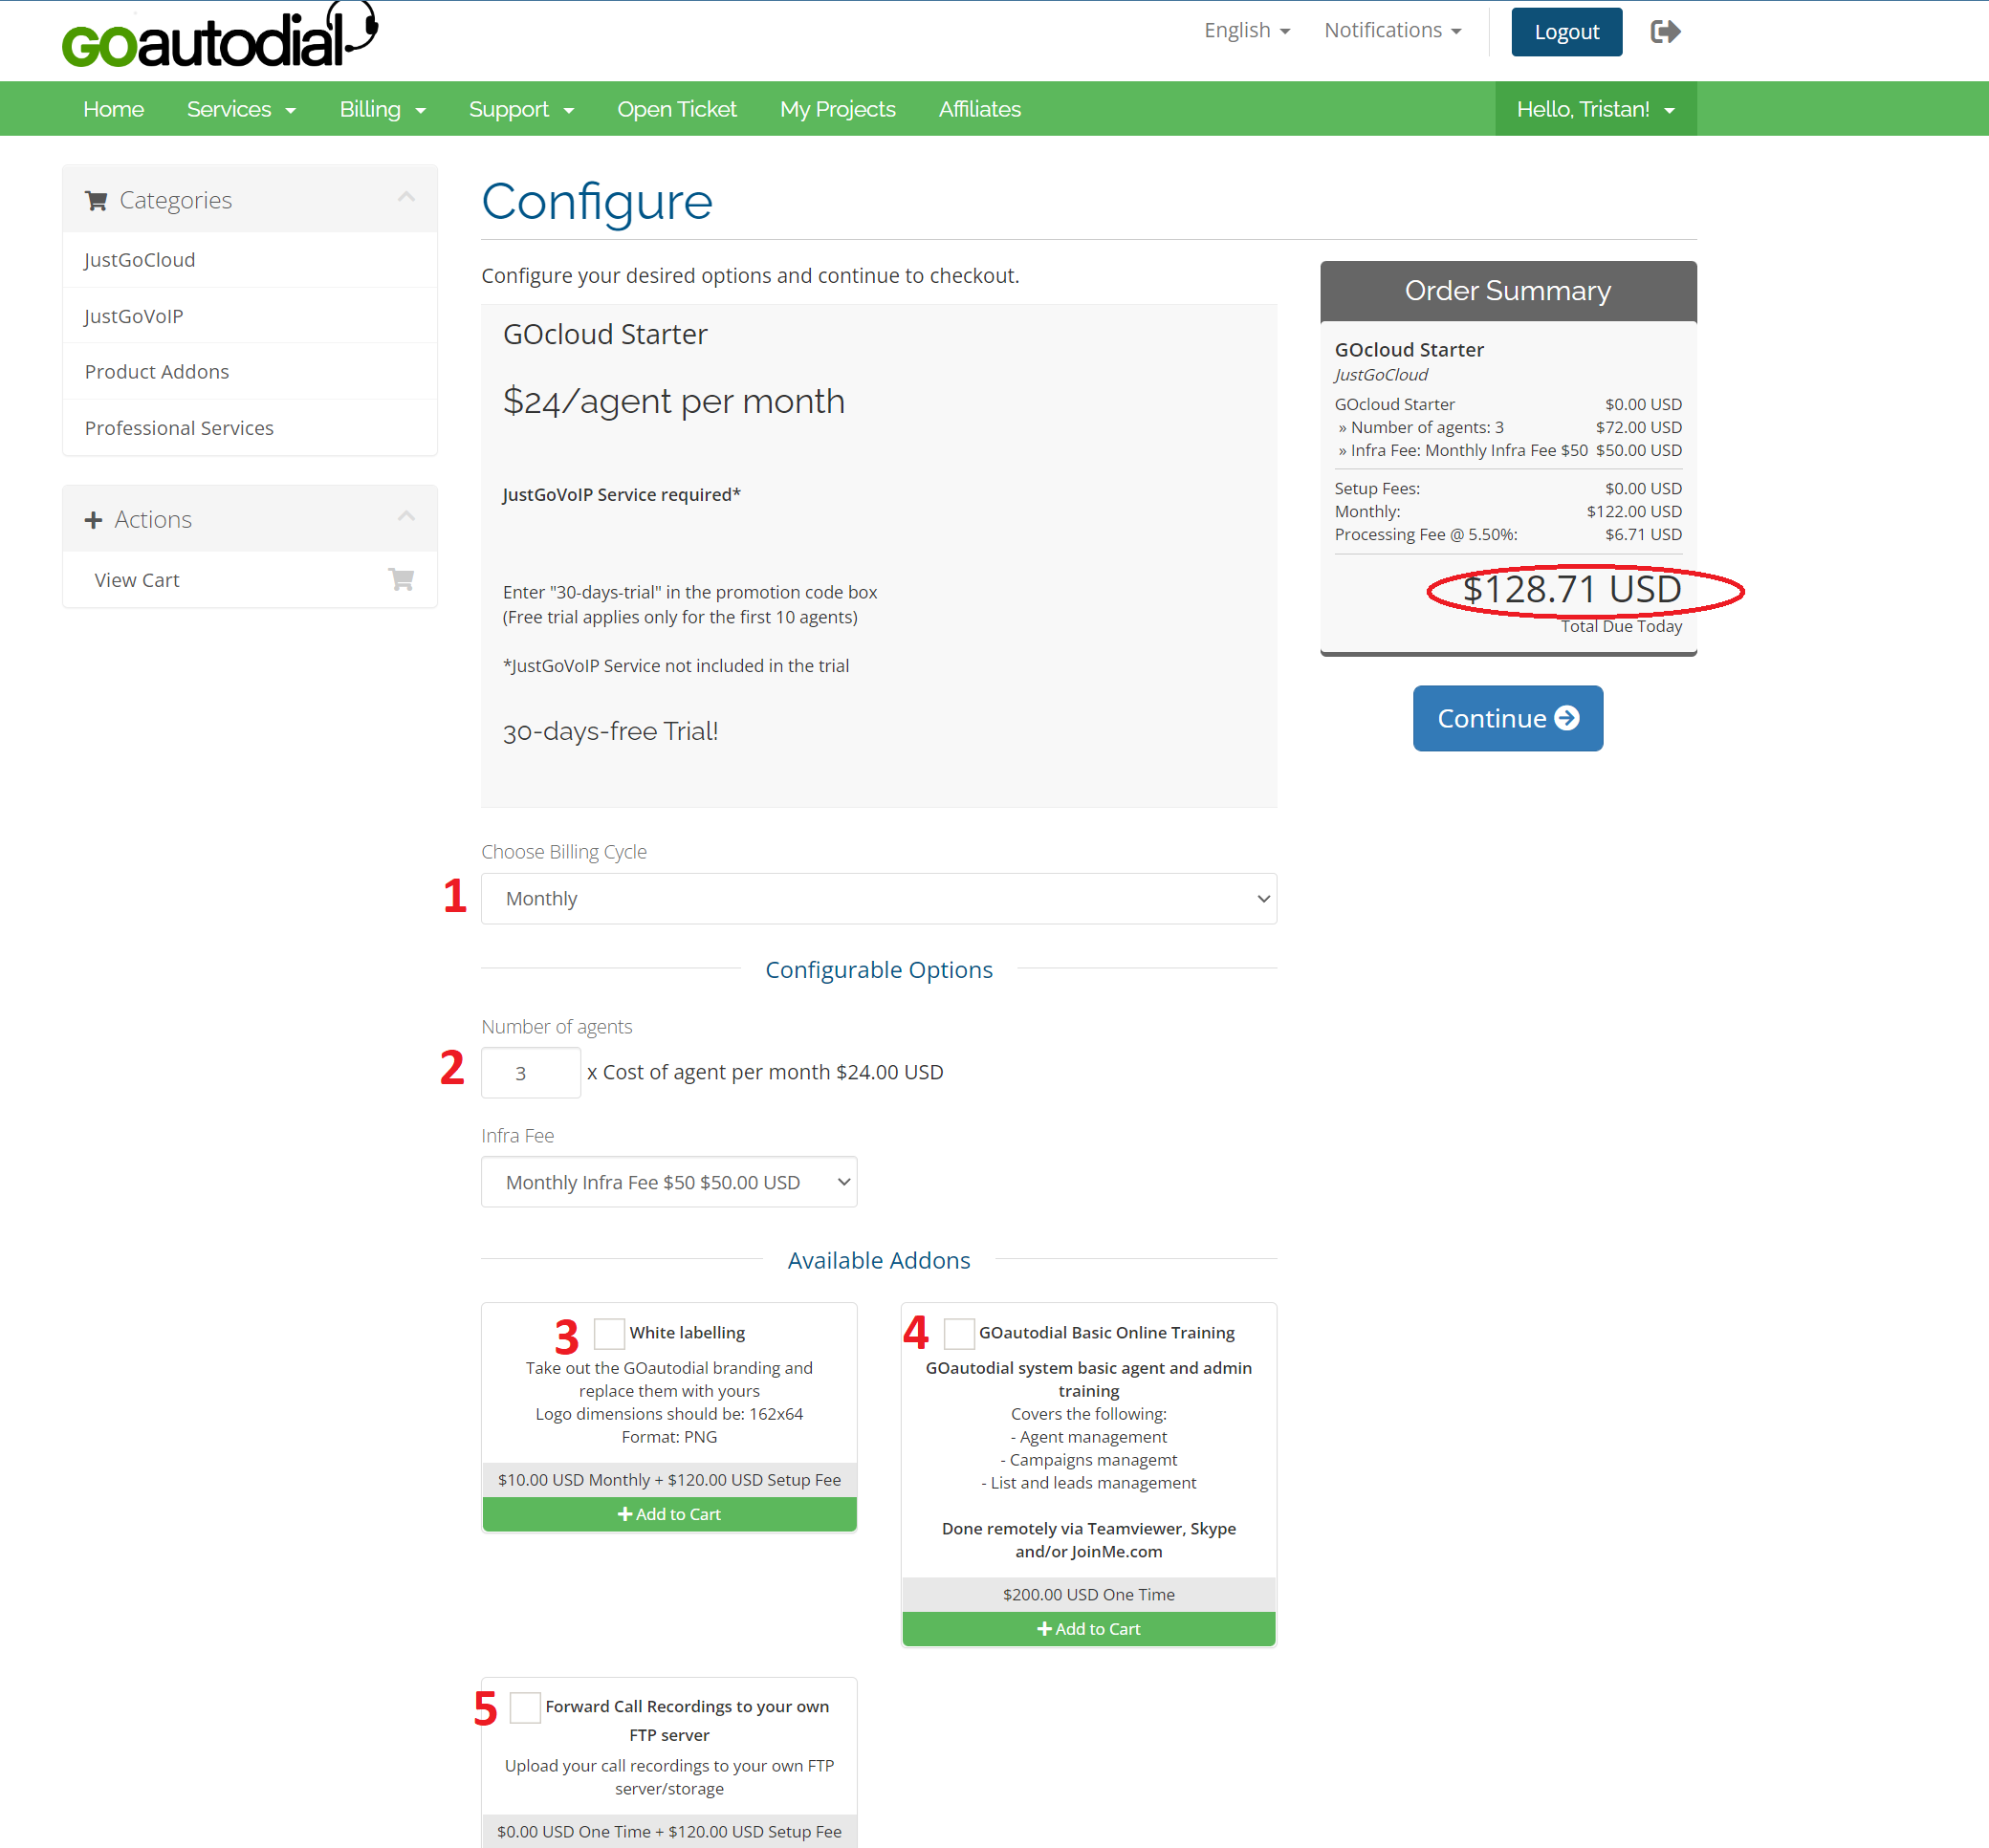
6. Configure your package based on your requirements. (1) Billing cycle can either be Monthly, Semi-Annual, or Annual. (2) Number of agents on the dialer. (3)White labeling allows you to use your own logo and brand on the dialer.
(4)Goautodial Basic Training covers topics that are important to get you started. (5) Forward calls to FTP Server will send recordings to your own FTP server. Click "continue" when done.
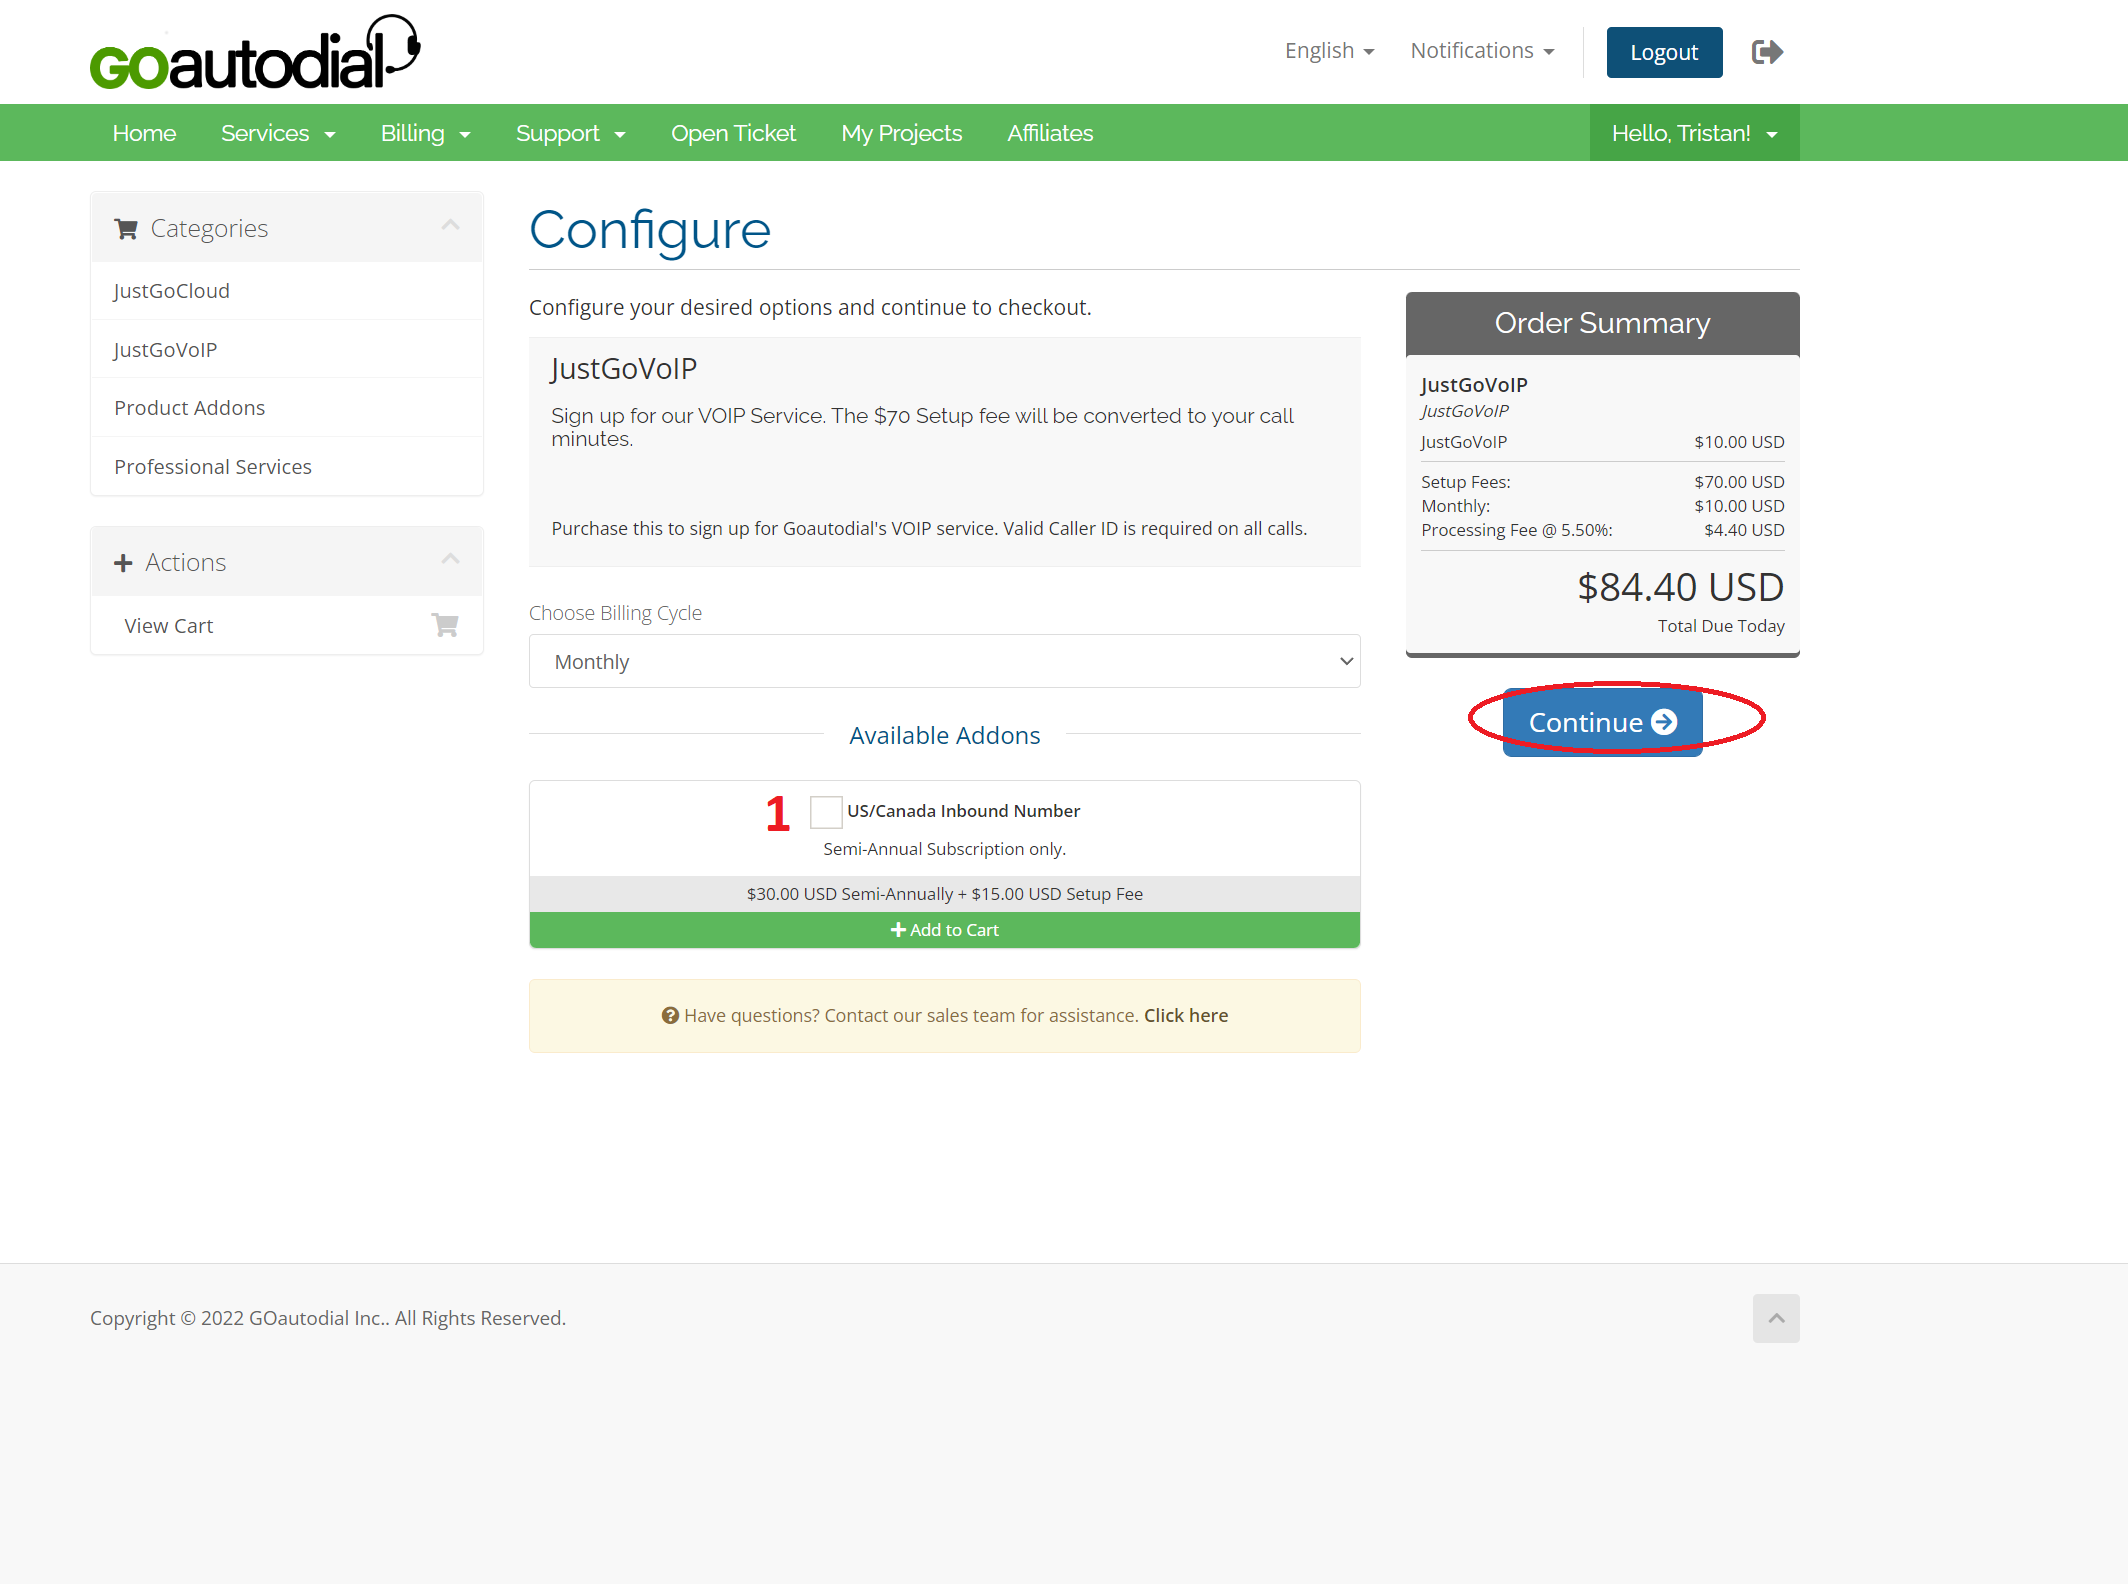
7. Bundled service will include our own VOIP service to allow you to make outbound/inbound calls with the dialer. (1)You can purchase DID's and TFN's with us. When done, click continue.
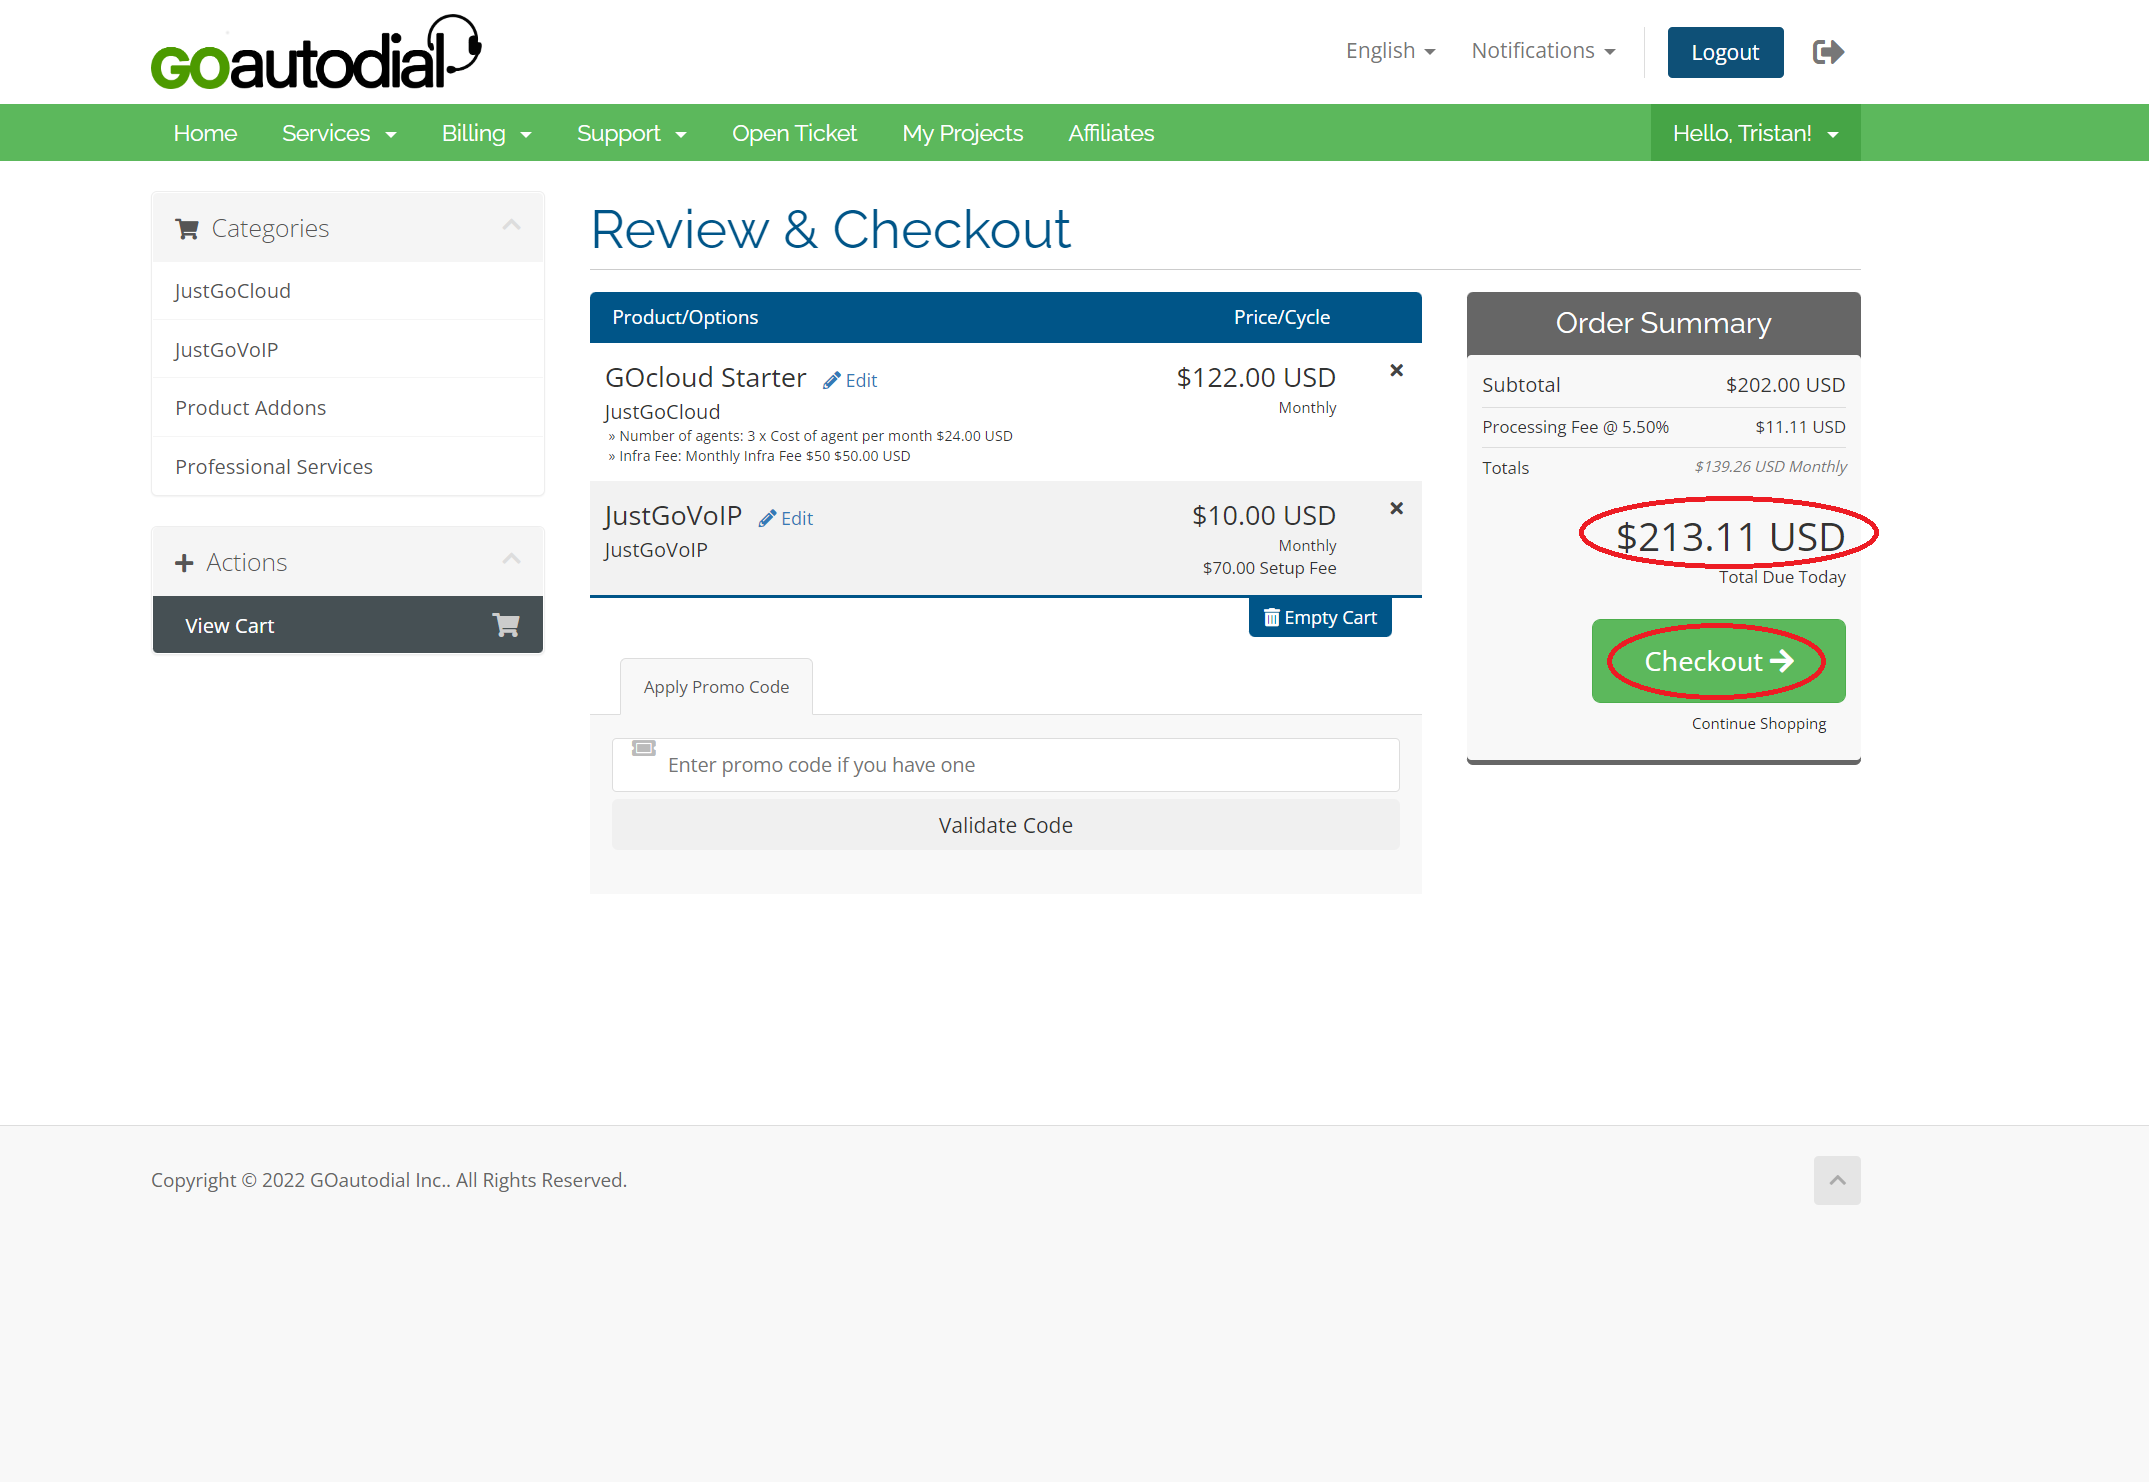
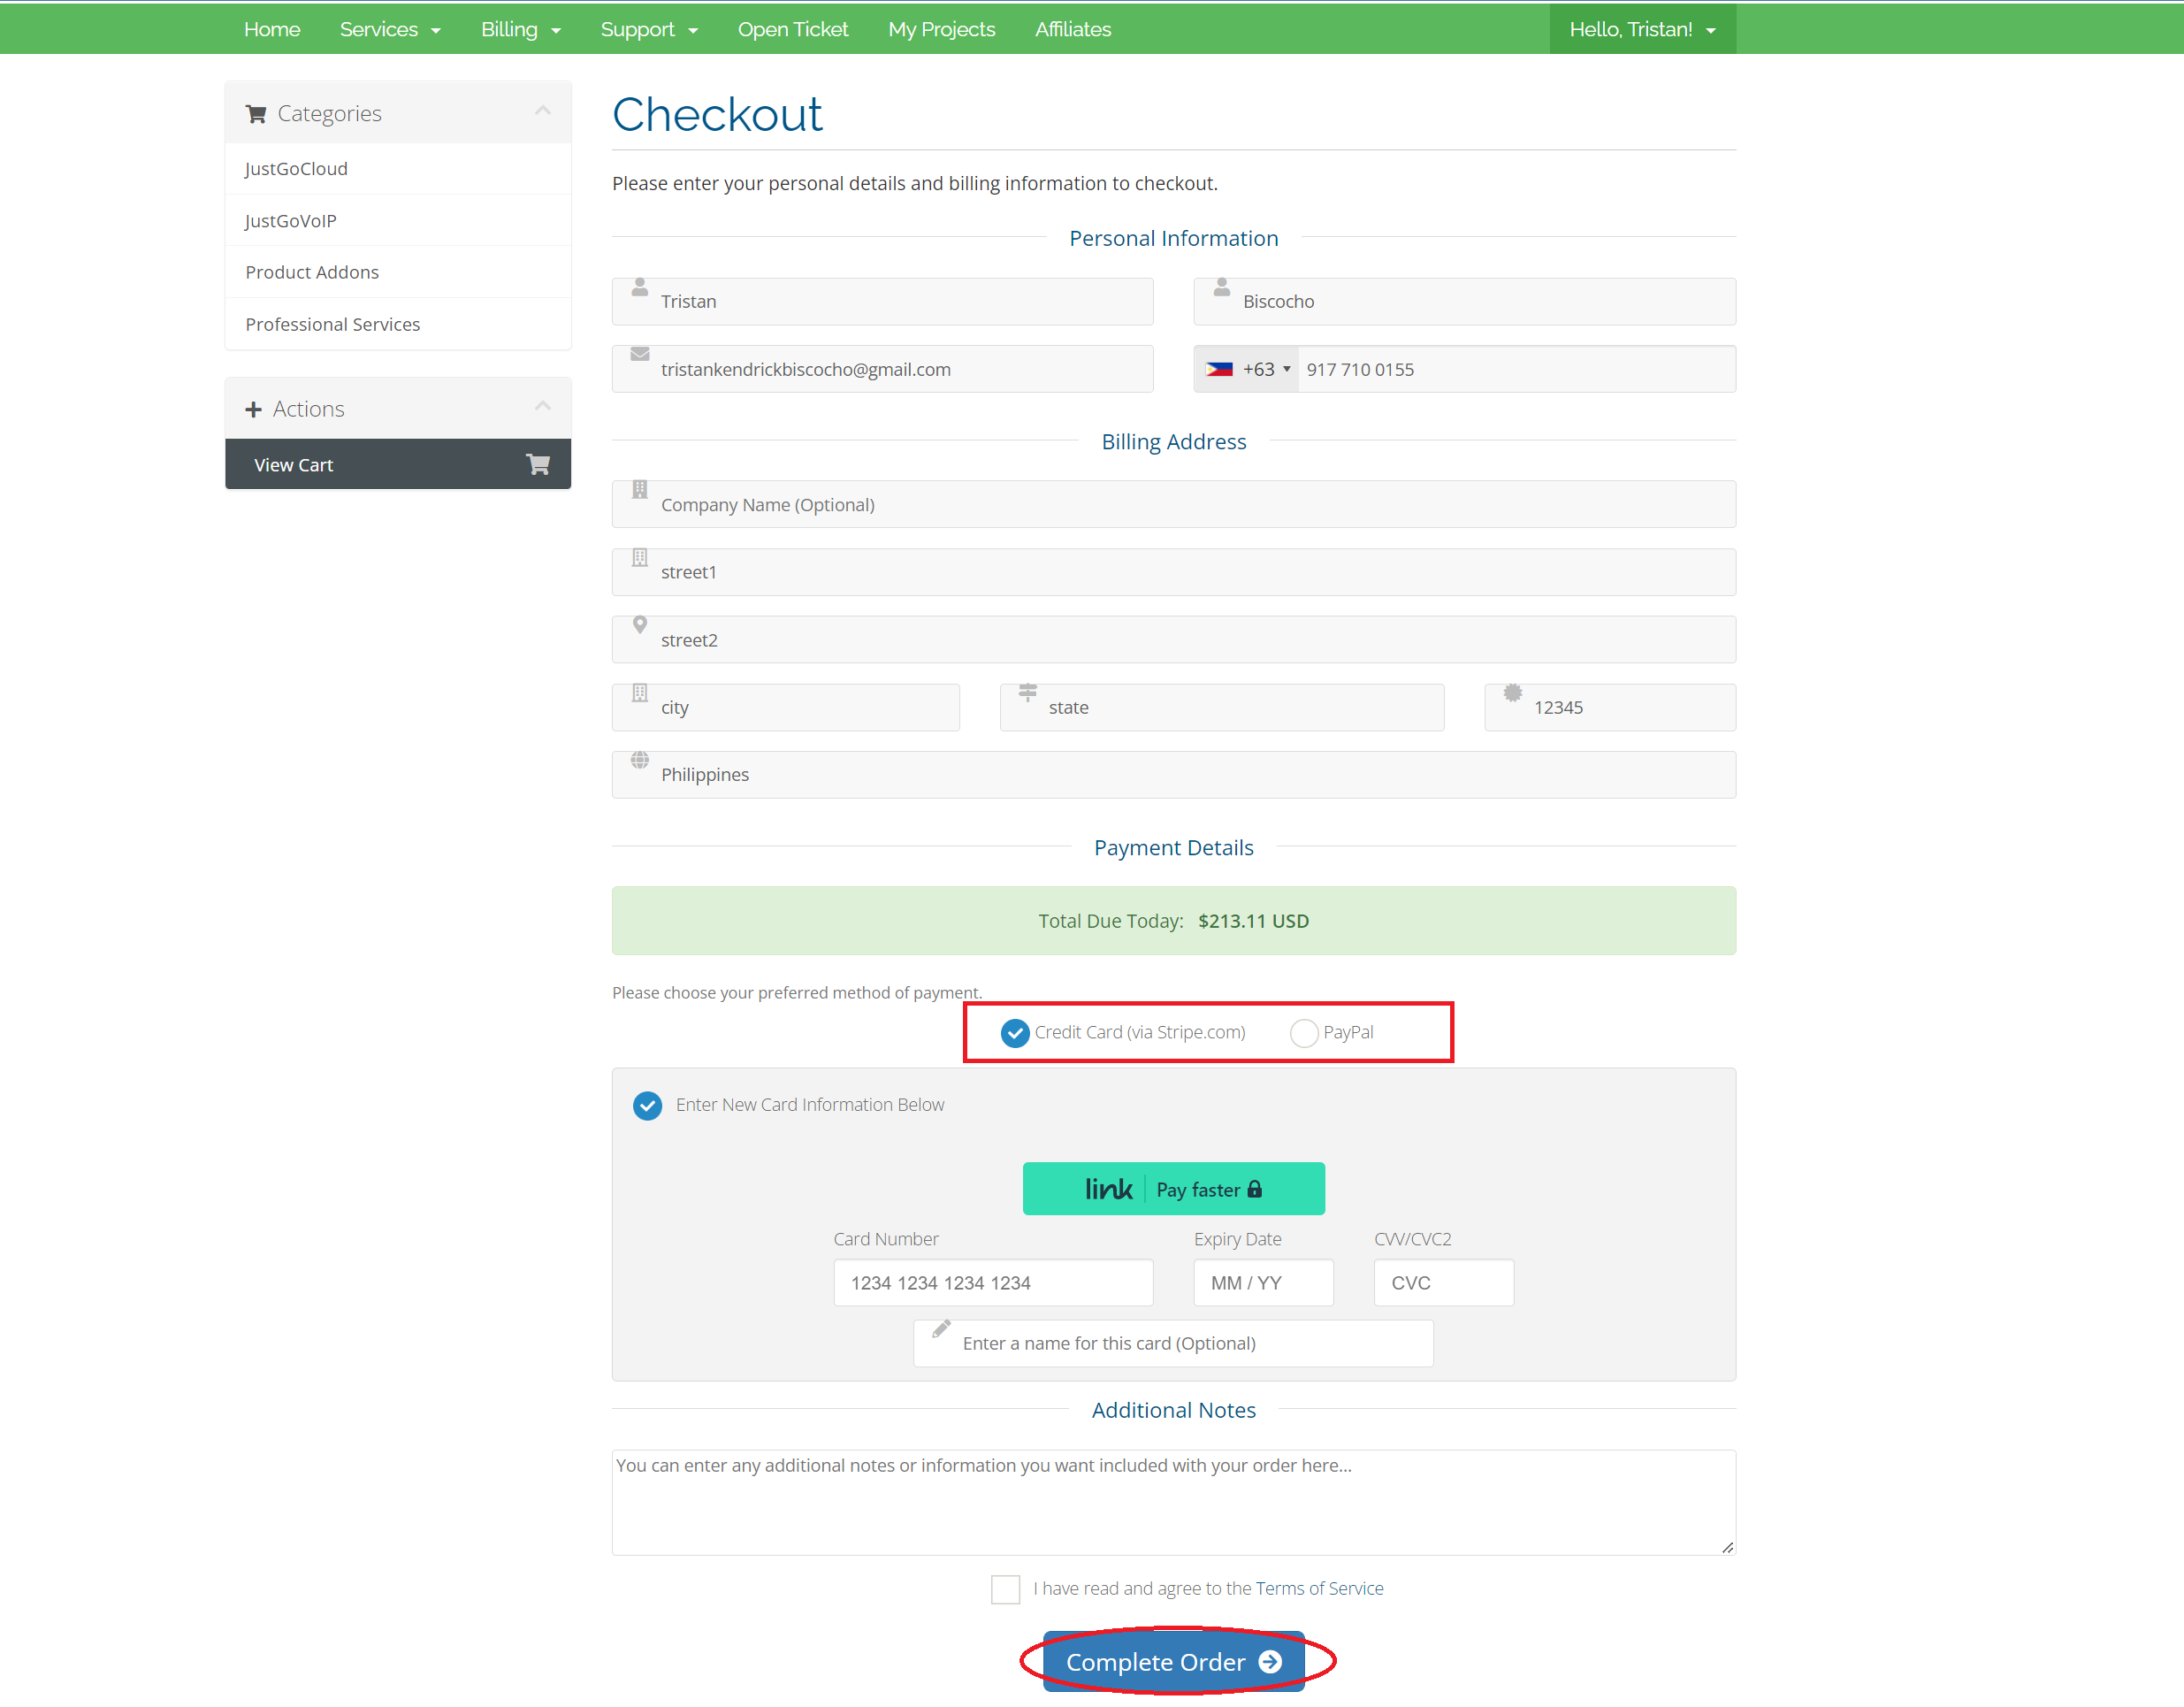
8. Review your selected items and click "checkout" when you are satisfied.
9. Select your payment method and complete your payment.
10. Once payment has been completed. You will be given a call to confirm your order. Your service will be set up within the next 48 hours. An email will be sent to notify you when your service is ready. The email will contain your login link and details.
You will need to check for the email that was sent to your inbox for your login details. The login details will include the link to your dialer and your admin username and password. Once you have obtained all these information, you are ready to set up the campaign you will need to start dialing. Login to the dialer using the URL indicated in the email we sent you.

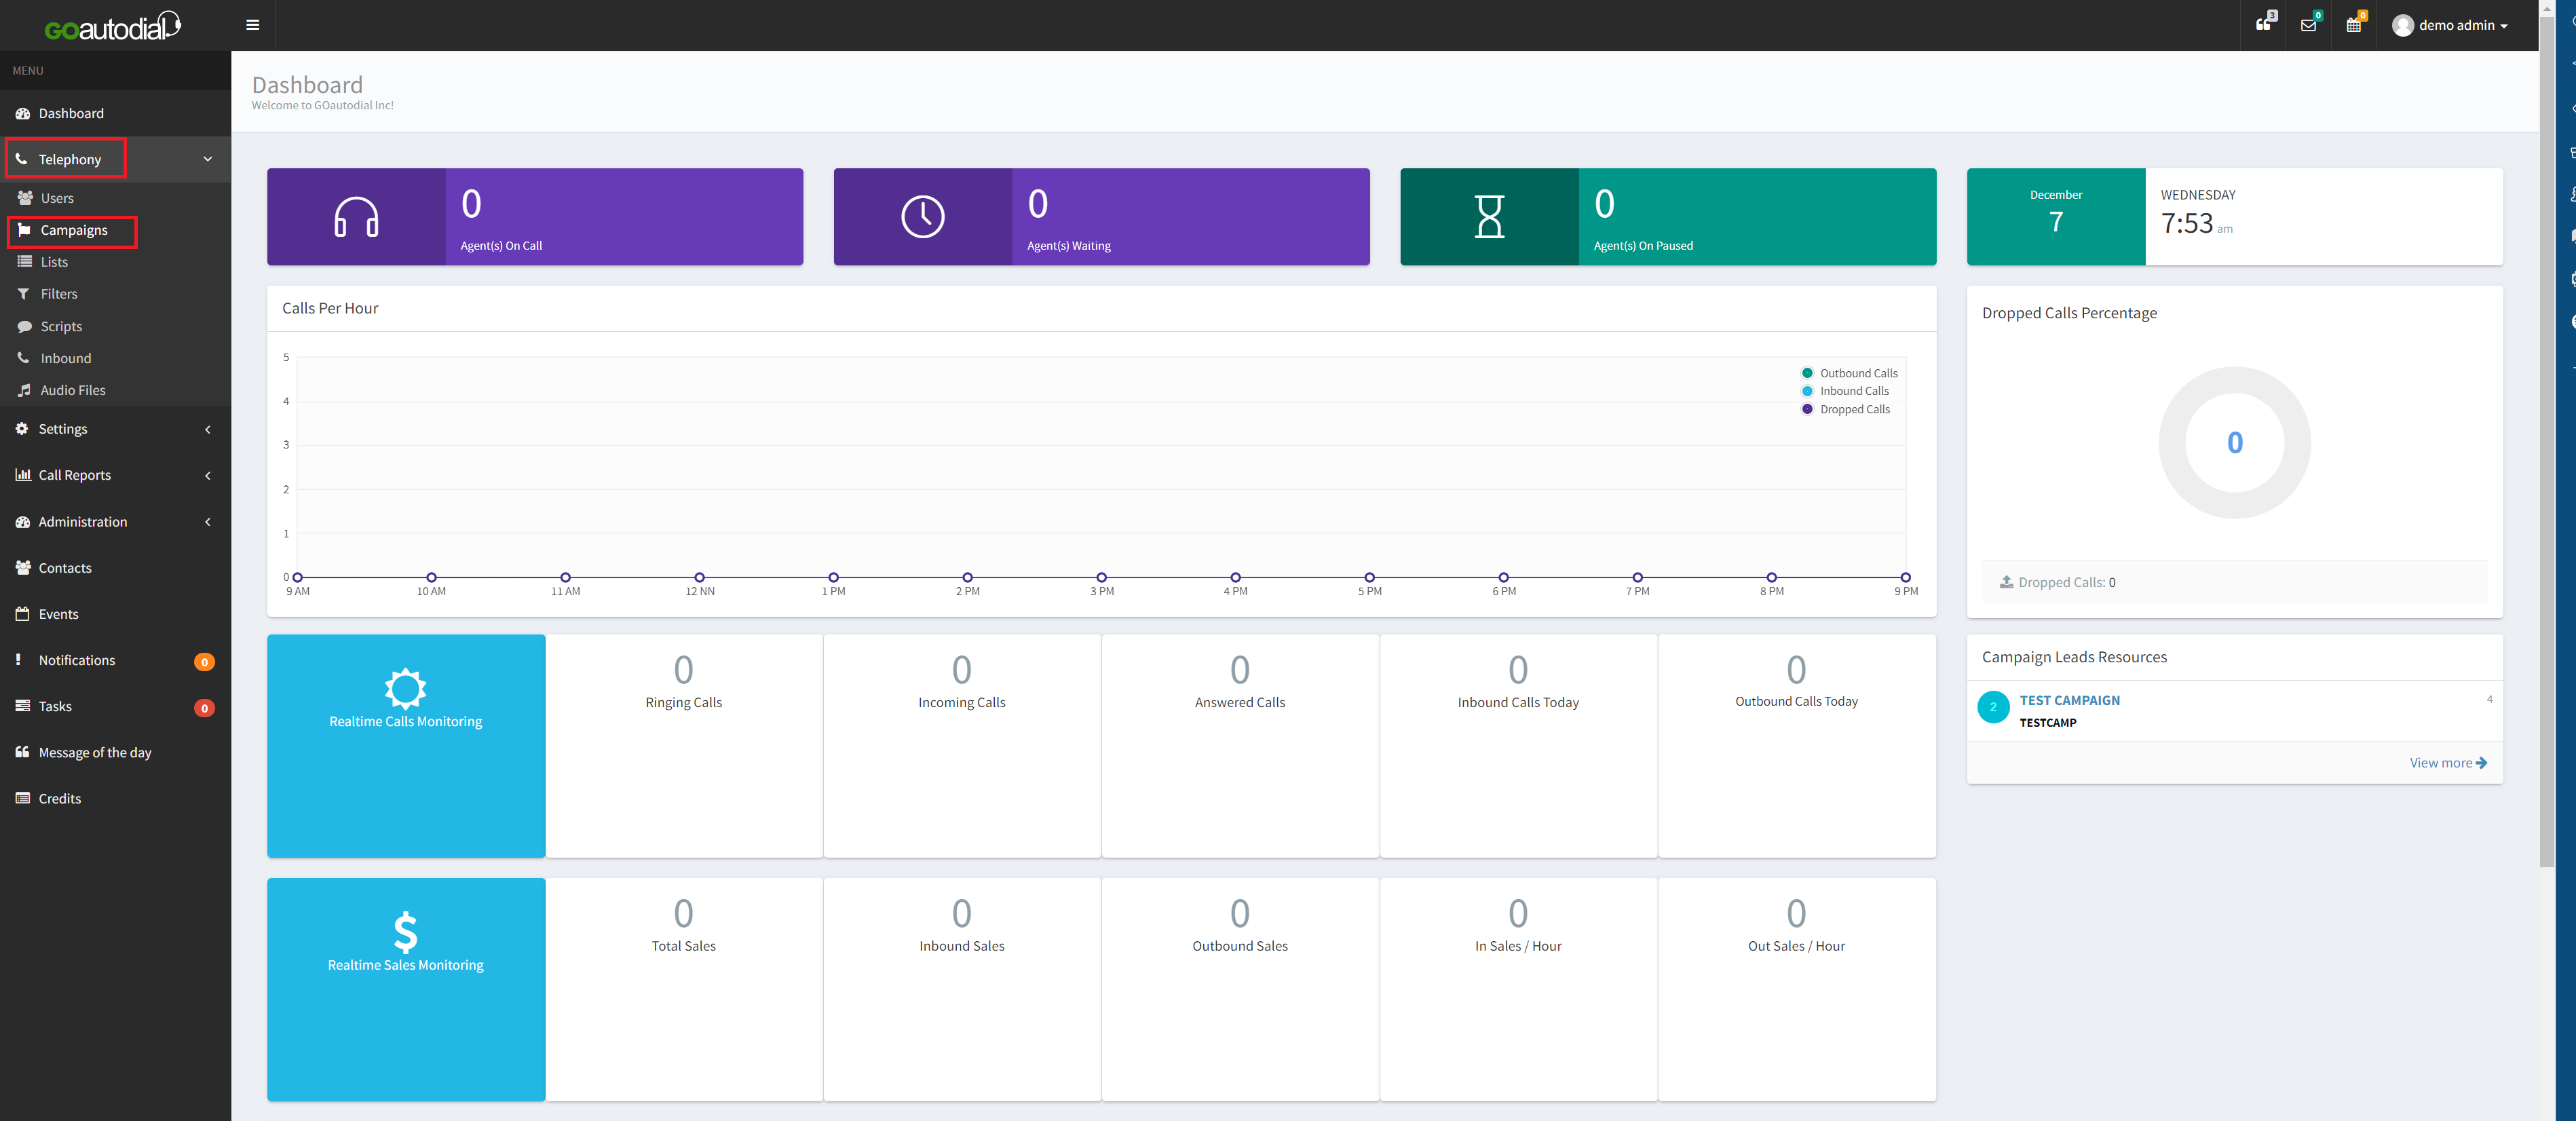
11. We will need to create a campaign first. The campaign defines the behaviour on how the outbound and inbound calls will be made and handled. To create a campaign, just go to Telephony > Campaigns.
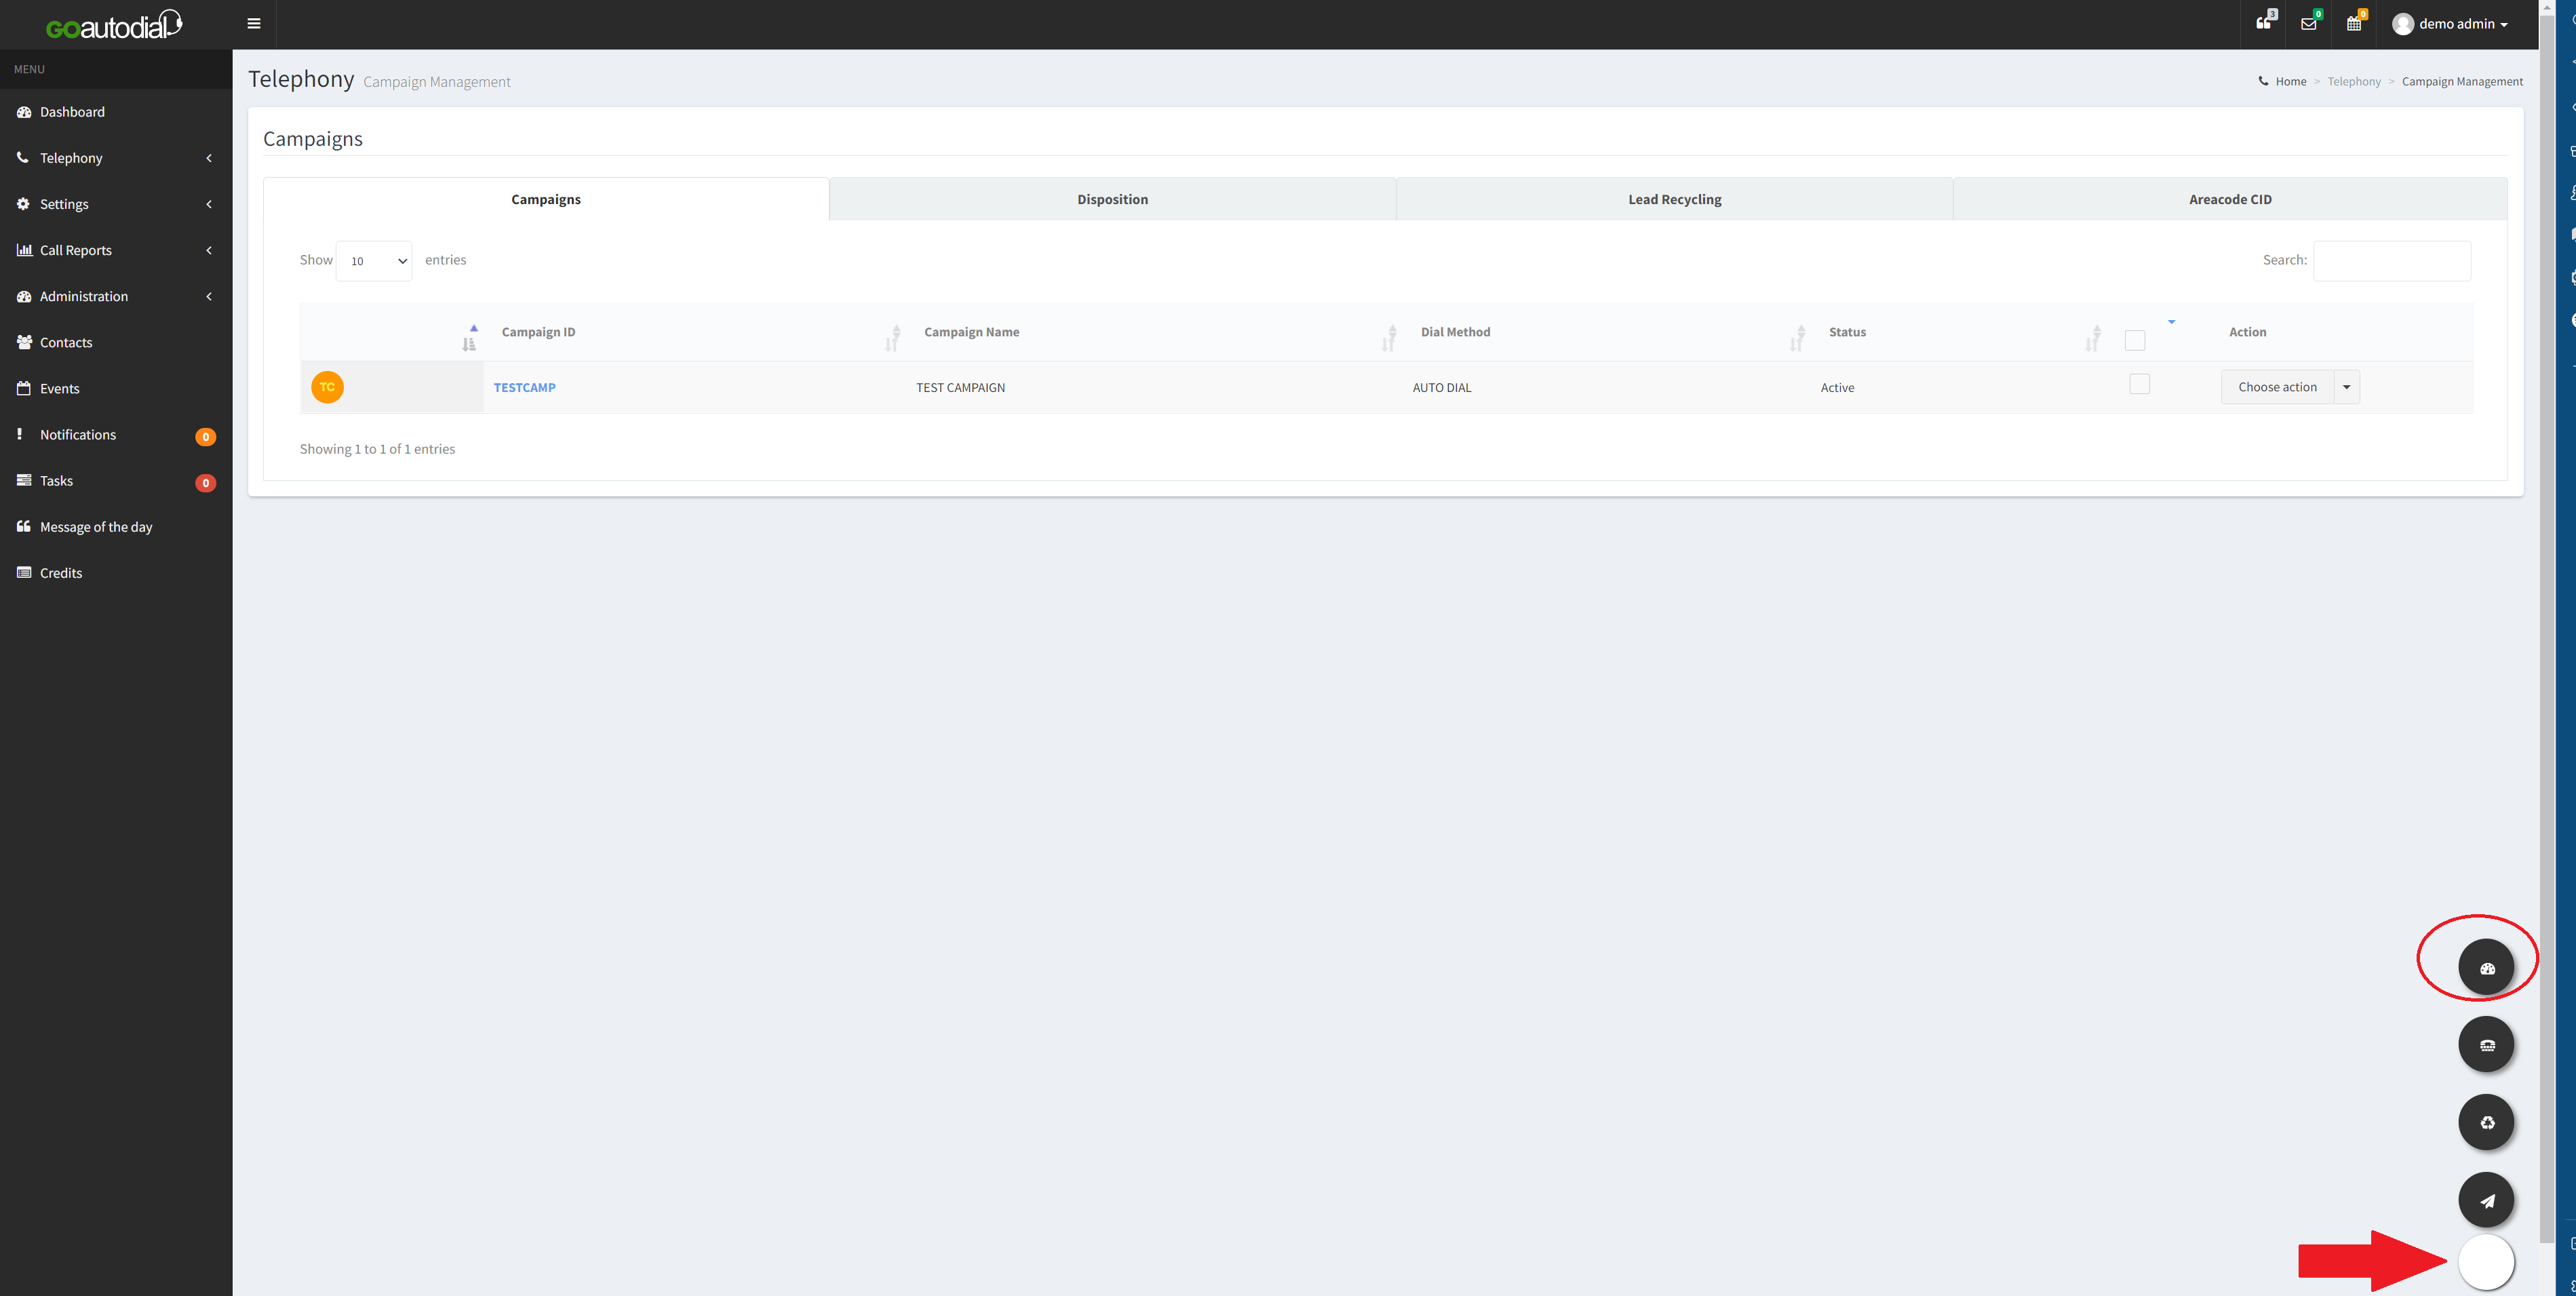
12. On the campaign page, click on the plus sign at the bottom right, then select "Add Campaign".
13. On the campaign wizard window, select the type of campaign you want to create. The types of campaigns are;
- Outbound - campaign for outbound dialing.
- Inbound - Campaign for receiving inbound calls.
- Survey Press 1 - A campaign that plays a voice file and requires the customer to press 1.
- Copy from Campaign - Copy existing campaign settings to a new campaign.
After selecting the campaign type, define the following settings on the wizard;
- Campaign Name - set the name of the campaign
- Carrier to use for this Campaign - select the VOIP service you want to use to make outbound calls. By default, "JustgoVOIP" should be selected.
Click Next.

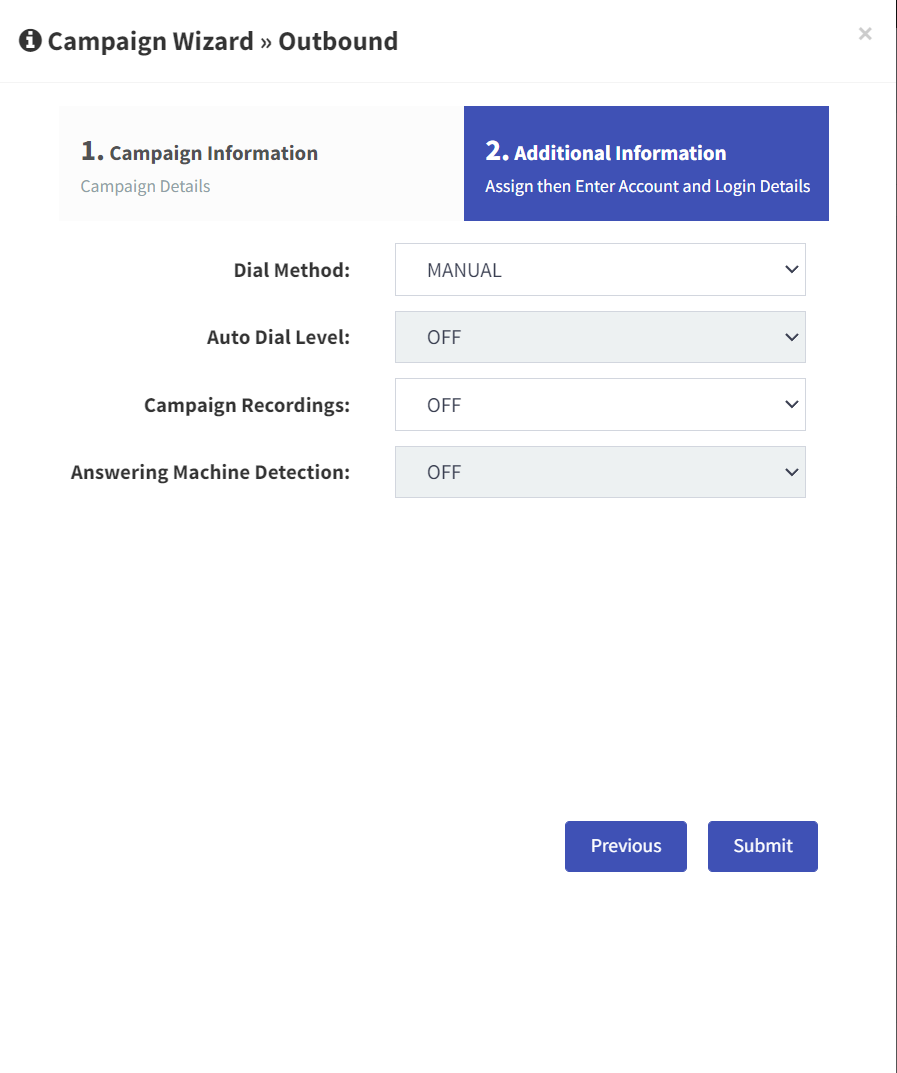
14. On the next page select the dial method to be used on the campaign; (applicable only if you selected "Outbound" on the Campaign Details dropdown)
- Manual - Agents will need to click the "Dial Next" button for the campaign to dial the lead
- Autodial - The campaign will automatically dial leads that have been uploaded to it.
- Predictive - The campaign will automatically dial the leads and will also adjust automatically the speed of dialing based on the drop rate of the campaign.
- InboundMan - This method will allow Inbound and Manual dialing on the campaign.
Autodial Level will control how fast the campaign dials the Leads. You can also set the campaign to record all calls. Answering machine detection will automatically hang up calls once it is detected
as an answering machine. The answering machine detection rate is at best 70%. Click submit once done.
15. Congratulations on creating your new campaign!
16. Recommended lead file format is .csv (Comma delimited). Required fields that should have data on your file is the phone number column. If "Omit Phone Code" is set to "N" on your campaign advanced settings, your lead file is required to have a phone code column as well.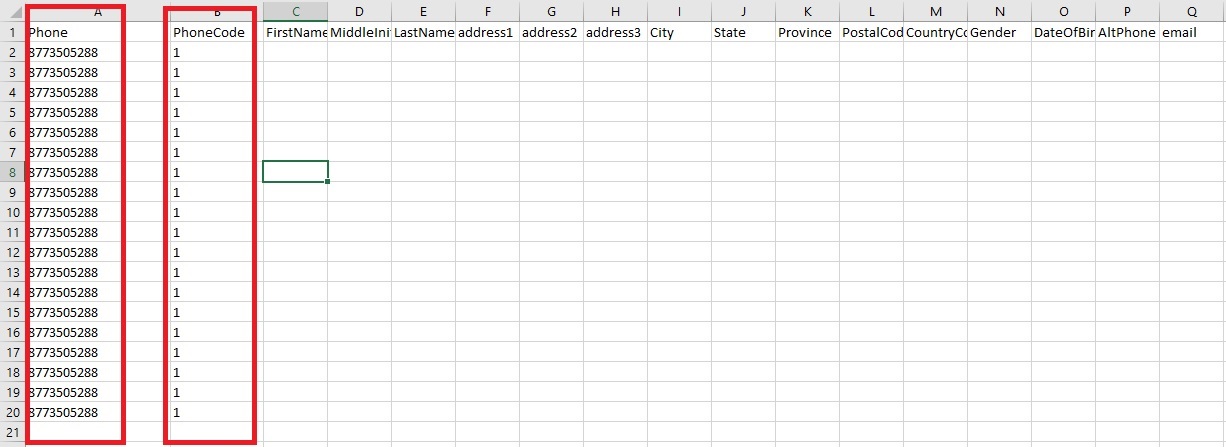
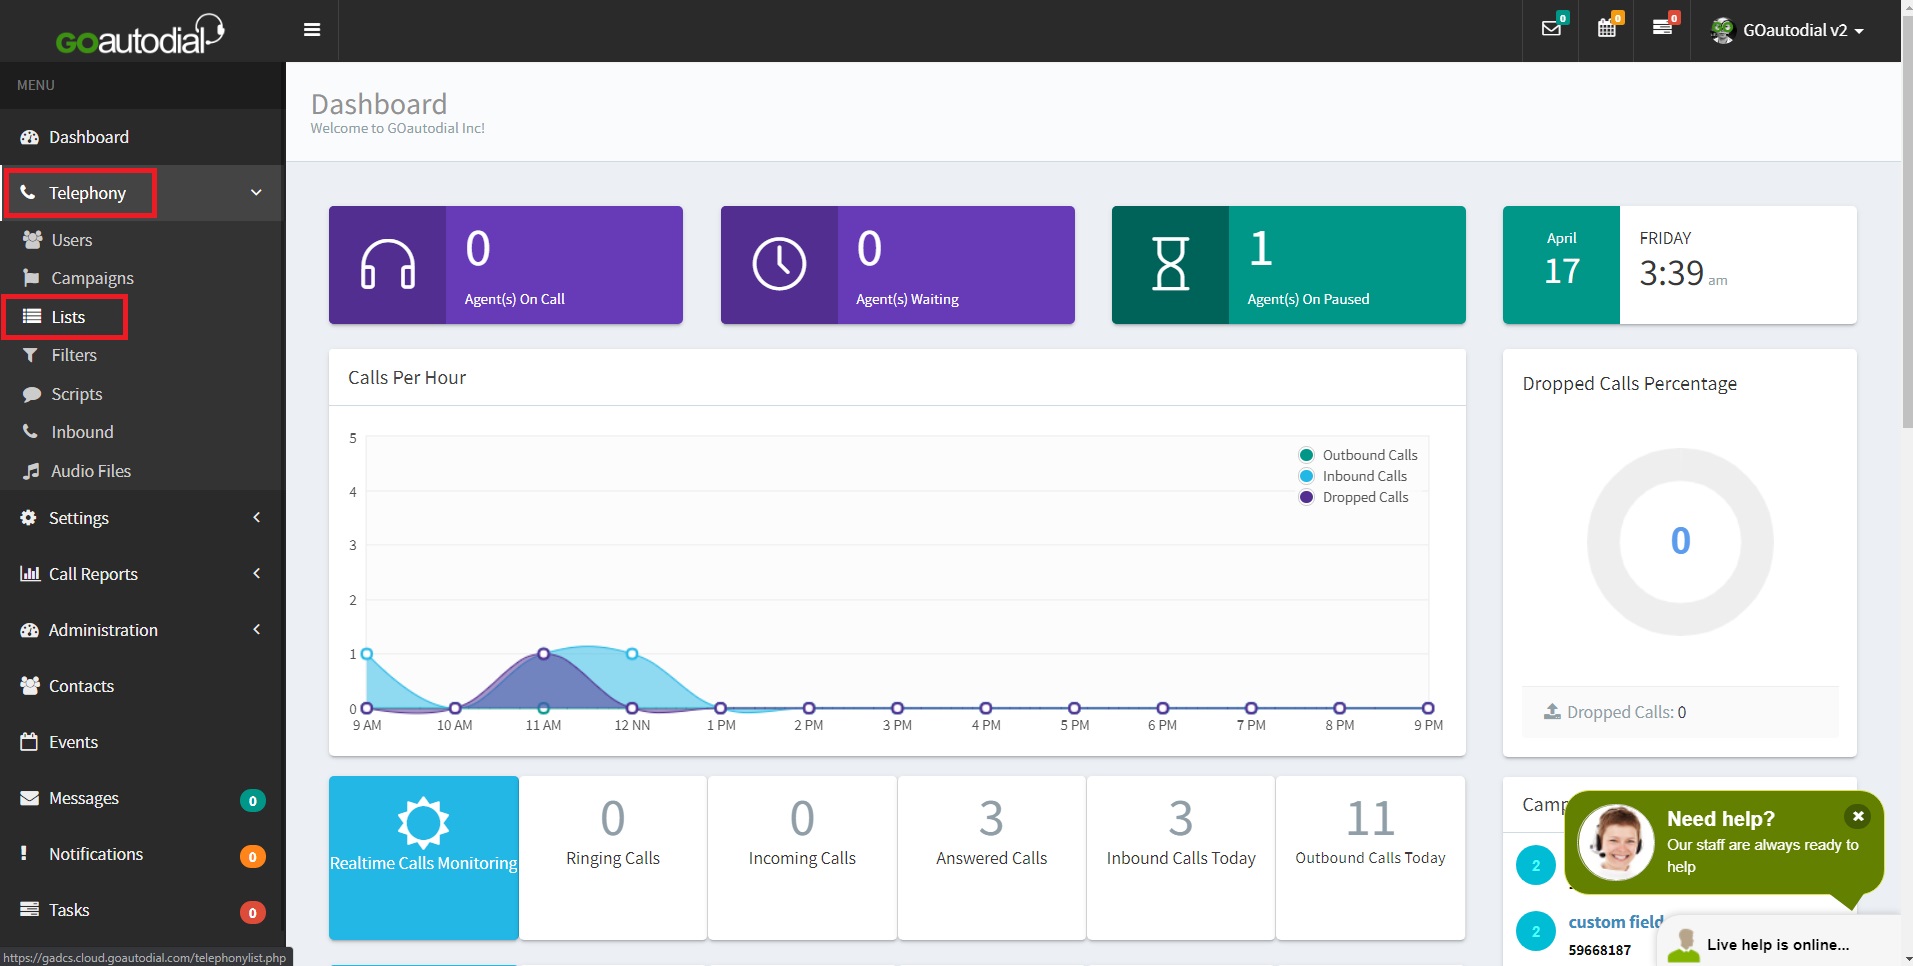
17. Log-in your Admin account then go to Telephony > List
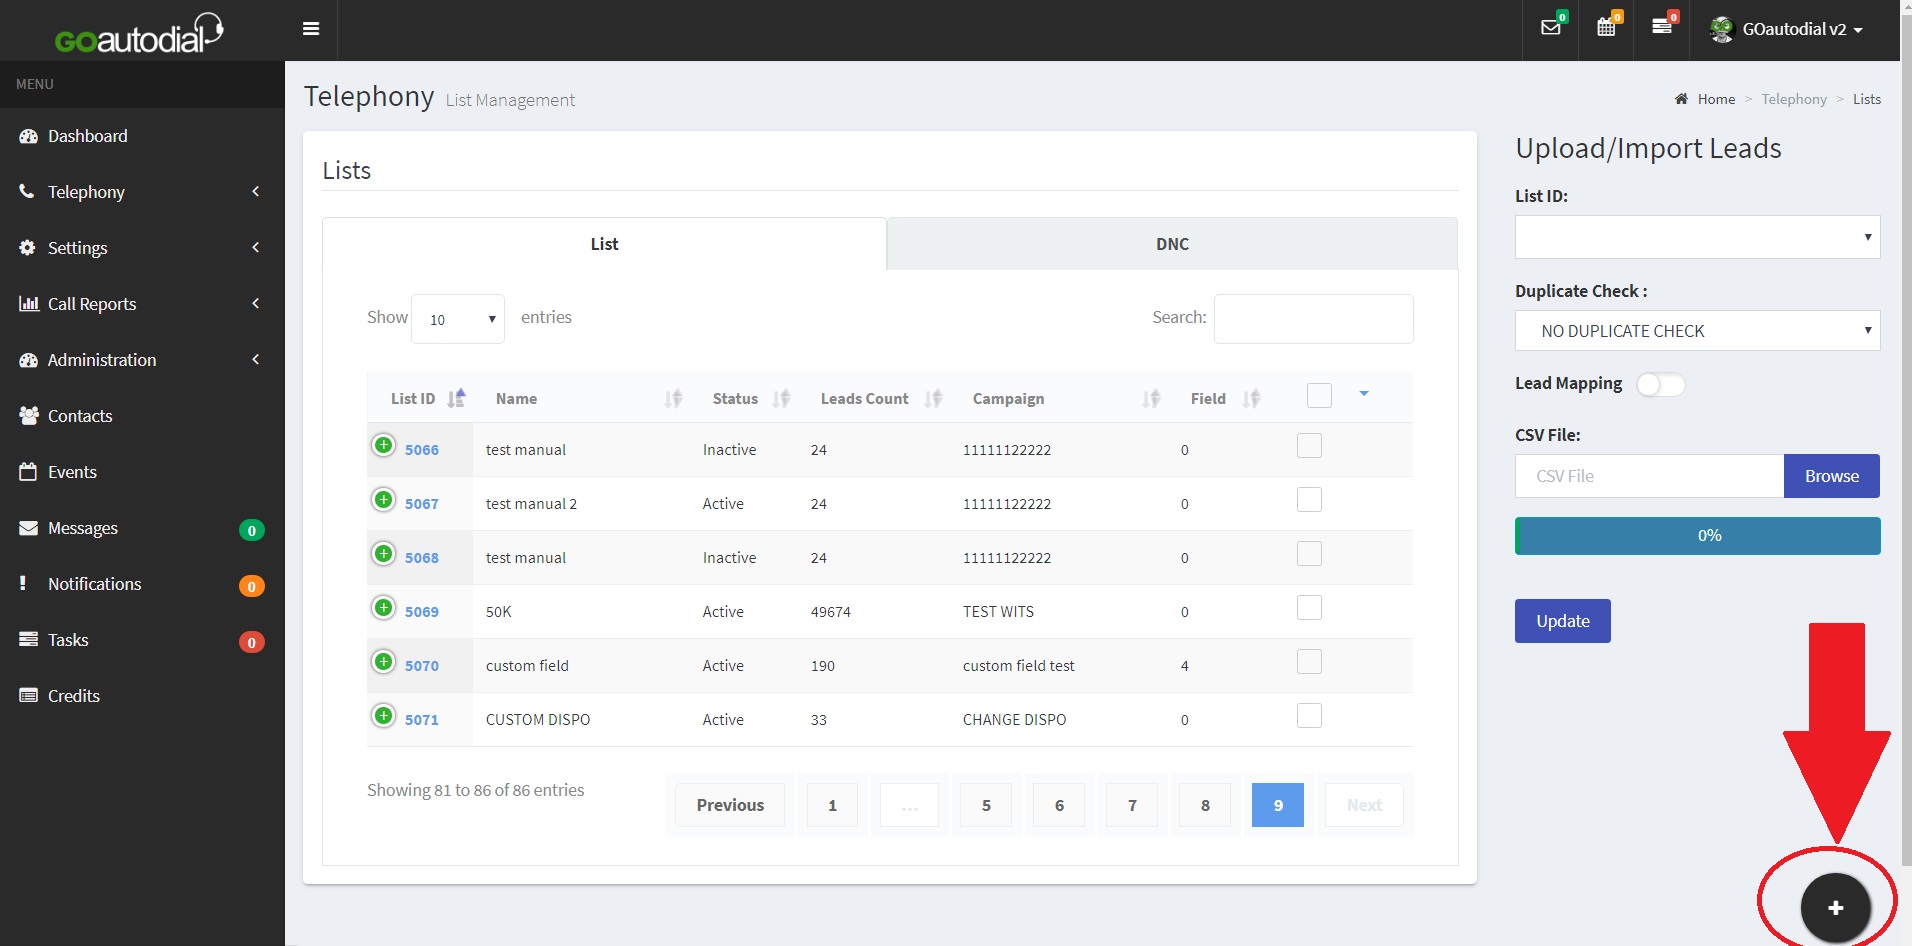
18. On the lower right corner click the circle to proceed to create a List.
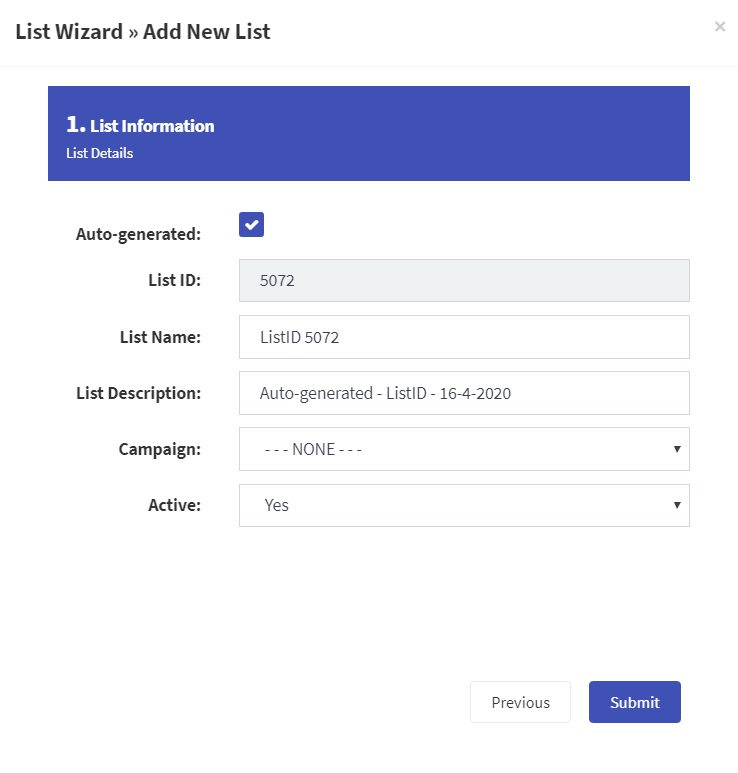
19. Fill up the List Wizard. You can type the List Name , Description , and which Campaign you want to assign the List/Leads. Then click submit to proceed.
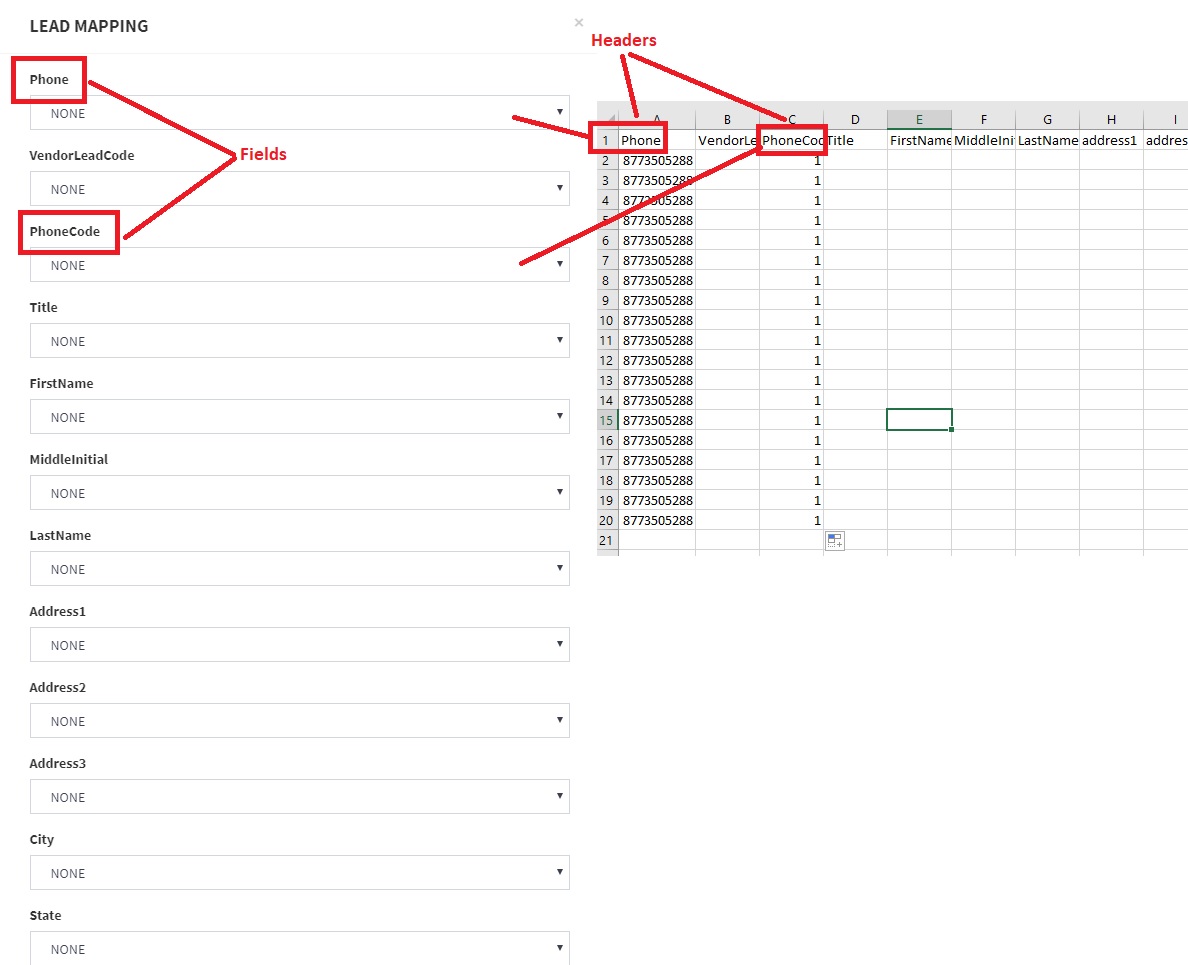
20. Now to upload your lead file make sure you select the List that you’ve created. You have an option to check for duplicates Make sure "Field Mapping" is toggled then browse your Lead File.csv then click Update to start uploading.
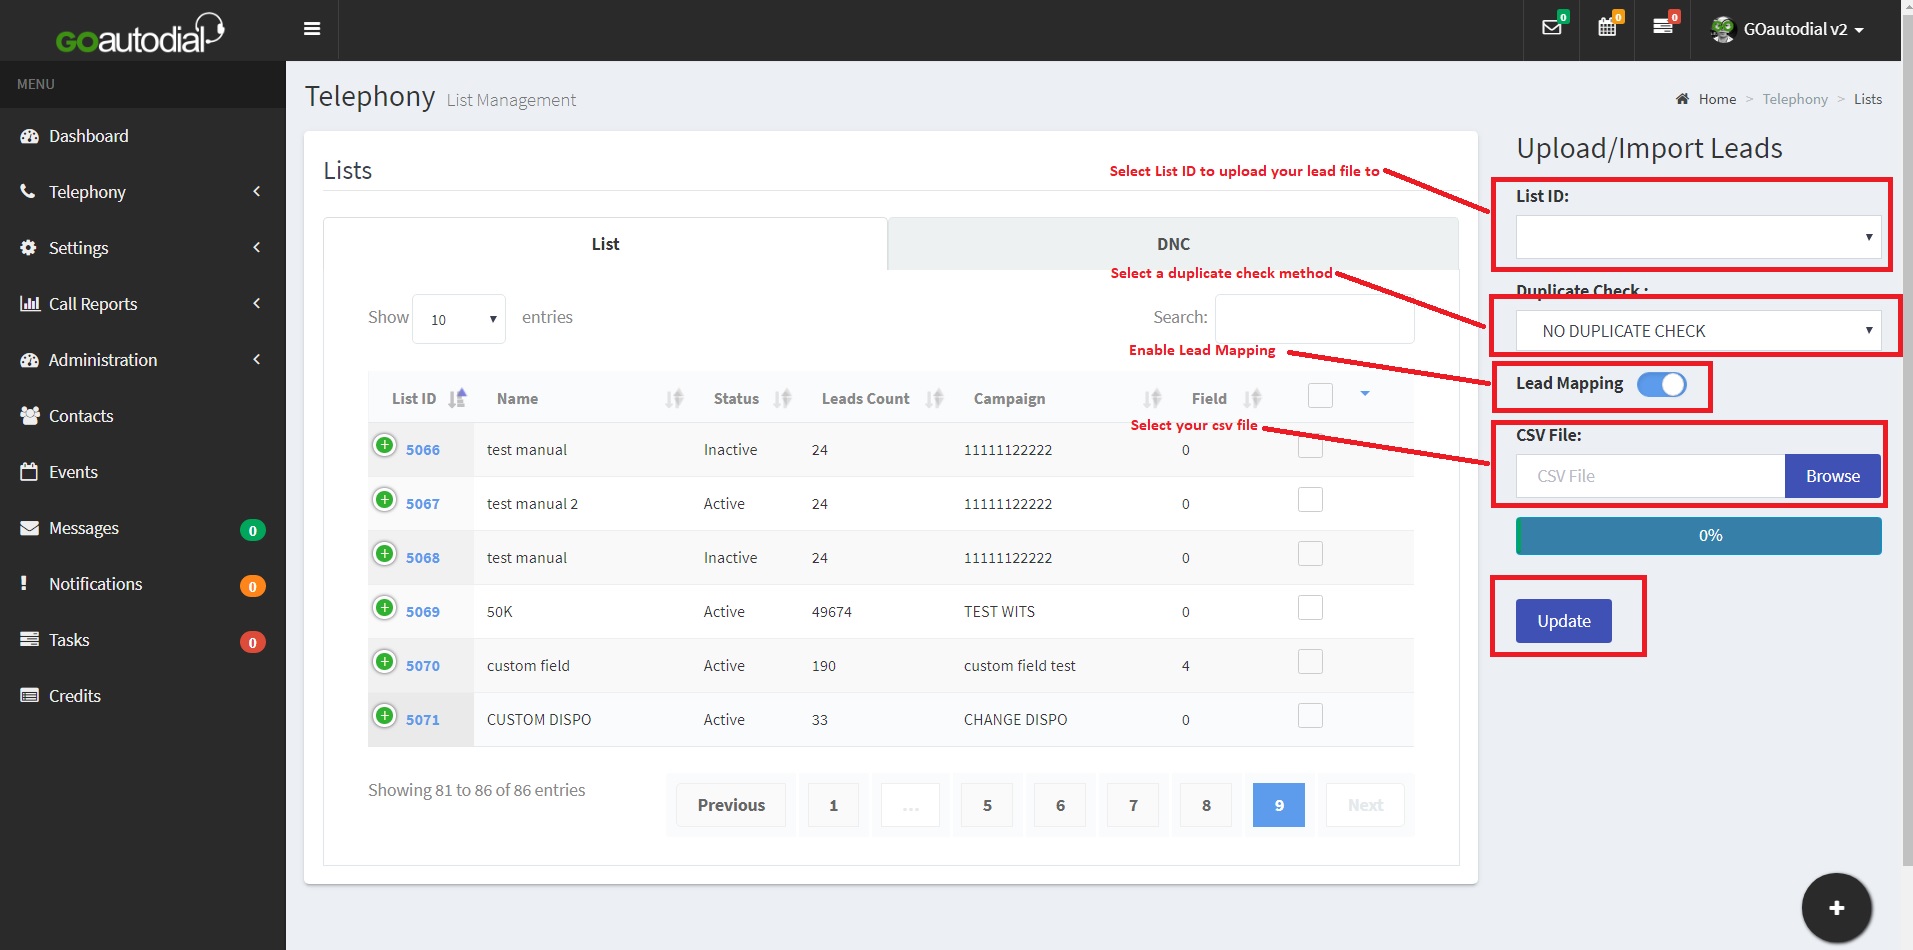
22. Wait for the leads to be uploaded once the “Data processing complete” pop-up, it means your lead file has already been uploaded to the List and Campaign. Click “OK”, then wait for the confirmation window informing you how many leads were uploaded and how many duplicates it found.
Once the campaign has been set up and the leads uploaded, the agents can now begin taking calls. Login as an agent
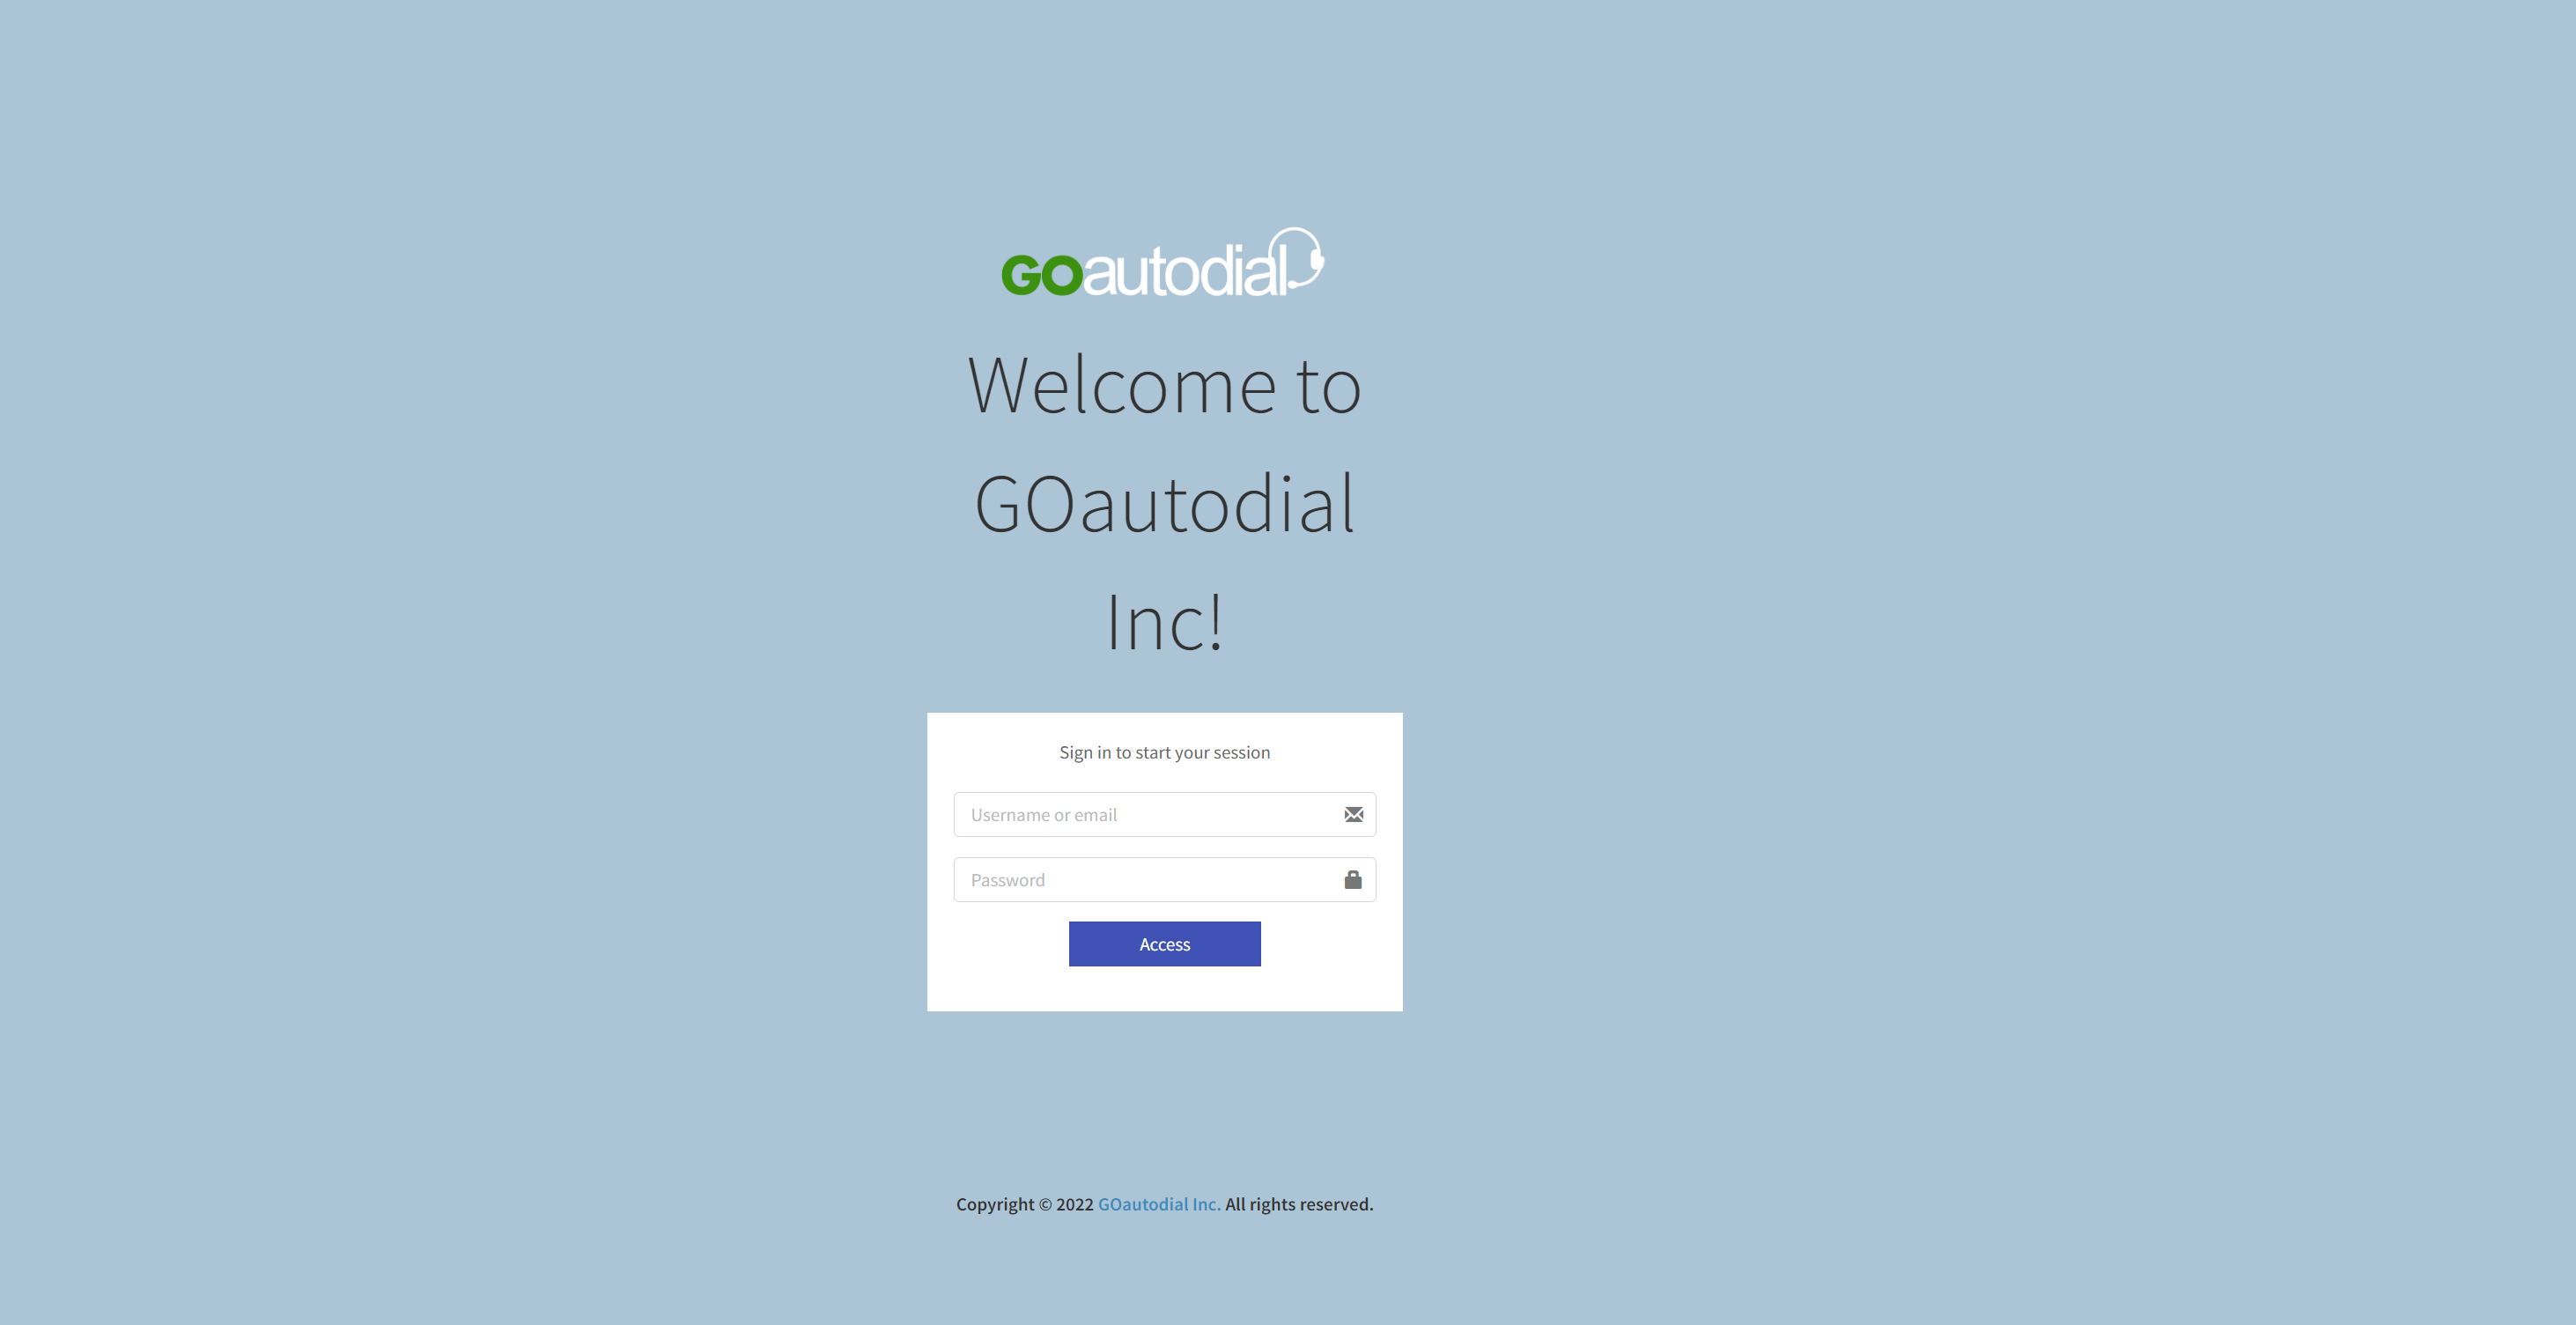
23. Log in to the dialer next.
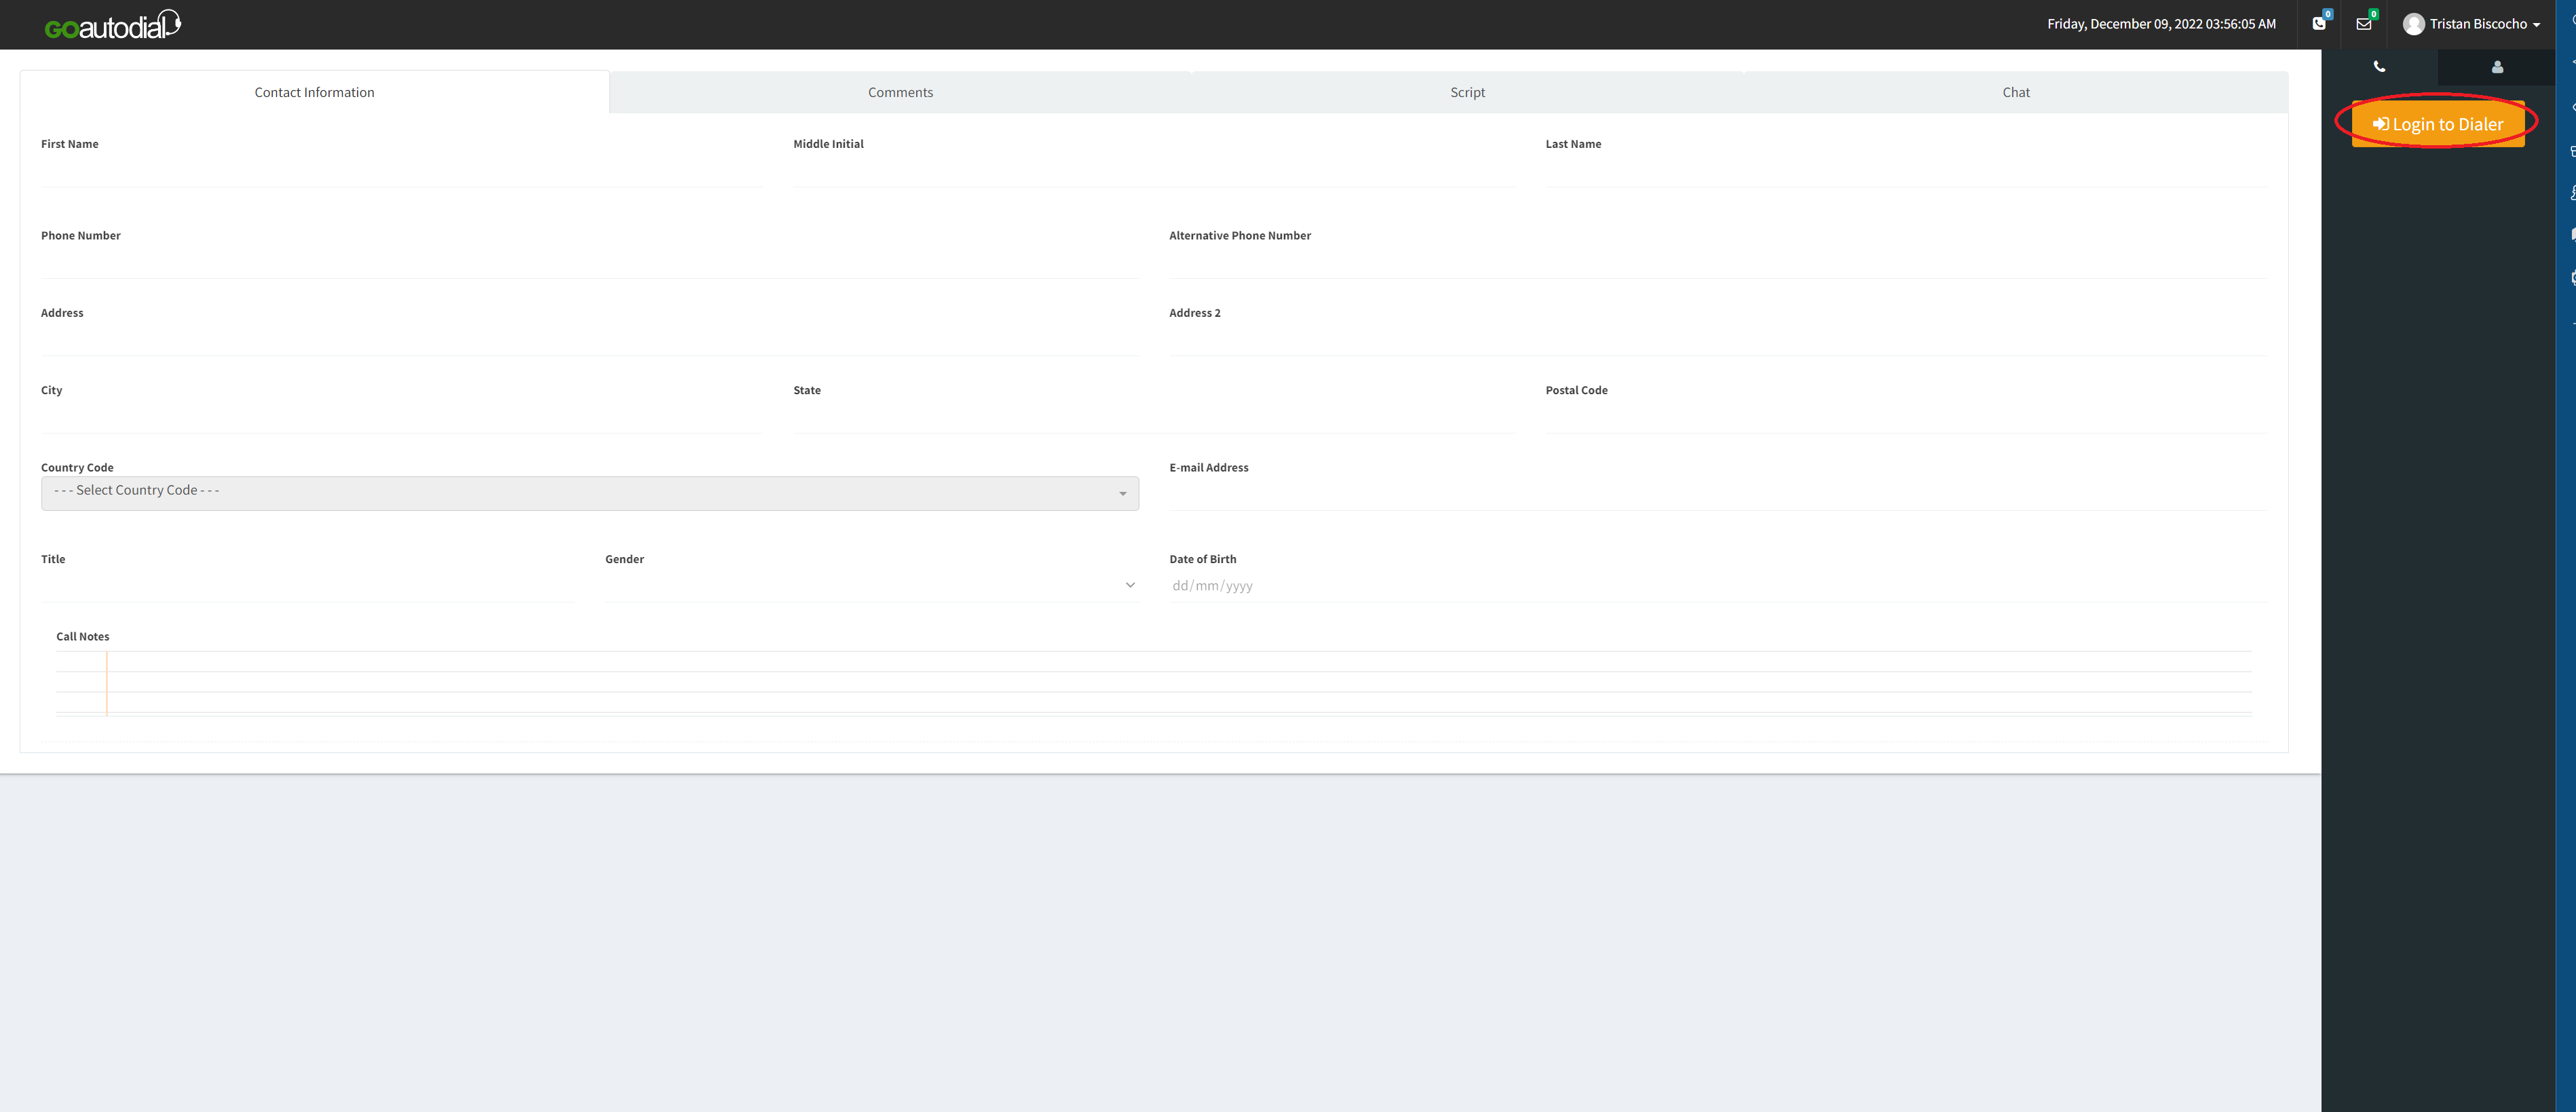
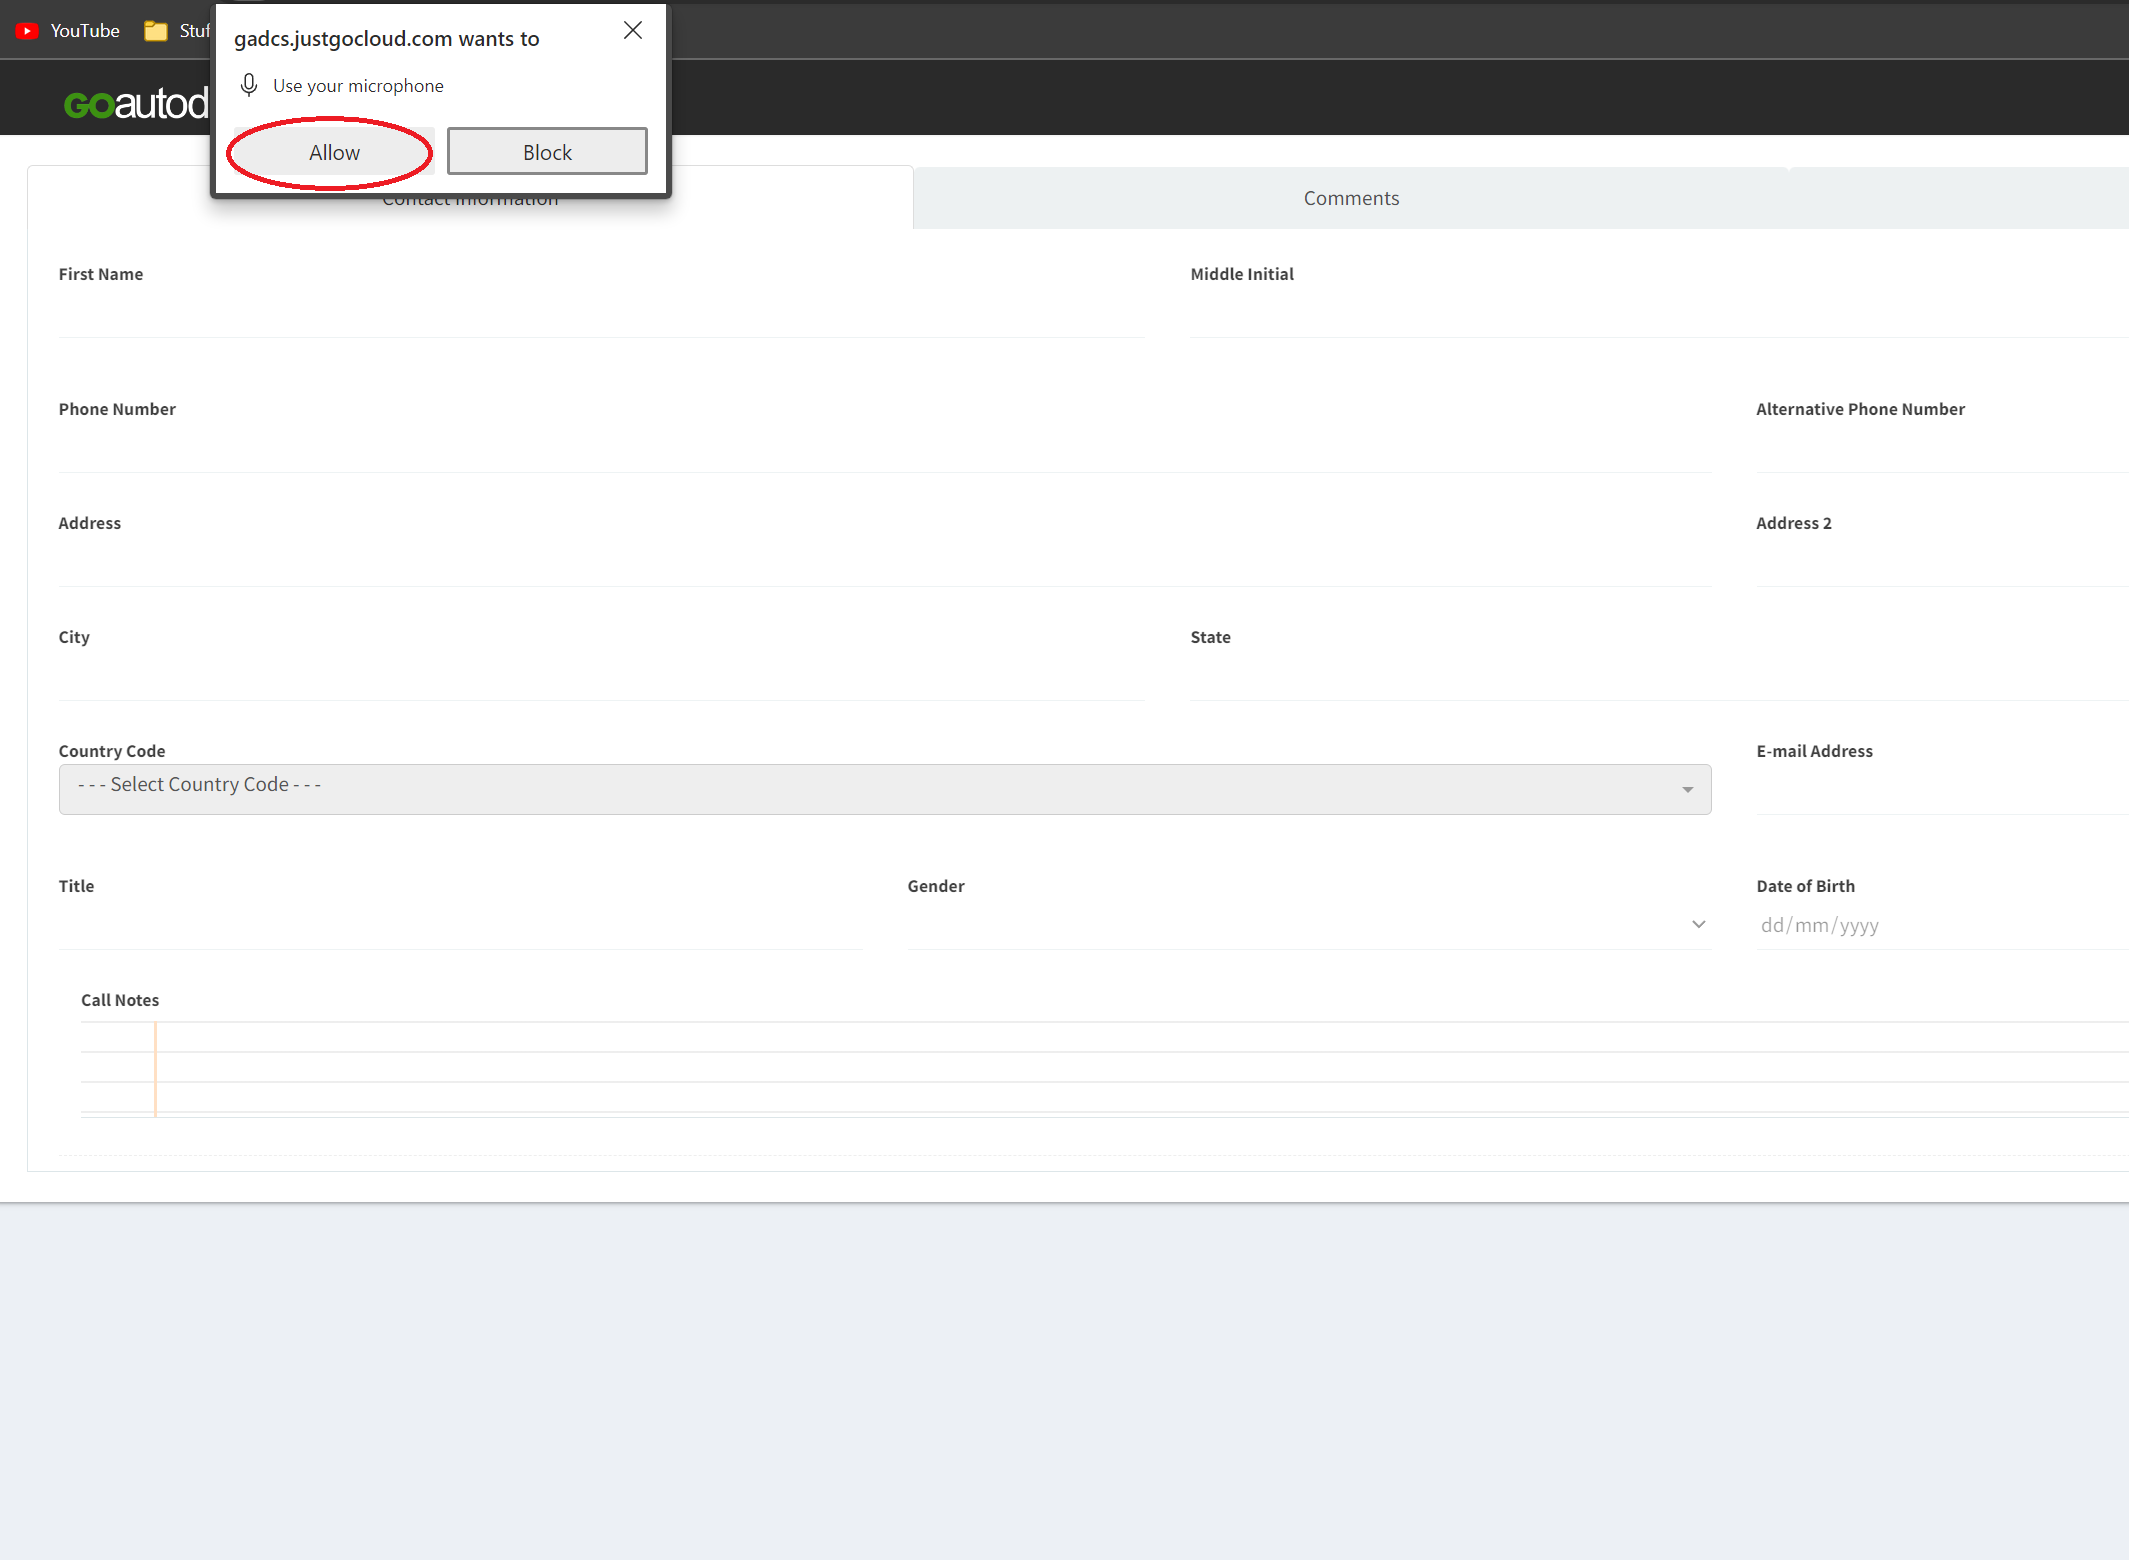
24. When the browser asks permission to use the microphone, select "Allow".
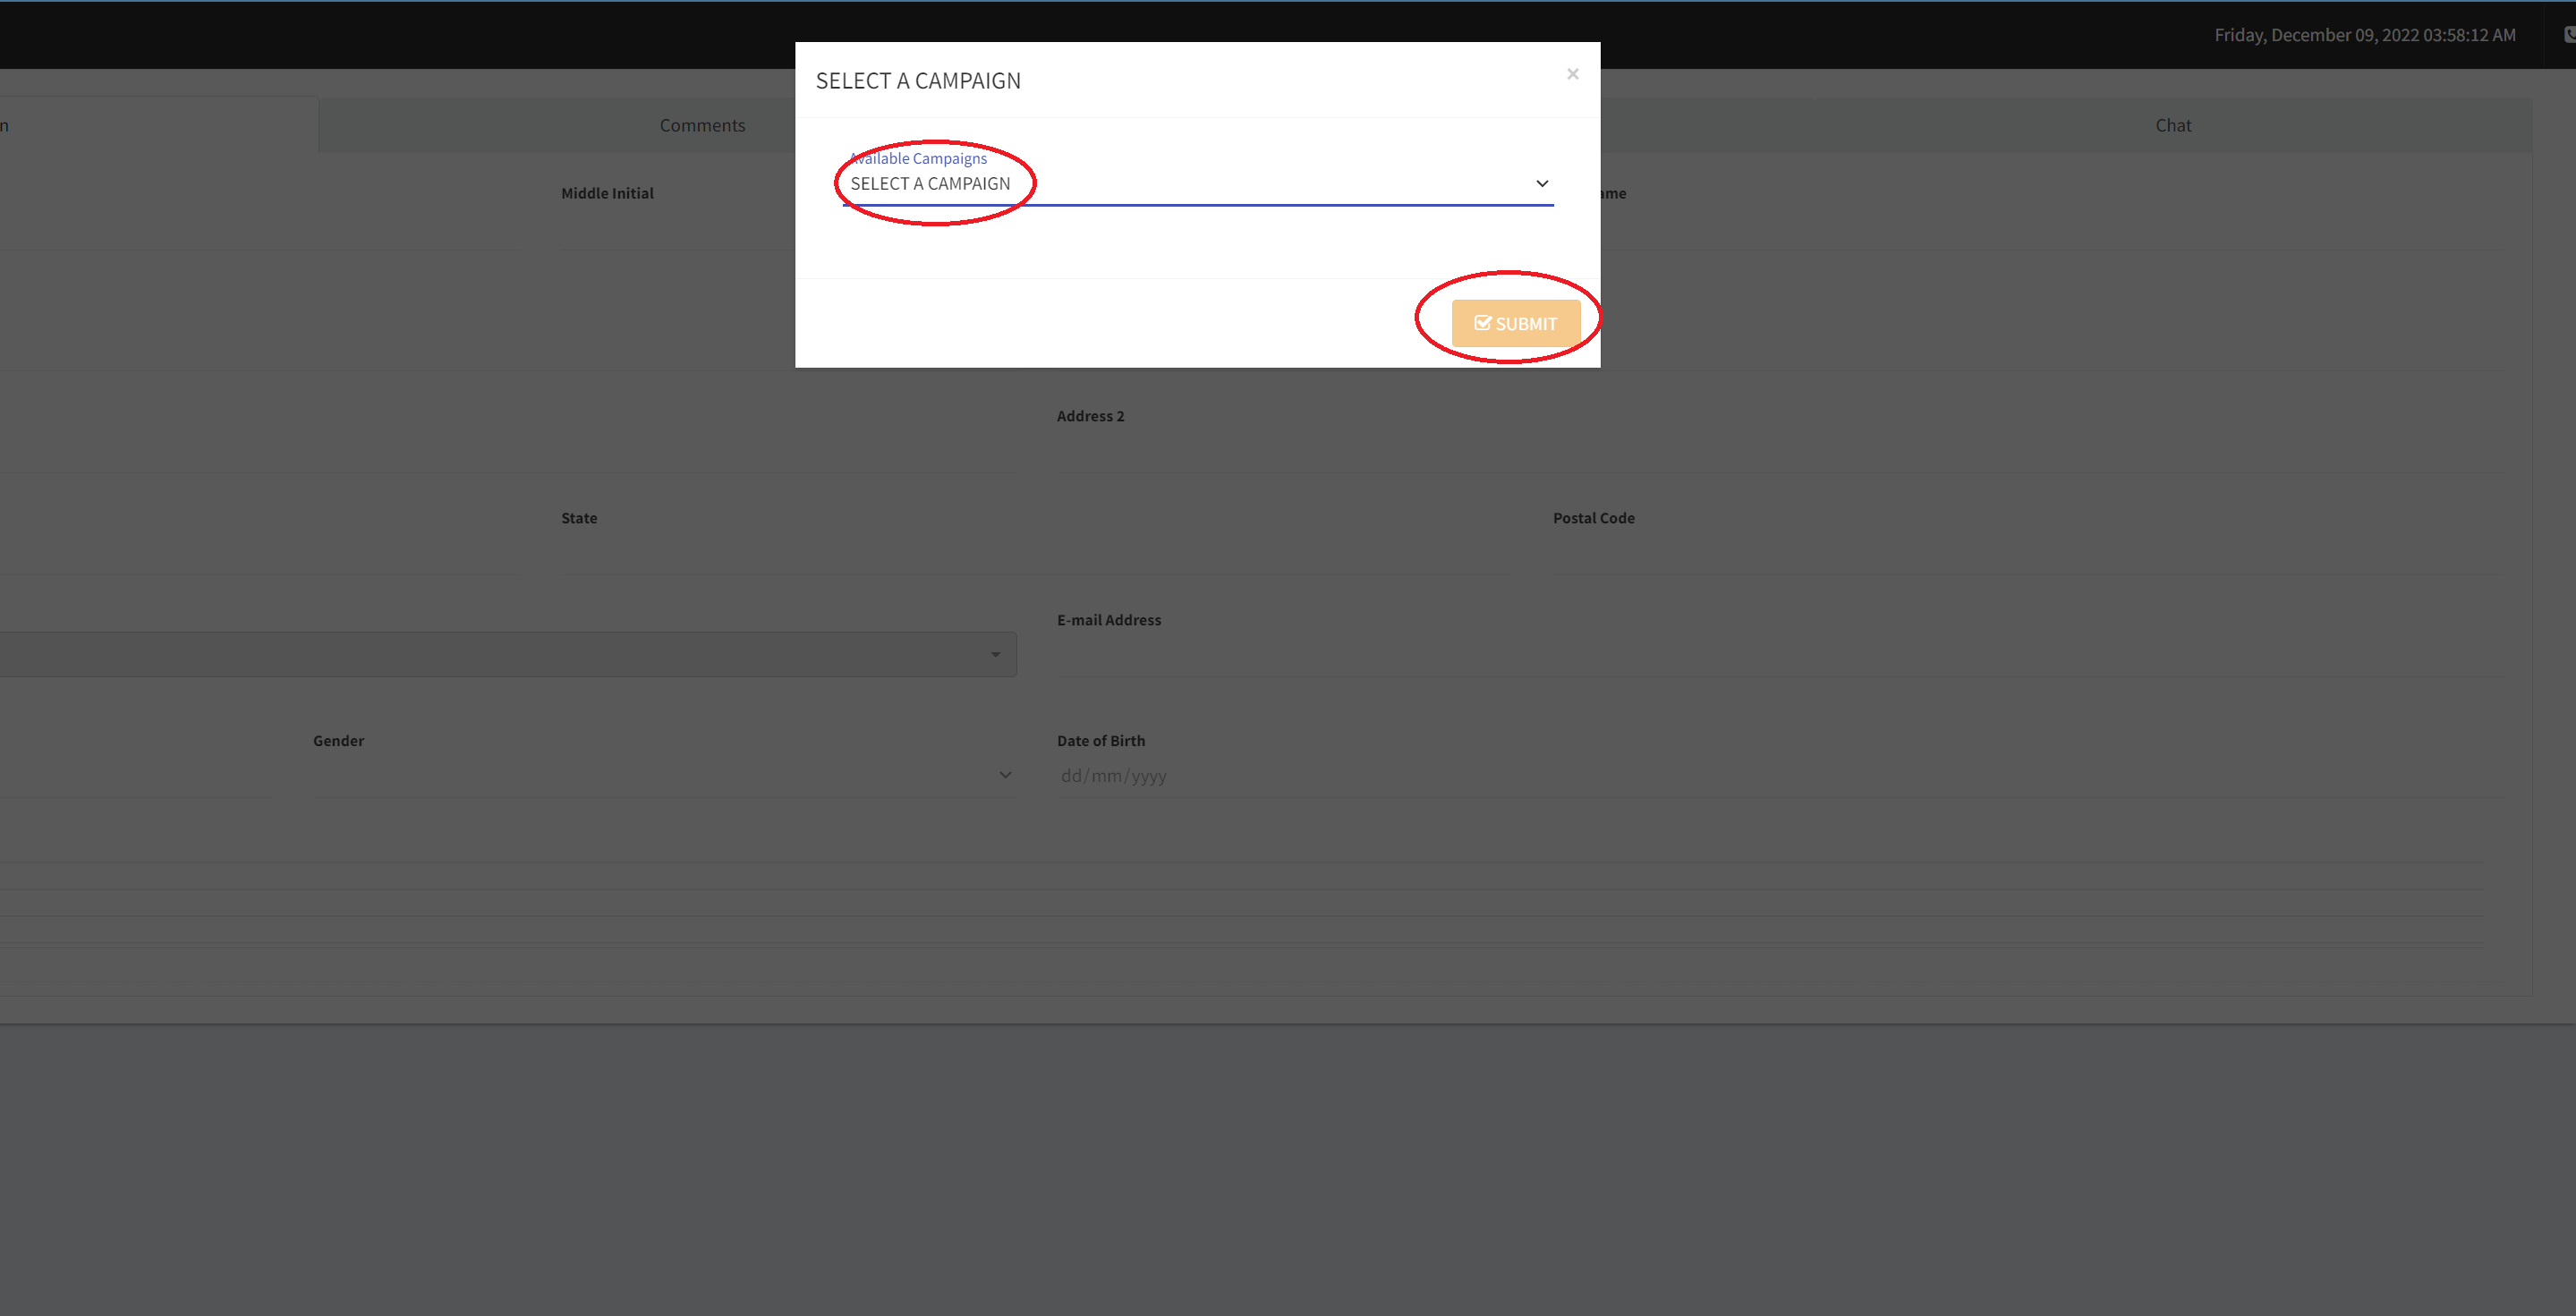
25. Select your campaign.
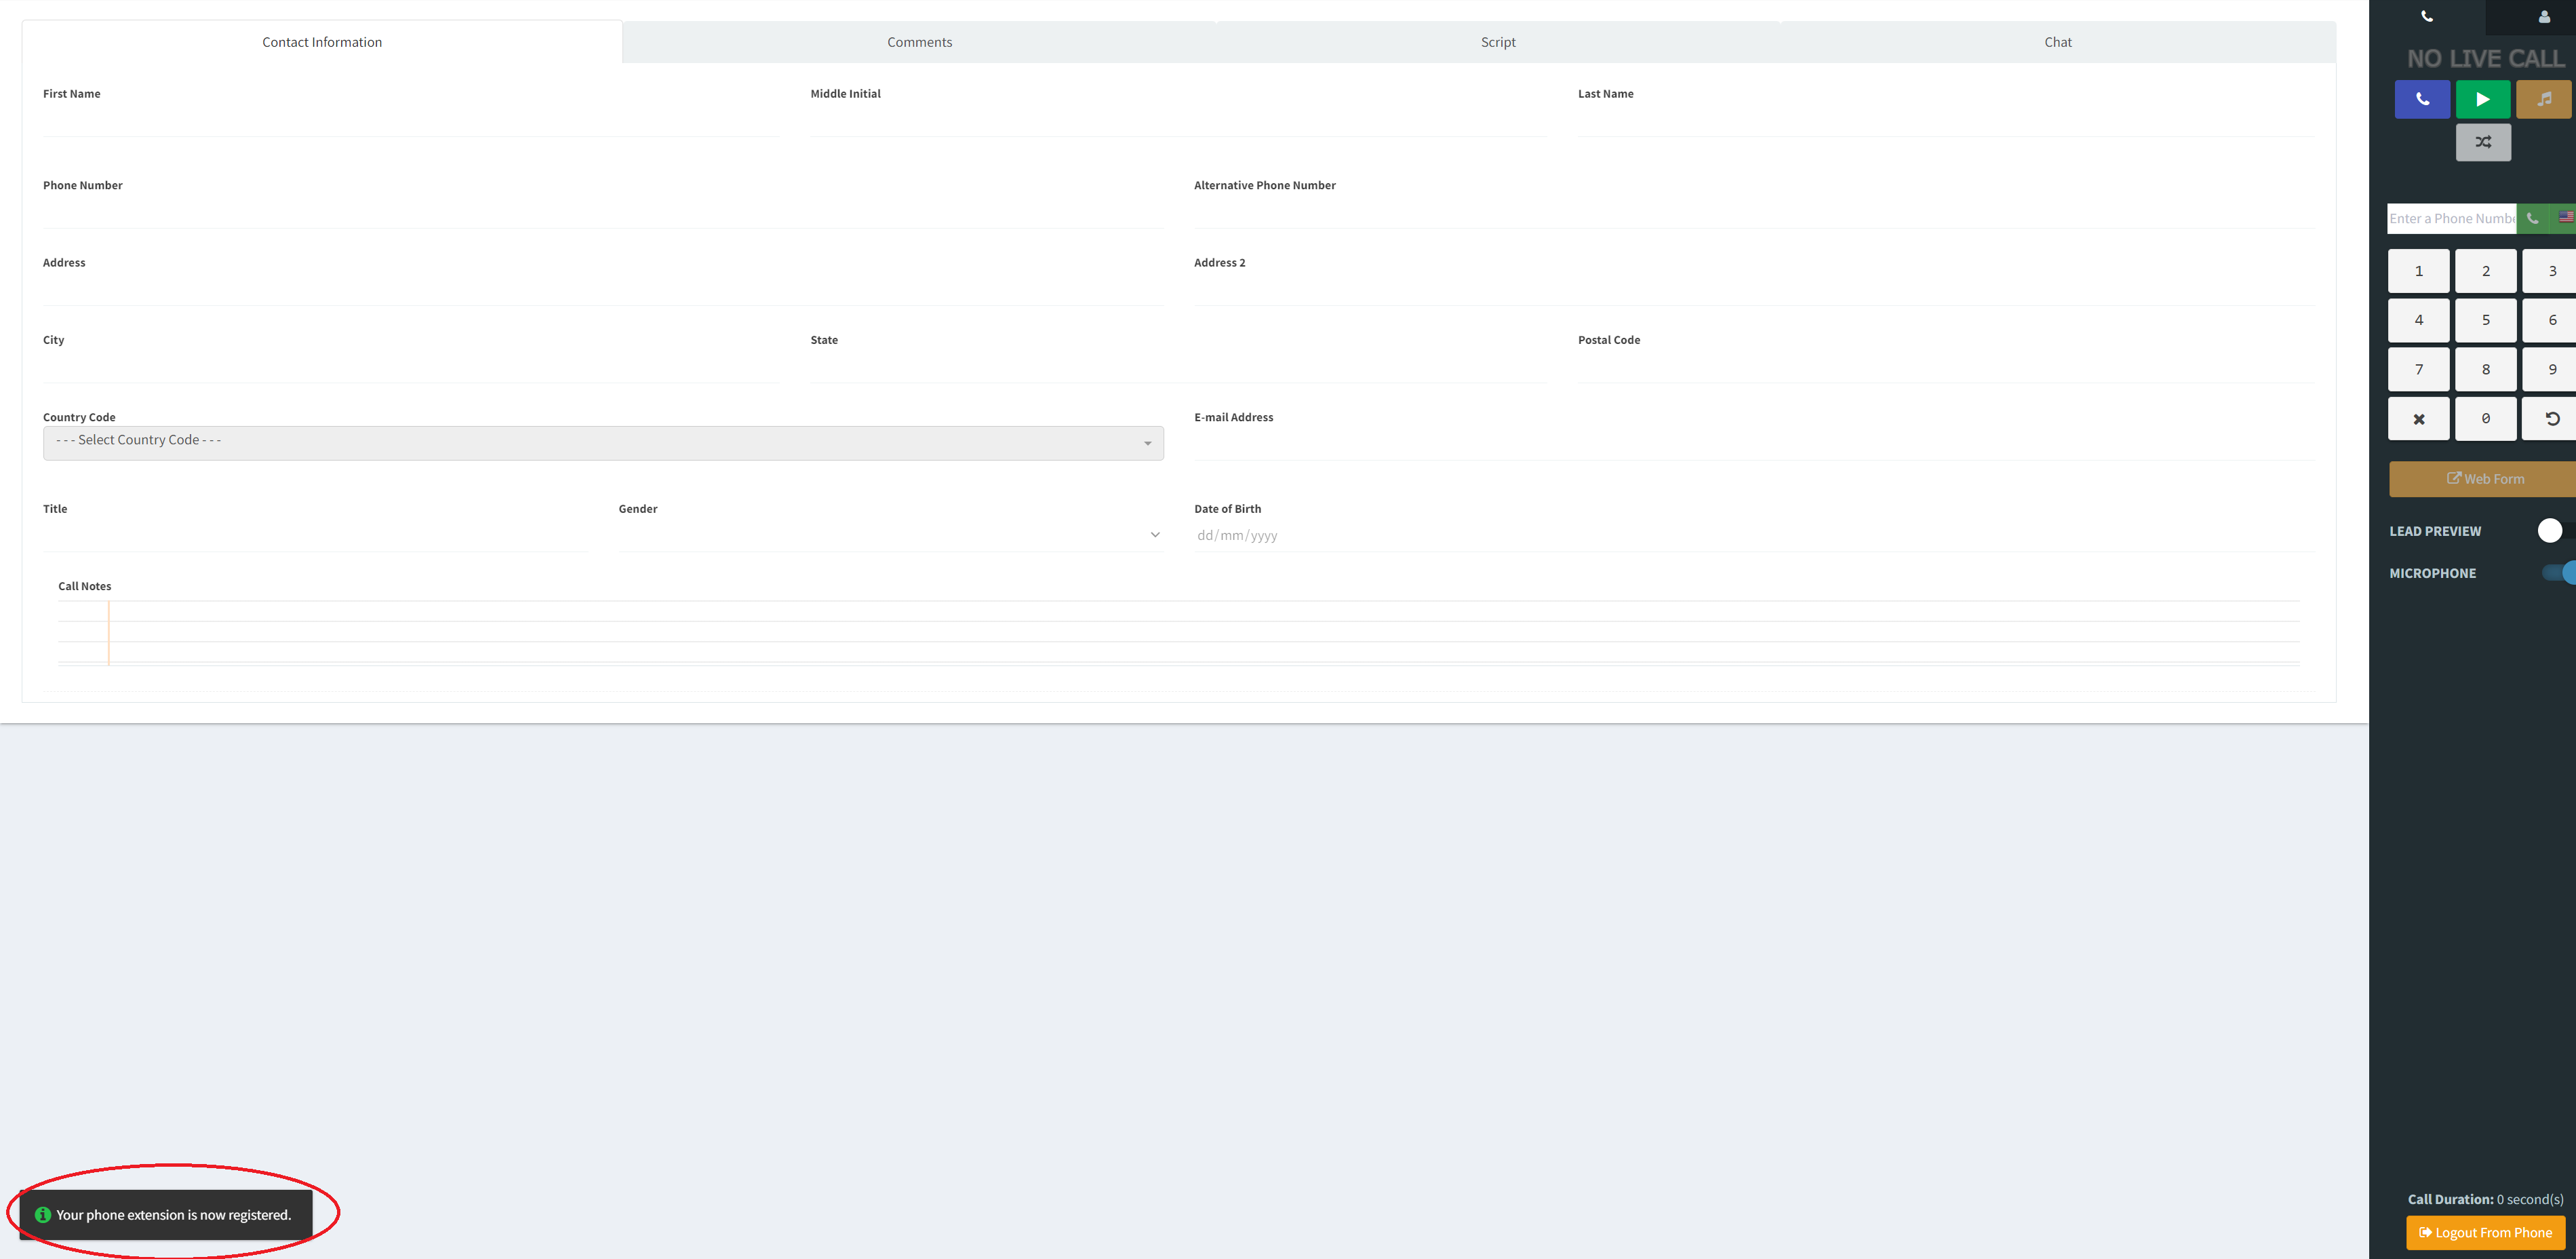
26. You will hear a voice prompt that will say "You are currently the only person in this conference". A notification will also be seen at the bottom left of your screen indicating your phone extension is now registered.
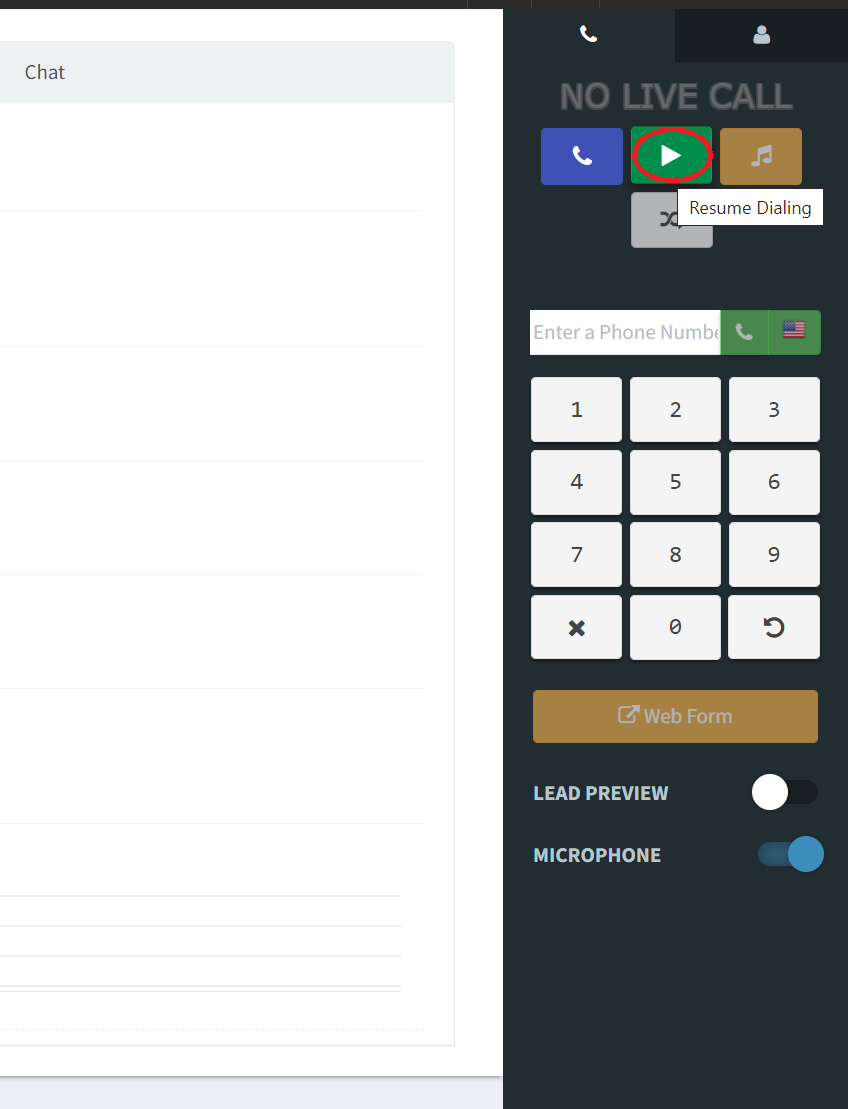
27. Click the green "Resume Dialing" button to start taking calls.
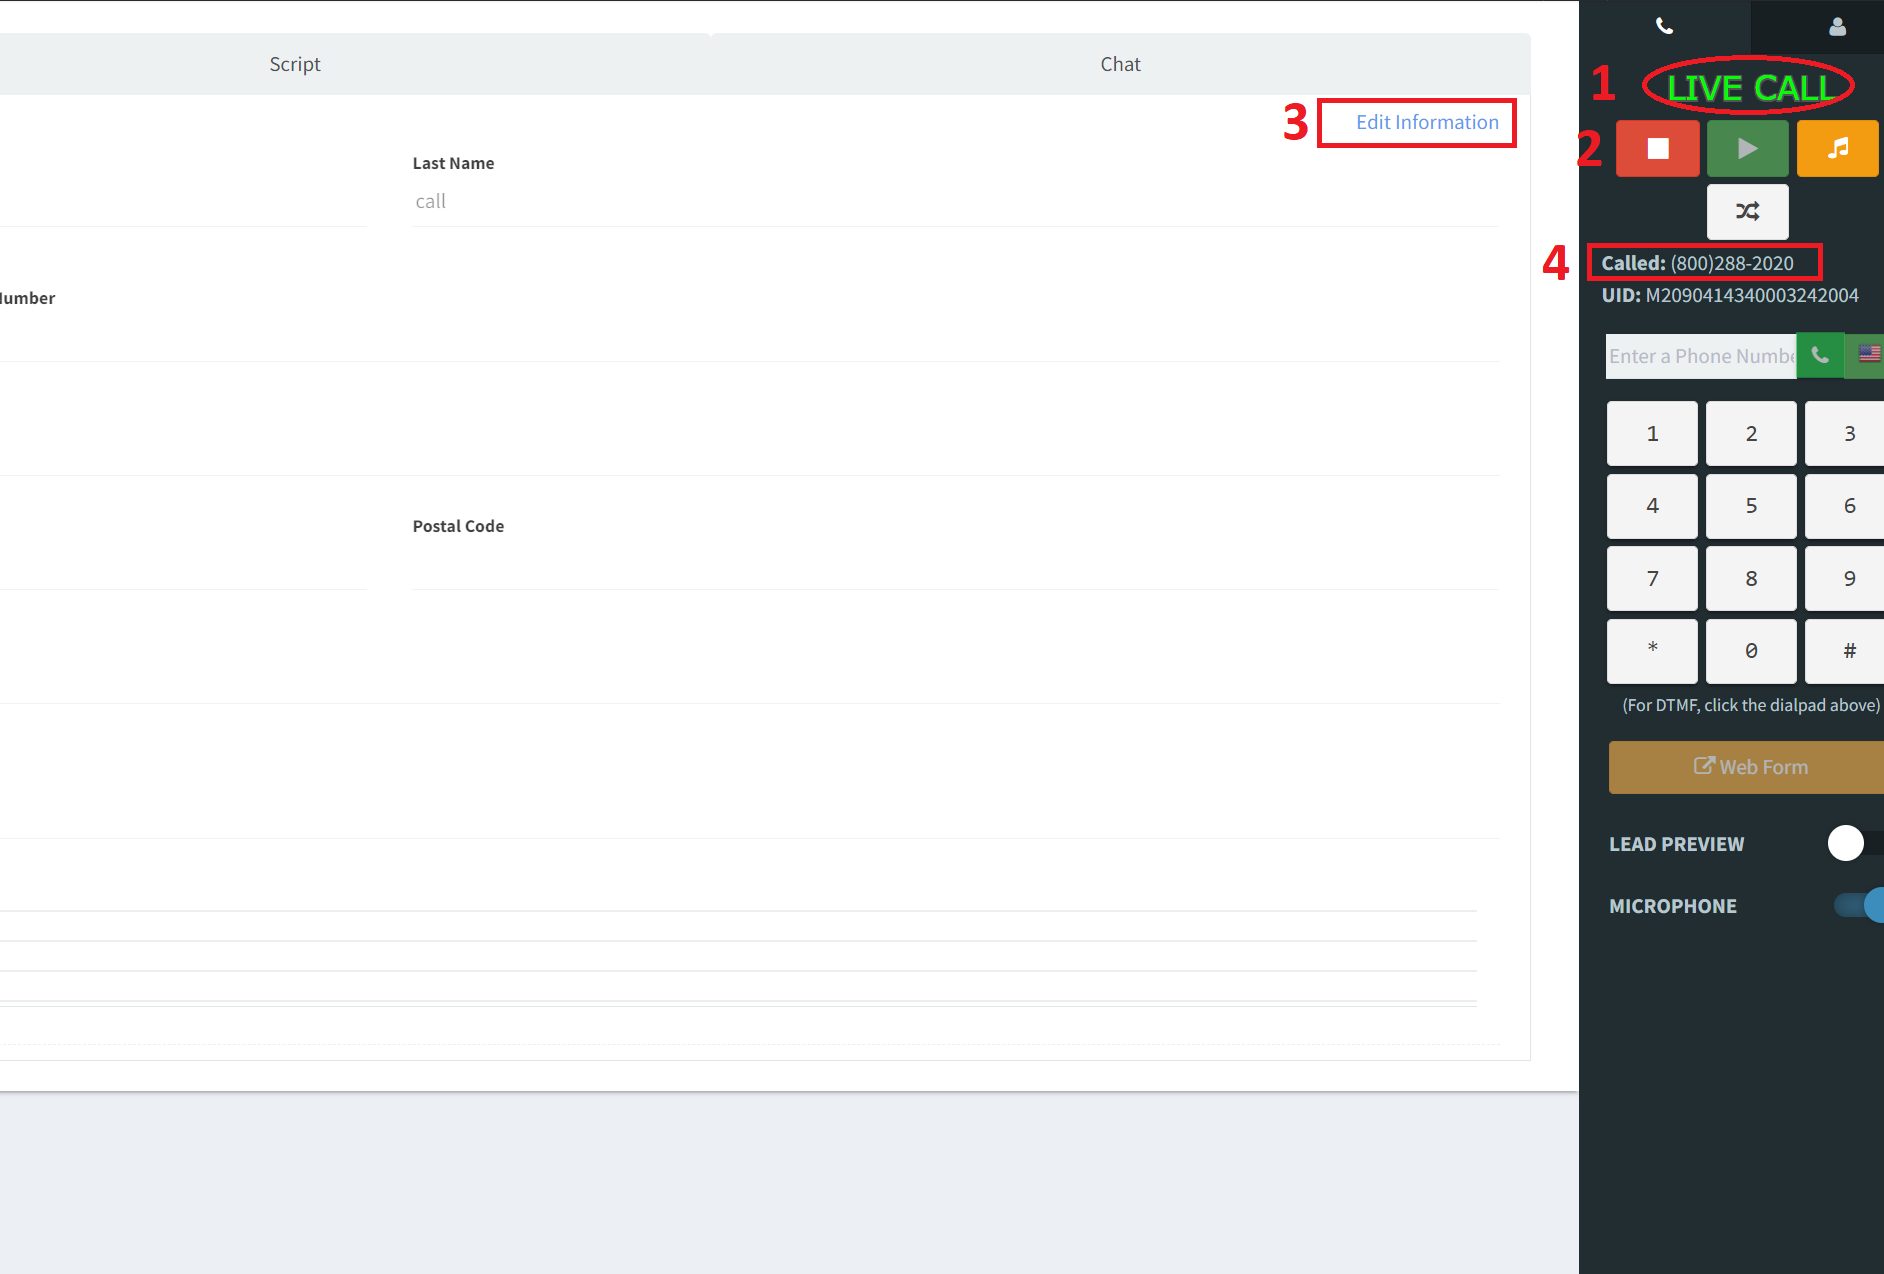
28. During a live call the following indicators will be present;
- Live Call (1) - Indicates an active call.
- Call buttons (2) - The red button is to hang up the call, the orange is to put the customer on hold, and the white button is to initiate a 3-way call.
- Edit information (3) - Allows the agent to change or add lead information on a live call. This gets saved after a disposition has been selected.
- Called Number (4) - Indicates the current number being called.
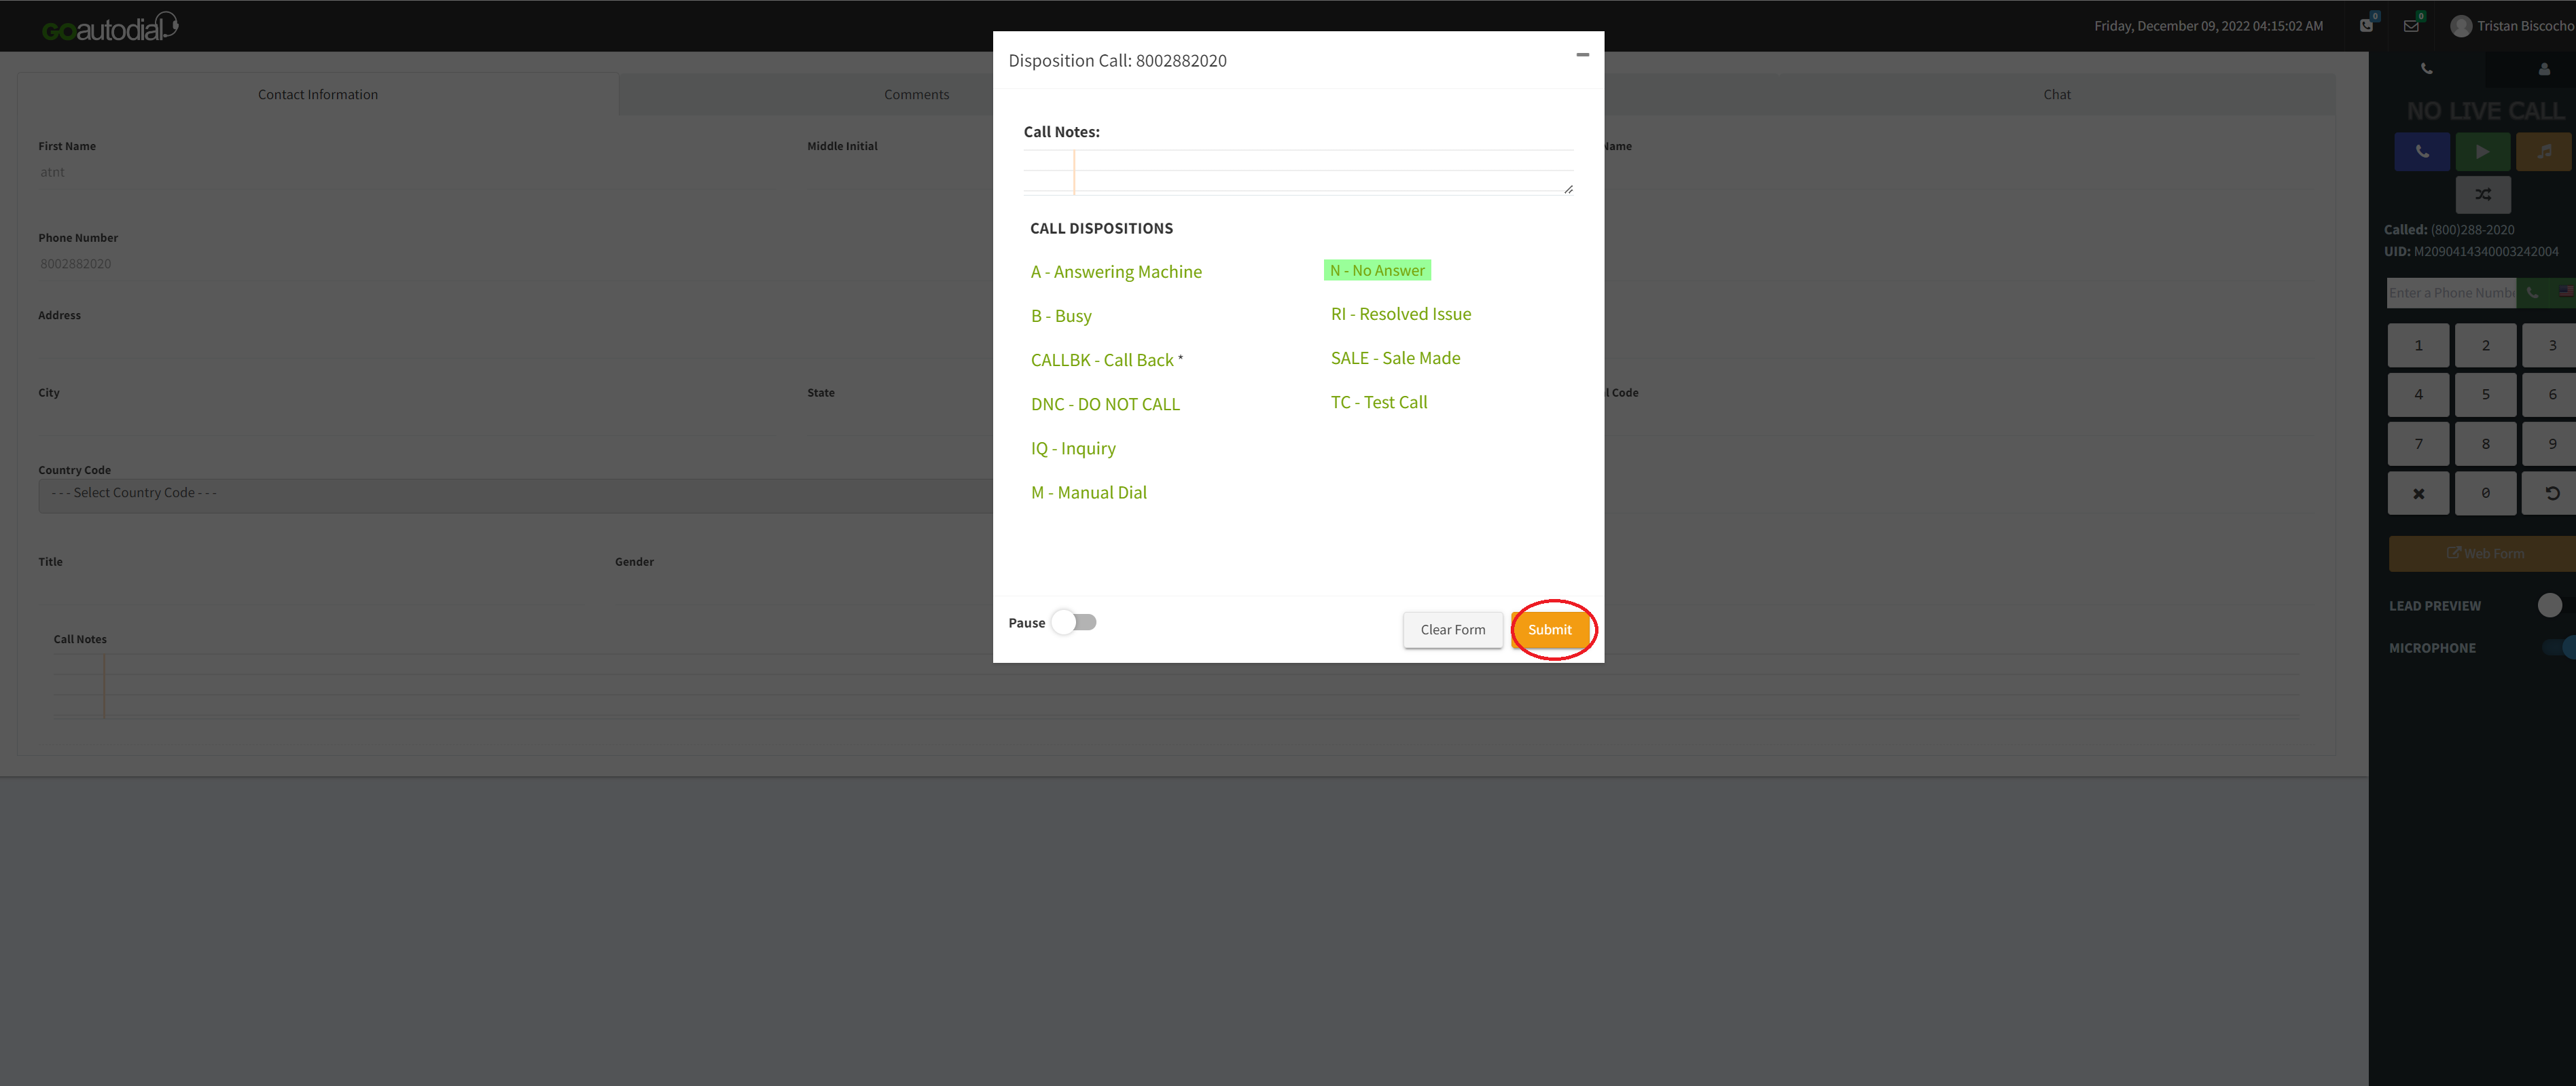
29. Once the call has ended, the agent will be prompted to select a disposition for the call. Click submit when done.
30. Rinse and repeat.
